Developer Blog

Tipps und Tricks für Entwickler und IT-Interessierte

Angular | Working with Angular Examples

General

On the Angular Website, there are a lot of examples.
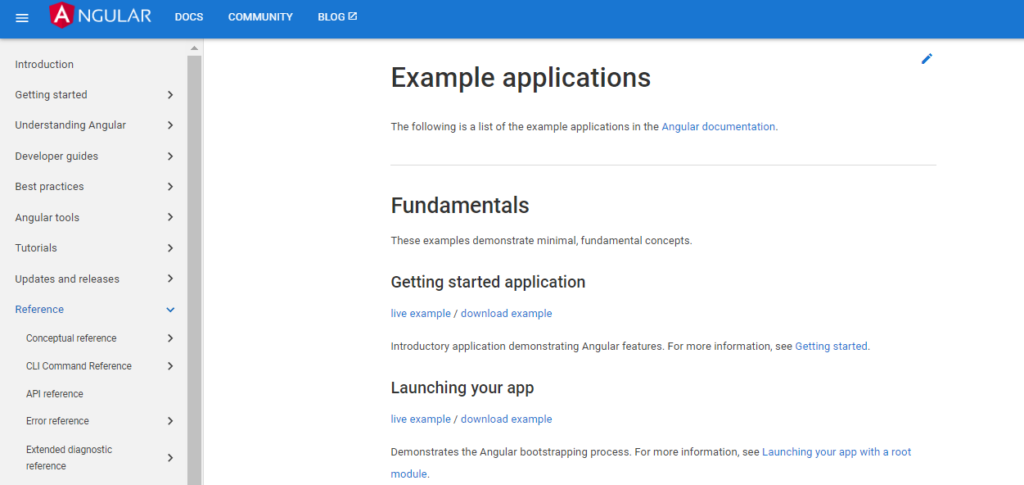
You could download each of them and look around. In this post, i will show you to do this at once for all examples.

So, we will

  • get list of all examples
  • download zip files of examples
  • extract examples

Preparation

First, we define some variables for the Chrom Browser and the resulting output files.

# Mac OS
CHROME=/Applications/Chromium.app/Contents/MacOS/Chromium

# Windows WSL
CHROME='/mnt/c/Program Files/Google/Chrome/Application/chrome.exe'

LISTOFZIPS=listofzips

Download List of examples

Next, we will download the list of examples from https://angular.io/guide/example-apps-list.

This is not a static html file. The list will be created dynamically when viewing the page. So, only download the page with wget or curl does not help, because we need to run the JavaScript code in the browser to create the list.

Therefore, we will use Chrome in headless mode: Load the page and dump the contents of the page (dom) into a file

do_get_list() {
        "$CHROME" --headless --dump-dom https://angular.io/guide/example-apps-list | tr '>' '>\n ' >${LISTOFZIPS}.html

        echo "##. Download List of Examples"
        echo "    #Examples: ($(grep 'href="guide/' listofzips.html | wc -l))"
}

Then, we will extract all the links to the zip examples files.

A quick look into the html file shows, that the html code with the links looks like this:

We need the part in the href of the <a tag.

  • First, we will split the html file, so that every html tag will be on a separate line.
  • Then, we will cut out only the parts between apostrophes.
  • Then, we search all files containing “.zip” and the end of the line ($)
do_extract() {
        cat ${LISTOFZIPS}.html                                          |\
        tr ' ' '\n'                                                     |\
        cut -d \" -f2                                                   |\
        grep -e '.zip$'                                                 > ${LISTOFZIPS}

        echo "generated/zips/component-overview/component-overview.zip" >> ${LISTOFZIPS}

        echo "##. Extract zip files ($(wc -l ${LISTOFZIPS}))"
        echo "    #Examples: ($(wc -l ${LISTOFZIPS}))"
}

The result will be the list of URL’s for each example.
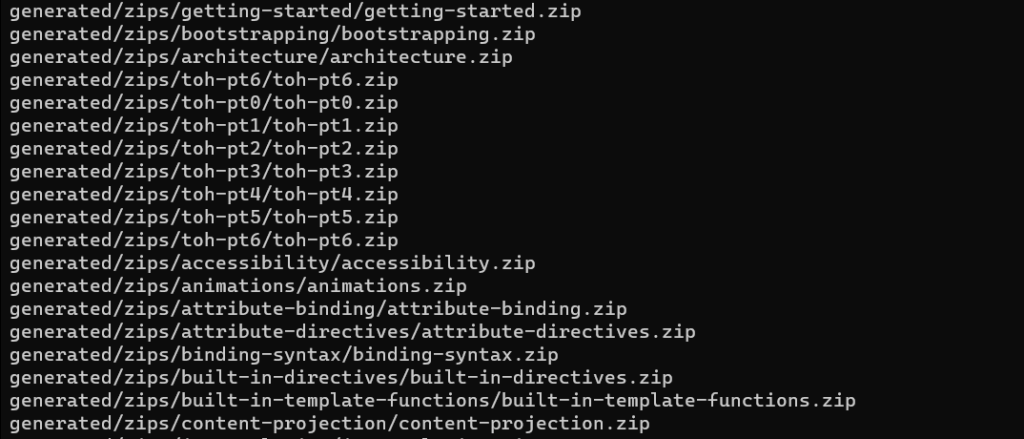
Download Examples

Next, for each of these example $ZIP, we will download the zip from the Angular Website with wget -q https://angular.io/$ZIP

do_download() {
        echo "##. Download Zips"

        (
                rm    -rf zip
                mkdir -p  zip
                cd        zip

                cat ../$LISTOFZIPS | while read ZIP
                do
                        echo "Download $ZIP"
                        if [ ! -f $ZIP ]; then
                                wget -q https://angular.io/$ZIP
                        fi
                done

                rm *.zip.1
        )
}

Extract ZIP Files

do_unzip() {
        echo "##. Unzip"

        rm    -rf src
        mkdir -p  src

        find zip -type f -exec basename {} \; | \
        while read FILE
        do
                FLDR=${FILE/.zip/}
                echo unzip zip/$FILE -d src/$FLDR
                unzip zip/$FILE -d src/$FLDR
        done
}

Upgrade all node modules to current version

We will need toe tool npm-check-updates for this.

Install it with

npm install -g npm-check-updates

ncu updates all packages to the latest version. Some Angular Examples require an earlier version of Typescript, so, after upgrade i changes the Typescript Version to 4.9.5

do_upgrade() {
	echo "##. Upgrade"

	(
		cd src
		ls | \
		while read FLDR
		do 
			echo "     $FLDR"
			(
				cd $FLDR
				ncu -u
				#     "typescript": "~4.9.3"
				sed -i '1,$s/"typescript": ".*"/"typescript": "~4.9.5"/' package.json
				# pnpm install
			)
		done
	)
}

Appendix

The code for the complete script is here:

#!/bin/bash

# Mac OS
CHROME=/Applications/Chromium.app/Contents/MacOS/Chromium

# Windows WSL
CHROME='/mnt/c/Program Files/Google/Chrome/Application/chrome.exe'

LISTOFZIPS=listofzips

do_get_list() {
        "$CHROME" --headless --dump-dom https://angular.io/guide/example-apps-list | tr '>' '>\n ' >${LISTOFZIPS}.html

        echo "##. Download List of Examples"
        echo "    #Examples: ($(grep 'href="guide/' listofzips.html | wc -l))"
}

do_extract() {
        cat ${LISTOFZIPS}.html                                          |\
        tr ' ' '\n'                                                                     |\
        cut -d \" -f2                                                           |\
        grep -e '.zip$'                                                         > ${LISTOFZIPS}

        echo "generated/zips/component-overview/component-overview.zip" >> ${LISTOFZIPS}

        echo "##. Extract zip files ($(wc -l ${LISTOFZIPS}))"
        echo "    #Examples: ($(wc -l ${LISTOFZIPS}))"
}

do_download() {
        echo "##. Download Zips"

        (
                rm    -rf zip
                mkdir -p  zip
                cd        zip

                cat ../$LISTOFZIPS | while read ZIP
                do
                        echo "Download $ZIP"
                        if [ ! -f $ZIP ]; then
                                wget -q https://angular.io/$ZIP
                        fi
                done

                rm *.zip.1
        )
}

do_unzip() {
        echo "##. Unzip"

        rm    -rf src
        mkdir -p  src

        find zip -type f -exec basename {} \; | \
        while read FILE
        do
                FLDR=${FILE/.zip/}
                echo unzip zip/$FILE -d src/$FLDR
                unzip zip/$FILE -d src/$FLDR
        done
}

do_upgrade() {
	echo "##. Upgrade"

	(
		cd src
		ls | \
		while read FLDR
		do 
			echo "     $FLDR"
			(
				cd $FLDR
				ncu -u
				#     "typescript": "~4.9.3"
				sed -i '1,$s/"typescript": ".*"/"typescript": "~4.9.5"/' package.json
				# pnpm install
			)
		done
	)
}


case "$1" in
        "get")       do_get_list;;
        "extract")   do_extract;;
        "download")  do_download;;
        "unzip")     do_unzip;;
        "upgrade")   do_upgrade;;
        *)

                echo "run $0 get|extract|download|unzip";;
esac

Podman | Getting Started

TL;DR

Take alook at the Podman Website

❯ brew install podman
❯ brew machine init
❯ podman machine start

Starting machine “podman-machine-default”
Waiting for VM …
Mounting volume… /Users:/Users
Mounting volume… /private:/private
Mounting volume… /var/folders:/var/folders

This machine is currently configured in rootless mode. If your containers
require root permissions (e.g. ports < 1024), or if you run into compatibility
issues with non-podman clients, you can switch using the following command:

podman machine set --rootful

API forwarding listening on: /Users/Shared/CLOUD/Programmier-Workshops/Kurse/Haskell/.podman/podman.sock

The system helper service is not installed; the default Docker API socket
address can’t be used by podman. If you would like to install it run the
following commands:

sudo /usr/local/Cellar/podman/4.4.2/bin/podman-mac-helper install
podman machine stop; podman machine start

You can still connect Docker API clients by setting DOCKER_HOST using the
following command in your terminal session:

export DOCKER_HOST='unix:///Users/Shared/CLOUD/Programmier-Workshops/Kurse/Haskell/.podman/podman.sock'

Machine “podman-machine-default” started successfully

Haskell | Getting Started

Readings

Haskell

Glasgow Haskell Compiler

Tutorials

Applications

Games

Installation

  • Install GHCup: Windows Binary is here
    GHCup is the main installer for the general purpose language Haskell.

Or install manuell

  • Download and Install Haskell here
choco install haskell-dev
refreshenv

Installation on Windows and Powershell

Set-ExecutionPolicy Bypass -Scope Process -Force;[System.Net.ServicePointManager]::SecurityProtocol = [System.Net.ServicePointManager]::SecurityProtocol -bor 3072;Invoke-Command -ScriptBlock ([ScriptBlock]::Create((Invoke-WebRequest https://www.haskell.org/ghcup/sh/bootstrap-haskell.ps1 -UseBasicParsing))) -ArgumentList $true

First Steps

In order to run ghc and cabal, you need to adjust your PATH variable.

To do so, you may want to run 'source /d/CLOUD/Programmier-Workshops/Kurse/Haskell/Programme/Haskell/ghcup/env' in your current terminal
session as well as your shell configuration (e.g. ~/.bashrc).
Start a simple repl via:
  ghci

Start a new haskell project in the current directory via:
  cabal init --interactive

Install other GHC versions and tools via:
  ghcup list
  ghcup install <tool> <version>

To install system libraries and update msys2/mingw64,
open the "Mingw haskell shell"
and the "Mingw package management docs"
desktop shortcuts.

If you are new to Haskell, check out https://www.haskell.org/ghcup/steps/

Configuration

Cabal configuration file is by default located at

&lt;$ENV:USERPROFILE>\AppData\Roaming\cabal\config

Create your first project

Create a haskell project

cabal init
cabal build
cabal run

Configure VS Code with Haskell Support

Install required components

$ cabal install hlint

Configure VSCode

$ stack new vscode-haskell-config
$ cd vscode-haskell-config
$ stack setup

Install an additional source code formatter

$ stack install brittany

Anaconda | Getting Started

Updating packages

To check if any new update is available you can use conda update. If any update is available you can choose whether to install or not to install it.

You can use an Anaconda prompt or the terminal for the following steps: 

  • Update specific package: 
conda update package-name
conda update --all
  • Update all packages in the current environment: 
conda update -n myenv --all
  • 4. Update Python: 
conda update python

5. Update conda itself: 

conda update conda

F# – Snippets

Mathematics

Sum of Squares

dotnet new --install Fable.Template

Create an new App

dotnet new fable

Prepare environment

dotnet tool restore

Fix NodeJS SSL Error

$ENV:NODE_OPTIONS="--openssl-legacy-provider"

Install dependencies and run app

npm install
npm start

F# – Working with Fable

Get started

Install Fable with

dotnet new --install Fable.Template

Create an new App

dotnet new fable

Prepare environment

dotnet tool restore

Fix NodeJS SSL Error

$ENV:NODE_OPTIONS="--openssl-legacy-provider"

Install dependencies and run app

npm install
npm start