Developer Blog

Tipps und Tricks für Entwickler und IT-Interessierte

Daily AI: Analyse WebPages with AI

Introduction

Large Language Models (LLMs) have revolutionized the field of Natural Language Processing (NLP) by providing powerful capabilities for understanding and generating human language. Open-source LLMs have democratized access to these technologies, allowing developers and researchers to innovate and apply these models in various domains. In this blog post, we will explore Ollama, a framework for working with LLMs, and demonstrate how to load webpages, parse them, build embeddings, and query the content using Ollama.

Understanding Large Language Models (LLMs)

LLMs are neural networks trained on vast amounts of text data to understand and generate human language. They can perform tasks such as translation, summarization, question answering, and more. Popular LLMs include GPT-3, BERT, and their open-source counterparts like GPT-Neo and BERT variants. These models have diverse applications, from chatbots to automated content generation.

Introducing Ollama

Ollama is an open-source framework designed to simplify the use of LLMs in various applications. It provides tools for training, fine-tuning, and deploying LLMs, making it easier to integrate these powerful models into your projects. With Ollama, you can leverage the capabilities of LLMs to build intelligent applications that understand and generate human language.

Example

The following example from the ollama documentation demonstrates how to use the LangChain framework in conjunction with the Ollama library to load a web page, process its content, create embeddings, and perform a query on the processed data. Below is a detailed explanation of the script’s functionality and the technologies used.

Technologies Used

  1. LangChain: A framework for building applications powered by large language models (LLMs). It provides tools for loading documents, splitting text, creating embeddings, and querying data.
  2. Ollama: A library for working with LLMs and embeddings. In this script, it’s used to generate embeddings for text data.
  3. BeautifulSoup (bs4): A library used for parsing HTML and XML documents. It’s essential for loading and processing web content.
  4. ChromaDB: A vector database used for storing and querying embeddings. It allows efficient similarity searches.

Code Breakdown

Imports and Setup

The script starts by importing the necessary modules and libraries, including sys, Ollama, WebBaseLoader, RecursiveCharacterTextSplitter, OllamaEmbeddings, Chroma, and RetrievalQA.

from langchain_community.llms import Ollama

from langchain_community.document_loaders import WebBaseLoader
from langchain.text_splitter import RecursiveCharacterTextSplitter
from langchain_community.embeddings import OllamaEmbeddings
from langchain_community.vectorstores import Chroma
from langchain.chains import RetrievalQA

Loading the Web Page

The script uses WebBaseLoader to load the content of a webpage. In this case, it loads the text of “The Odyssey” by Homer from Project Gutenberg.

print("- get web page")

loader = WebBaseLoader("https://www.gutenberg.org/files/1727/1727-h/1727-h.htm")
data = loader.load()

Splitting the Document

Due to the large size of the document, it is split into smaller chunks using RecursiveCharacterTextSplitter. This ensures that the text can be processed more efficiently.

print("- split documents")

text_splitter=RecursiveCharacterTextSplitter(chunk_size=500, chunk_overlap=0)
all_splits = text_splitter.split_documents(data)

Creating Embeddings and Storing Them

The script creates embeddings for the text chunks using the Ollama library and stores them in ChromaDB, a vector database. This step involves instantiating an embedding model (nomic-embed-text) and using it to generate embeddings for each text chunk.

print("- create vectorstore")

oembed = OllamaEmbeddings(base_url="http://localhost:11434", model="nomic-embed-text")
vectorstore = Chroma.from_documents(documents=all_splits, embedding=oembed)

Performing a Similarity Search

A question is formulated, and the script uses the vector database to perform a similarity search. It retrieves chunks of text that are semantically similar to the question.

print("- ask for similarities")

question="Who is Neleus and who is in Neleus' family?"
docs = vectorstore.similarity_search(question)
nrofdocs=len(docs)
print(f"{question}: {nrofdocs}")

Creating an Ollama Instance and Defining a Retrieval Chain

The script initializes an instance of the Ollama model and sets up a retrieval-based question-answering (QA) chain. This chain is used to process the question and retrieve the relevant parts of the document.

print("- create ollama instance")
ollama = Ollama(
    base_url='http://localhost:11434',
    model="llama3"
)

print("- get qachain")
qachain=RetrievalQA.from_chain_type(ollama, retriever=vectorstore.as_retriever())

Running the Query

Finally, the script invokes the QA chain with the question and prints the result.

print("- run query")
res = qachain.invoke({"query": question})

print(res['result'])

Result

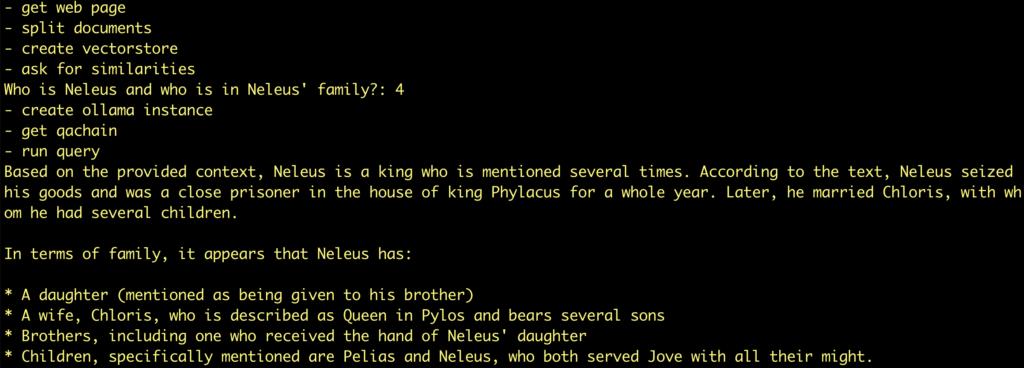
Now lets look at the impresiv result:
Try another example: ask wikipedia page

In this example, we are going to use LangChain and Ollama to learn about something just a touch more recent. In August 2023, there was a series of wildfires on Maui. There is no way an LLM trained before that time can know about this, since their training data would not include anything as recent as that.

So we can find the Wikipedia article about the fires and ask questions about the contents.

url = "https://en.wikipedia.org/wiki/2023_Hawaii_wildfires"
question="When was Hawaii's request for a major disaster declaration approved?"

Daily AI: Analyse Images with AI

General

With Open Source Toools, it is easy to analyse images.

Just install Ollama, download the llava image and run this command:

❯ ollama run llava:latest "Beschreibe das Bild <path to image>"

Try this image: Statue of LIberty

❯ ollama run llava:latest "Beschreibe das Bild /tmp/statue-liberty-liberty-island-new-york.jpg"
Added image '/tmp/statue-liberty-liberty-island-new-york.jpg'
The image shows the Statue of Liberty, an iconic landmark in New York Harbor. This neoclassical statue is a symbol of freedom and democracy, and it has become a universal symbol of the United States. The statue is situated on Liberty Island, which is accessible via ferries from Manhattan.

In the background, you can see a clear sky with some clouds, indicating good weather. The surrounding area appears to be lush with greenery, suggesting that the photo was taken in spring or summer when vegetation is abundant. There are also people visible at the base of the statue, which gives a sense of scale and demonstrates the size of the monument.

Add CoPilot functionality to VSCode with Open Source tools

Introduction

The GitHub Copilot extension is an AI pair programmer tool that helps you write code faster and smarter. 

We want to use this feature with Open Source Tools:

Setup

Install Ollama

Download Ollama and install it.

To start Ollama, you have two possibilities:

From the command line

Using the Icon from the Installation

With MacOS, you could start Ollama

You should the the runnning Ollama instance in the header

Pull Phi3 Model

Run

ollama pull phi3

Install VS Code

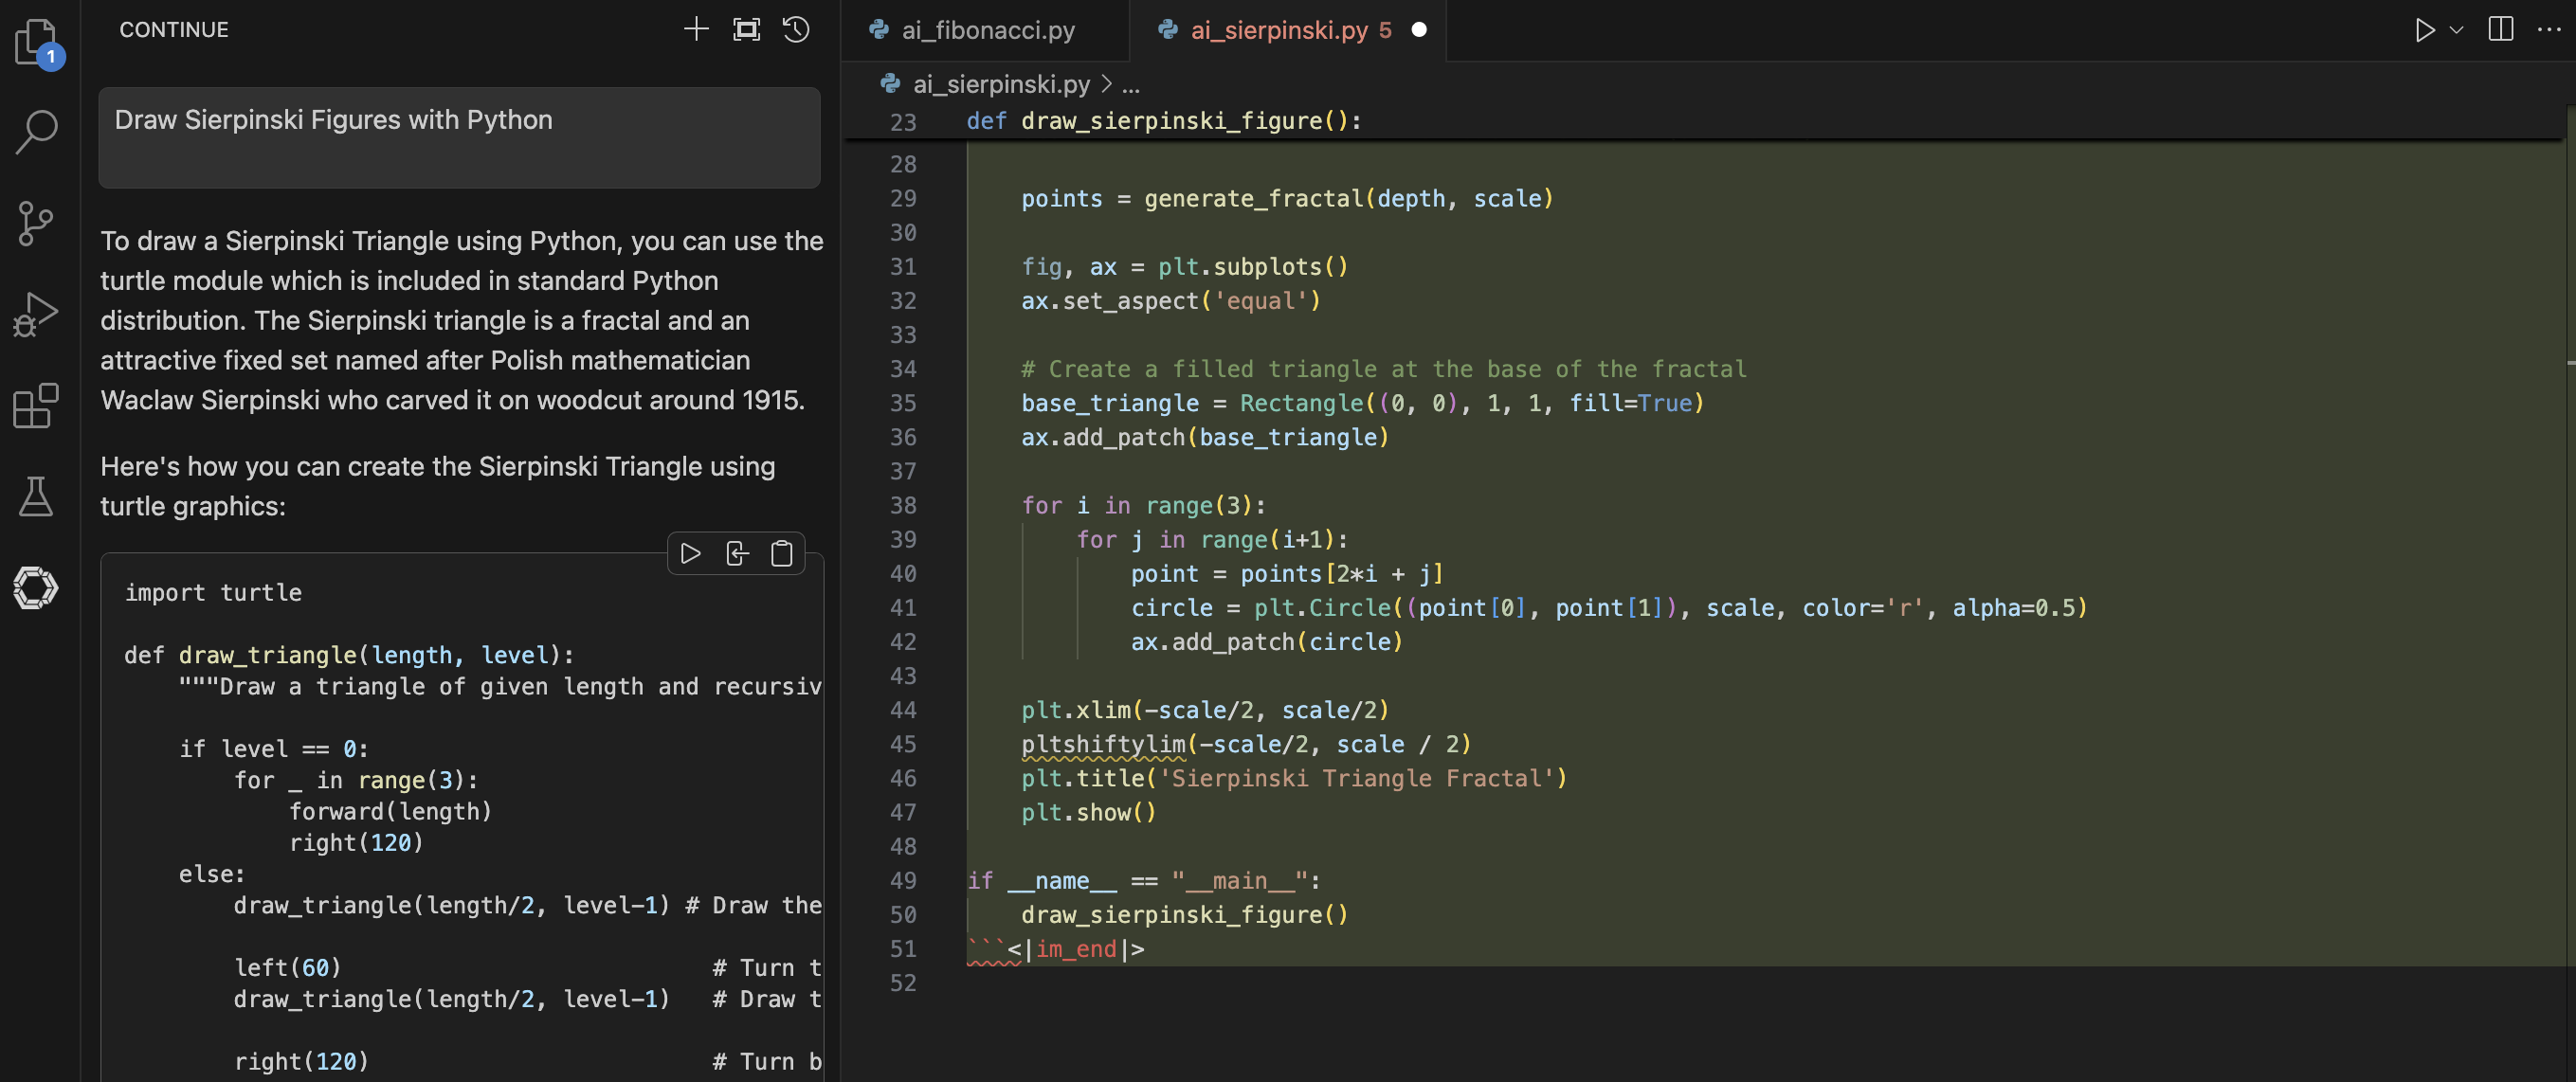
Install VS Code Extension Continue

Start Model

Configure VS Code Extension

Ollama | Create a ChatGPT Clone with Ollama and HyperDiv

In this blog post, we’ll explore how to create a ChatGPT-like application using Hyperdiv and Ollama. Hyperdiv provides a flexible framework for building web applications, while Ollama offers powerful local machine learning capabilities.

We will start with the Hyperdiv GPT-chatbot app template and adapt it to leverage Ollama, which runs locally. This guide will walk you through the necessary steps and code changes to integrate these technologies effectively.

TL;DR

The complete code for this tutorial is here.

Step 1: Setting Up Your Environment

Install Ollama

Download Ollama from https://ollama.com/download.

Install (Windows) or unpack (macOS) the downloaded file. This gets you an Ollama app (which allows you to start the Ollama service) and a Ollama command line.

Start the Ollama service by starting the Ollama app.

On macOS, you will see an icon for the Ollama Servce at the top bar.

Then, open a terminal and type ollama list. This command displays the install models.

ollama list

To install a model, type

ollama pull llama3

For our ChatGPT Clone, we will use the llama3 model.

If you want to use another model, then search here: https://ollama.com/library

Clone the HyperDiv Examples Repository

Start by cloning or downloading the Hyperdiv GPT-chatbot app. This app provides a basic structure for a chatbot application, which we will modify to work with Ollama.

Go to your desired local folder to store the sources and type

git clone https://github.com/hyperdiv/hyperdiv-apps

Then, go to the folder hyperdiv-apps/gpt-chatbot

Adapt app to use Ollama backend

First, we will create an ollama client to process all request:

from openai import OpenAI

client = OpenAI(
    base_url="http://localhost:11434/v1",
    api_key="ollama",
)

Then we modify the request function to use this client

We change

response = openai.ChatCompletion.create(

to

response = client.chat.completions.create(

Next step is changing the accees to the response fields. With OpenAI, the response data is a dictionary, so the way to acess the fields is like

chunk["choices"]

With Ollama, we can access the field by name

chunk.choices

The changes are

 for chunk in response:
    message = chunk.choices[0].delta
    state.current_reply += message.content

And the last step would be the change to use the correct model:

model = form.select(
    options=("codellama", "llama2", "llama3", "mistral"),
        value="llama3",
        name="gpt-model",
)

Thats is! Save all changes

Prepare Python environment and run app

Install the required modules:

pip install openai hyperdiv

Run the app:

python start.py

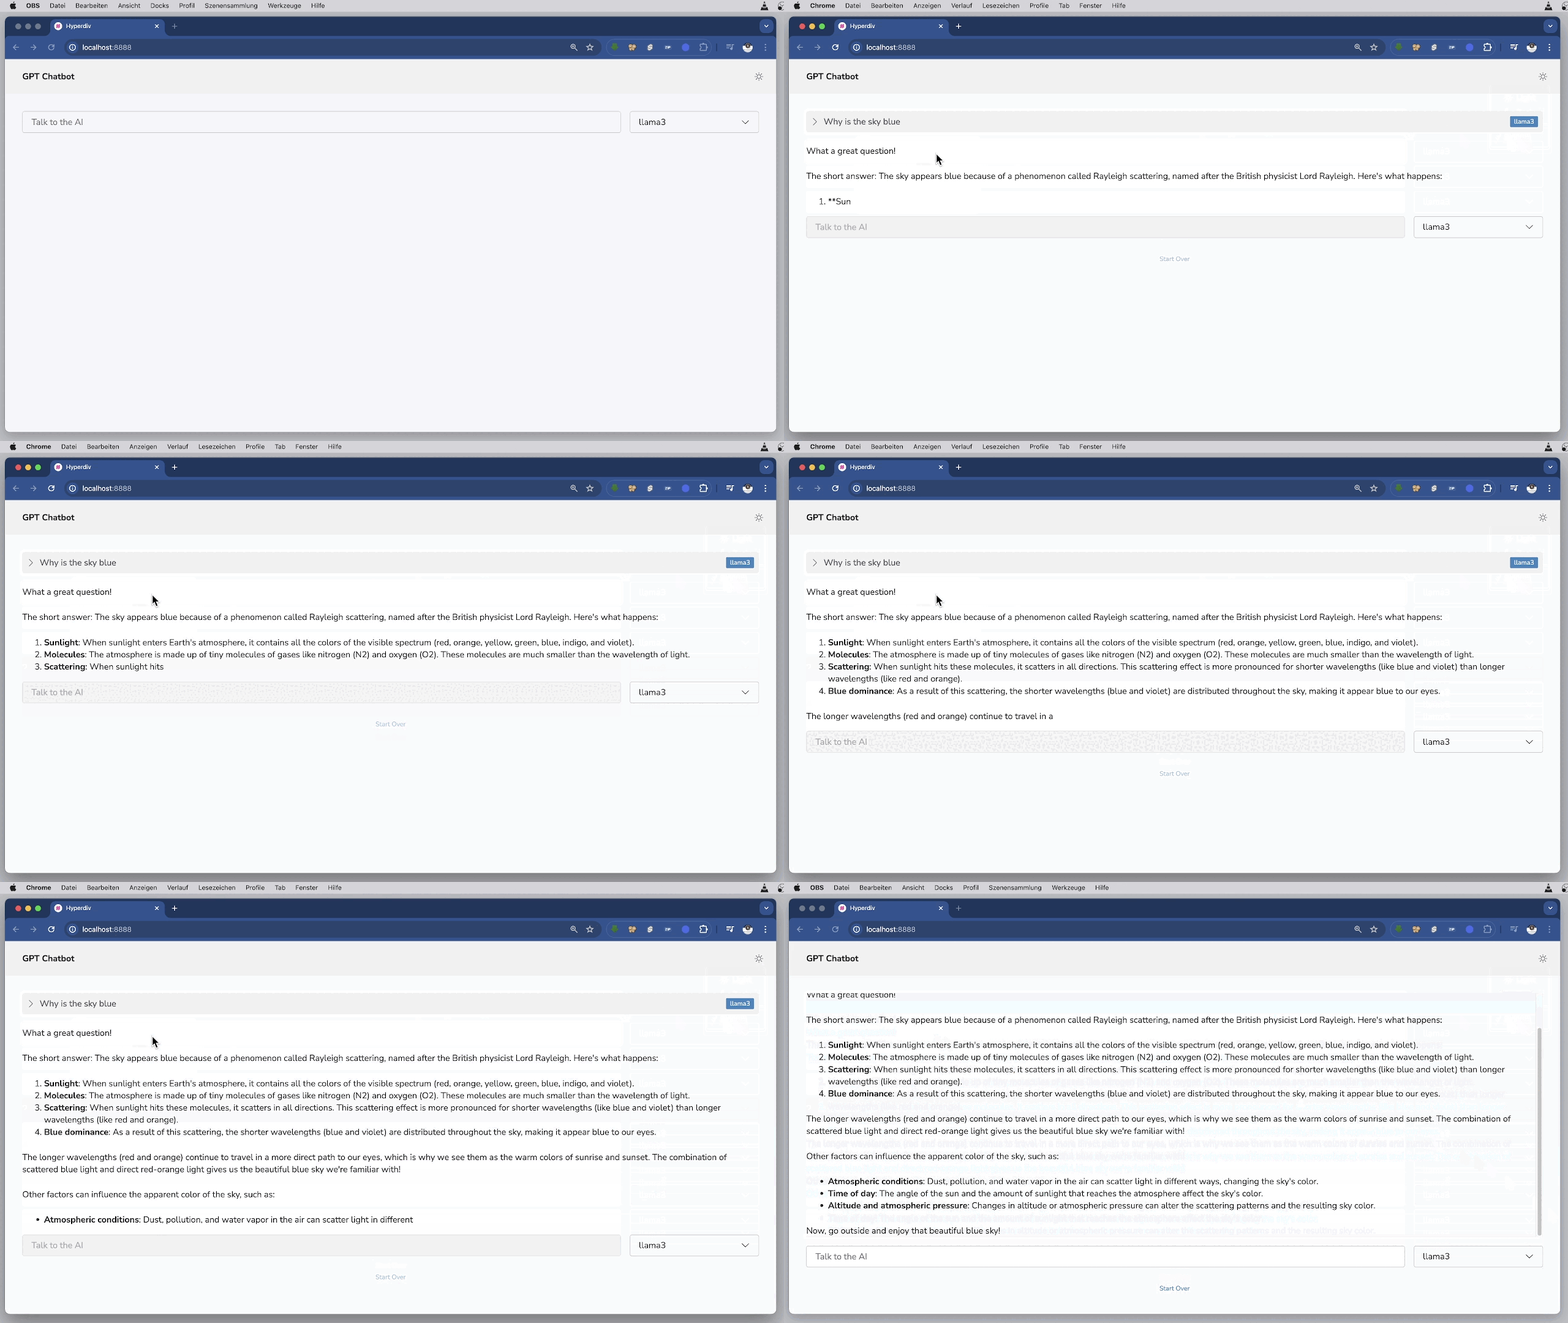
Open the browser at http://localhost:8888

Final Result

The complete code for this tutorial is here.

Learning | Hello World in different Languages

Python

print("Hello, World!")

Java

public class HelloWorld {
    public static void main(String[] args) {
        System out println("Hello, World!");
    }
}

C

#include <stdio h>

int main() {
    printf("Hello, World!\n");
    return 0;
}

C++:

#include <iostream>

int main() {
    std::cout << "Hello, World!" << std::endl;
    return 0;
}

JavaScript

console log("Hello, World!");

Ruby

puts "Hello, World!"

Swift

print("Hello, World!")

Go

package main

import "fmt"

func main() {
    fmt Println("Hello, World!")
}

Rust

fn main() {
    println!("Hello, World!");
}

PHP

<?php
echo "Hello, World!";
?>

Perl

print "Hello, World!\n";

Kotlin

fun main() {
    println("Hello, World!")
}

Scala

object HelloWorld {
  def main(args: Array[String]): Unit = {
    println("Hello, World!")
  }
}

Lua

print("Hello, World!")

Haskell

main :: IO ()
main = putStrLn "Hello, World!"

Dart

void main() {
  print('Hello, World!');
}

Shell

echo "Hello, World!"

Batch

@echo off
echo Hello, World!

PowerShell

Write-Output "Hello, World!"

VBScript

MsgBox "Hello, World!"

Objective-C

#import <Foundation/Foundation h>

int main(int argc, const char * argv[]) {
    @autoreleasepool {
        NSLog(@"Hello, World!");
    }
    return 0;
}

Assembly

section  data
    hello db 'Hello, World!',10
    len equ $ - hello

section  text
    global _start

_start:
    ; write our string to stdout
    mov eax, 4         ; sys_write
    mov ebx, 1         ; file descriptor 1 (stdout)
    mov ecx, hello     ; message to write
    mov edx, len       ; message length
    int 0x80           ; syscall
    ; exit
    mov eax, 1         ; sys_exit
    xor ebx, ebx       ; exit status 0
    int 0x80           ; syscall

VBA (Visual Basic for Applications)

Sub HelloWorld()
    MsgBox "Hello, World!"
End Sub

Tcl

puts "Hello, World!"

COBOL

       IDENTIFICATION DIVISION 
       PROGRAM-ID  HELLO-WORLD 
       PROCEDURE DIVISION 
           DISPLAY "Hello, World!" 
           STOP RUN 

26 F#:

printfn "Hello, World!"

Elixir

IO puts "Hello, World!"

SQL (MySQL)

SELECT 'Hello, World!';

SQL (SQLite)

SELECT 'Hello, World!';

SQL (PostgreSQL)

SELECT 'Hello, World!';

SQL (Oracle)

SELECT 'Hello, World!' FROM DUAL;

SQL (SQL Server)

PRINT 'Hello, World!';

Smalltalk

Transcript show: 'Hello, World!'; cr 

R

cat("Hello, World!\n")

Bash

echo "Hello, World!"

Erlang

-module(hello) 
-export([hello_world/0]) 

hello_world() ->
    io:fwrite("Hello, World!~n") 

Julia

println("Hello, World!")

MATLAB

disp('Hello, World!');

AutoHotkey

MsgBox, Hello, World!

Clojure

(println "Hello, World!")

Groovy

println "Hello, World!"

OCaml

print_endline "Hello, World!"

D

import std stdio;

void main()
{
    writeln("Hello, World!");
}

Crystal

puts "Hello, World!"

Nim

echo "Hello, World!"

Common Lisp

(format t "Hello, World!


Scheme

(display "Hello, World!")
(newline)

Prolog

:- initialization(main) 

main :-
    write('Hello, World!'), nl,
    halt 

ABAP

REPORT ZHELLO_WORLD 

WRITE: / 'Hello, World!' 

VB NET

vb net
Module HelloWorld
    Sub Main()
        Console WriteLine("Hello, World!")
    End Sub
End Module 

AI Environment | Writing Apps for OpenAI, ChatGPT, Ollama and others

Python UI Frameworks

  • Gradio
    Gradio is the fastest way to demo your machine learning model with a friendly web interface so that anyone can use it, anywhere!
  • Streamlit
    Streamlit turns data scripts into shareable web apps in minutes.
    All in pure Python. No front‑end experience required.
  • HyperDiv
    Open-source framework for rapidly building reactive web apps in Python, with built-in Shoelace components, Markdown, charts, tables, and more.
  • Shoelace
    A forward-thinking library of web components.

Ollama | Getting Started

Installation

Read here for details.

Linuxcurl -fsSL https://ollama.com/install.sh | sh
Mac OSDownload
WindowsDownload

Start Ollama Service

ollama start

This starts the Ollama Service and binds it to the default ip address 127.0.0.1:11434

If you want to access the service from another host/client, you have to use the ip address 0.0.0.0

systemctl stop ollama.service
export OLLAMA_HOST=0.0.0.0:11434
ollama start

To change the IP address of the service, edit the file /etc/systemd/system/ollama.service and add

[Unit]
Description=Ollama Service
After=network-online.target

[Service]
ExecStart=/usr/local/bin/ollama serve
User=ollama
Group=ollama
Restart=always
RestartSec=3
Environment="OLLAMA_HOST=0.0.0.0:11434"

[Install]
WantedBy=default.target

Access the Ollama Service from your Browser using <ip-adress of host>:11434

Sample Python Chat

Install Python

Install Ollama Library

pip install ollama

Create the chat programm

#!/usr/bin/env python

from ollama import Client

ollama = Client(host='127.0.0.1')

response = ollama.chat(model='llama3', messages=[
  {
    'role': 'user',
    'content': 'Why is the sky blue?',
  },
])
print(response['message']['content'])

Run the programm

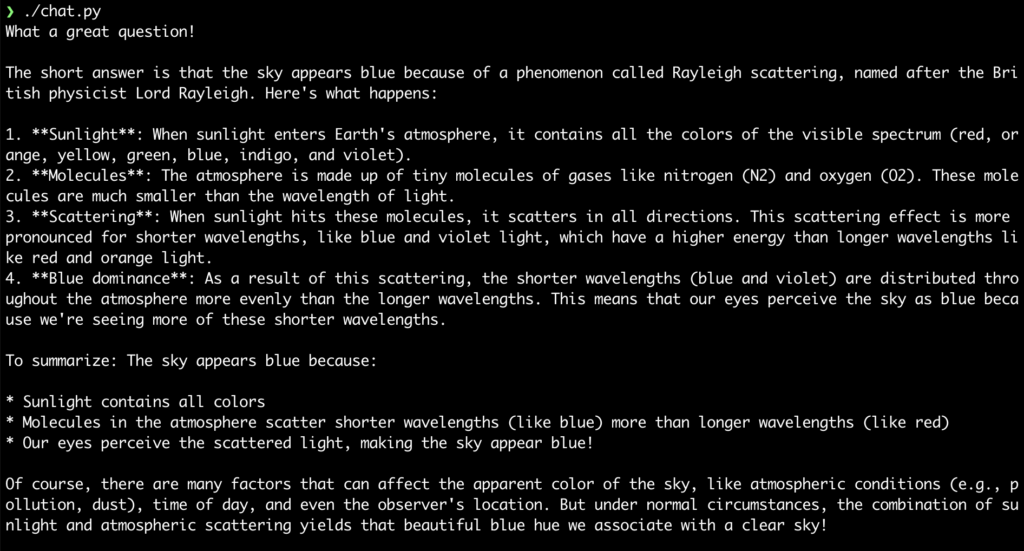
❯ ./chat.py

Hint: To see, whats happen with the service, monitor the logfile

❯ sudo journalctl -u ollama.service -f

Query the API

Read the API definition here

curl http://localhost:11434/api/generate -d '{
  "model": "llama2",
  "prompt": "Why is the sky blue?",
  "stream": false
}'

Create a simple ChatGPT Clone

Create the Gradio App

Gatsby | Getting started with Gatsby

Installation

npm init gatsby
pnpm create gatsby
❯ npm create gatsby
.../21.6.2/pnpm/store/v3/tmp/dlx-42253   |   +3 +
.../21.6.2/pnpm/store/v3/tmp/dlx-42253   | Progress: resolved 3, reused 1, downloaded 2, added 3, done
create-gatsby version 3.13.1

                                                                            Welcome to Gatsby!
What would you like to call your site?
✔ Getting-Started-with-Gatsby/ site
✔ Will you be using JavaScript or TypeScript?
· TypeScript
✔ Will you be using a CMS?
· No (or I'll add it later)
✔ Would you like to install a styling system?
· Tailwind CSS
✔ Would you like to install additional features with other plugins?
· Add responsive images
· Add an automatic sitemap
· Generate a manifest file
· Add Markdown and MDX support


Thanks! Here's what we'll now do:

    🛠  Create a new Gatsby site in the folder site
    🎨 Get you set up to use Tailwind CSS for styling your site
    🔌 Install gatsby-plugin-image, gatsby-plugin-sitemap, gatsby-plugin-manifest, gatsby-plugin-mdx

✔ Shall we do this? (Y/n) · Yes
✔ Created site from template
✔ Installed Gatsby
✔ Installed plugins
✔ Created site in site
🔌 Setting-up plugins...
info Adding gatsby-plugin-postcss
info Adding gatsby-plugin-image
info Adding gatsby-plugin-sitemap
info Adding gatsby-plugin-manifest
info Adding gatsby-plugin-mdx
info Adding gatsby-plugin-sharp
info Adding gatsby-transformer-sharp
info Adding gatsby-source-filesystem
info Installed gatsby-plugin-postcss in gatsby-config
success Adding gatsby-plugin-postcss to gatsby-config - 0.224s
info Installed gatsby-plugin-image in gatsby-config
success Adding gatsby-plugin-image to gatsby-config - 0.221s
info Installed gatsby-plugin-sitemap in gatsby-config
success Adding gatsby-plugin-sitemap to gatsby-config - 0.230s
info Installed gatsby-plugin-manifest in gatsby-config
success Adding gatsby-plugin-manifest to gatsby-config - 0.258s
info Installed gatsby-plugin-mdx in gatsby-config
success Adding gatsby-plugin-mdx to gatsby-config - 0.264s
info Installed gatsby-plugin-sharp in gatsby-config
success Adding gatsby-plugin-sharp to gatsby-config - 0.265s
info Installed gatsby-transformer-sharp in gatsby-config
success Adding gatsby-transformer-sharp to gatsby-config - 0.269s
info Installed gatsby-source-filesystem in gatsby-config
success Adding gatsby-source-filesystem (images) to gatsby-config - 0.279s
info Installed gatsby-source-filesystem in gatsby-config
success Adding gatsby-source-filesystem (pages) to gatsby-config - 0.286s
🎨 Adding necessary styling files...
🎉  Your new Gatsby site Getting Started with Gatsby has been successfully created
at /Users/Shared/CLOUD/Programmier-Workshops/Kurse/Gatsby/Einsteiger/Getting-Started-with-Gatsby/site.
Start by going to the directory with

  cd site

Start the local development server with

  npm run develop

See all commands at

  https://www.gatsbyjs.com/docs/reference/gatsby-cli/
❯ cd site
❯ npm install
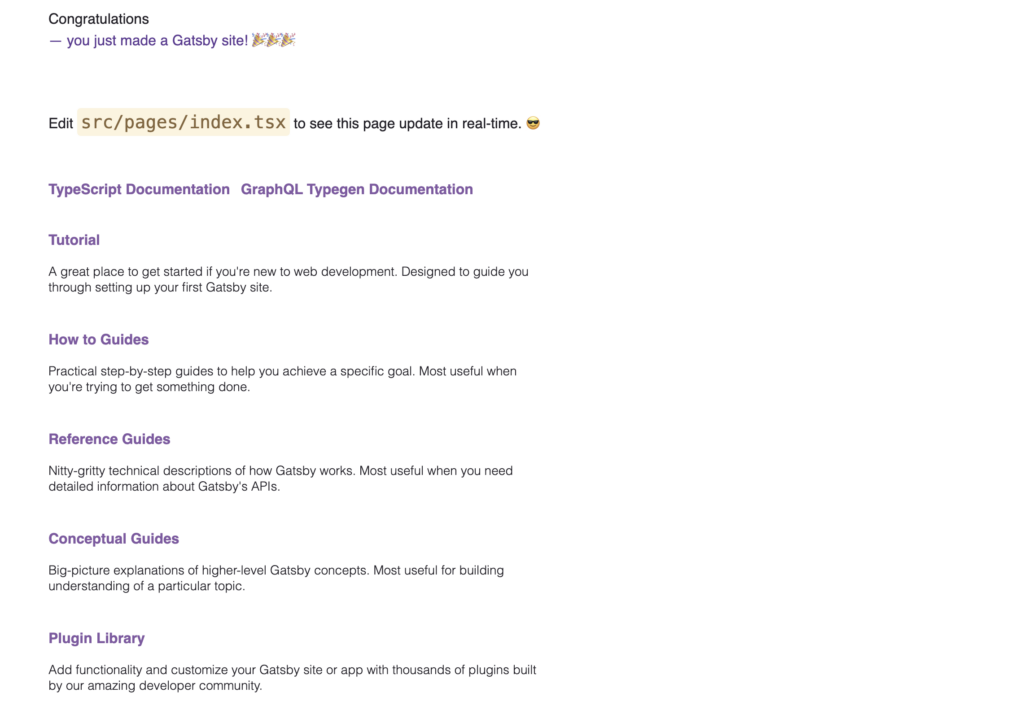
❯ npm run develop