Developer Blog

Tipps und Tricks für Entwickler und IT-Interessierte

Vue3 and Laravel + Inertia | Cookbook

Allgemeines

Vue and CSS

Styling with CSS Variables

<script setup>
const theme = {
    "menu": {
        "background": 'black',
        "item": {
            "background": "green"
        },
        "subitem": {
            "background": "green"
        }
    }
}
</script>
<style scoped>
.menu {
    background-color: v-bind('theme.menu.background');
}

Using PrimeVue

Installation

❯ pnpm add primevue @primevue/themes
❯ pnpm add primevue @primevue/icons

Vue3 | Einstieg

Allgemeines

Installation

Installation mit der vue-cli

yarn global add @vue/cli
# OR
npm install -g @vue/cli

Neues Projekt erstellen

vue create my-project
# OR
vue ui

Installation mit Vite

Vite

Vite ist ein Build-Tool für die Webentwicklung, das aufgrund seines nativen ES-Modul-Importansatzes eine blitzschnelle Bereitstellung von Code ermöglicht.

Installation mit npm:

npm init @vitejs/app <project-name>
cd <project-name>
npm install
npm run dev

Oder mit Yarn

$ yarn create @vitejs/app <project-name>
$ cd <project-name>
$ yarn
$ yarn dev

Wenn der Projektname Leerzeichen ehthält, kann es zu Fehlern kommen. Dann hilft das nachfolgende Kommando

$ create-vite-app <project-name>

Vue Frameworks

Description:

GroupLink TextURLDescriptionDetailsAdvantages
UI FrameworkVuetifyhttps://next.vuetifyjs.com/Material design component framework for Vue 3.Rich in features and components.Highly customizable, extensive components, material design.
UI FrameworkQuasarhttps://quasar.dev/Build responsive websites, mobile, and desktop apps using a single codebase with Vue 3.All-in-one framework for web, mobile, and desktop apps.Cross-platform, fast development, rich ecosystem.
UI FrameworkElement Plushttps://element-plus.org/Enterprise-ready UI component library for Vue 3.Popular in the Chinese market, enterprise-friendly.Well-documented, easy to use, comprehensive components.
UI FrameworkNaive UIhttps://www.naiveui.com/Minimalistic and customizable component library for Vue 3.Lightweight and easy to integrate.Customizable, lightweight, modern.
UI FrameworkPrimeVuehttps://primefaces.org/primevue/Rich set of customizable UI components for Vue 3.Comes with many pre-built themes and components.Wide variety of components, responsive, many themes.
UI FrameworkAnt Design Vuehttps://2x.antdv.com/Vue 3 implementation of the Ant Design UI library.Well-suited for professional and enterprise-grade apps.Clean, professional design, extensive components.
UI FrameworkBootstrapVue 3https://bootstrap-vue.org/Bootstrap-based Vue 3 components.Based on Bootstrap for familiarity.Bootstrap ecosystem, responsive, familiar grid system.Lacks some modern UI components compared to newer libraries.
RoutingVue Routerhttps://router.vuejs.org/Official Vue 3 router for single-page applications.Powerful and flexible routing.Seamless integration with Vue 3, dynamic routing, nested routes.Requires setup for advanced features (SSR, lazy loading).
State ManagementPiniahttps://pinia.vuejs.org/Lightweight, intuitive state management library for Vue 3.Vuex alternative with Composition API support.Simple API, modular, Composition API support, easy to learn.Limited ecosystem compared to Vuex.
State ManagementVuexhttps://vuex.vuejs.org/Official state management library for Vue.js, compatible with Vue 3.Centralized state management for Vue apps.Well-supported, battle-tested, great for large apps.Can be complex for small applications, more boilerplate.
Build ToolVitehttps://vitejs.dev/Fast build tool with native support for Vue 3.Modern alternative to Webpack, optimized for Vue 3.Super fast builds, modern JavaScript support, HMR.Still evolving, lacks plugins compared to Webpack.
Build ToolVue CLIhttps://cli.vuejs.org/CLI to scaffold and manage Vue.js applications, supports Vue 3.Long-standing, mature build tool.Easy to use, integrates well with Vue ecosystem, powerful plugins.Slower build times compared to Vite.
Dev ToolsVue Devtoolshttps://devtools.vuejs.org/Browser extension for debugging Vue.js applications.Essential for Vue development.Powerful debugging, time-travel debugging, component inspection.Can slow down large apps in development mode.
Meta FrameworkNuxt 3https://v3.nuxtjs.org/Vue 3 meta-framework for SSR and static site generation.Built on Vue 3, optimized for server-side rendering.SSR, static site generation, auto-routing, great SEO support.More complex setup, slower build times than SPAs.
Utility LibraryVueUsehttps://vueuse.org/Collection of essential Vue 3 composition utilities.Focused on utility functions for the Composition API.Makes Vue Composition API easier, reusable functions.Only useful for Composition API users, lacks official support.
Data FetchingApollo Vuehttps://apollo.vuejs.org/A Vue 3 integration for building GraphQL-powered applications.Full-featured GraphQL client for Vue 3.Great GraphQL support, works well with Vue, powerful querying.Heavyweight, more setup required for small projects.
Data FetchingVue Queryhttps://vue-query.vercel.app/Data-fetching and state management library, similar to React Query, for Vue 3.Simplifies API data-fetching and caching.Easy API, great for handling remote data, caching, and synchronization.Less support for large data models compared to Vuex.
ValidationVuelidatehttps://vuelidate-next.netlify.app/Validation library for Vue 3 with support for the Composition API.Composition API-based validation.Lightweight, easy to integrate, simple to use.Not as feature-rich as some alternatives (like VeeValidate).
Form HandlingFormKithttps://formkit.com/Robust form management and validation for Vue 3.Advanced form management with full validation support.Extensive features for forms, great validation handling.Overkill for simple forms, can increase bundle size.
UI FrameworkIonic Vuehttps://ionicframework.com/docs/vue/Build cross-platform mobile apps with Vue 3 and Ionic.Optimized for mobile development.Cross-platform, mobile-first components, easy PWA integration.Can feel bloated for web-only applications.
UI FrameworkVue 3 Materialhttps://vuematerial.io/Material Design 3 component library for Vue 3.Material Design components for Vue 3.Simple to use, clean material design.Fewer components compared to other material design libraries like Vuetify.
UI FrameworkVuestic UIhttps://vuestic.dev/UI library for building accessible, fully customizable interfaces with Vue 3.Focused on accessibility and customization.Highly customizable, lightweight, accessible out of the box.Smaller community and ecosystem.
UI FrameworkDevExtreme Vuehttps://js.devexpress.com/Overview/Vue/Enterprise-ready Vue 3 components for data-heavy applications.Optimized for enterprise and data-heavy apps.Great data components, enterprise-grade, responsive.Commercial product, steeper learning curve.
TestingVue Test Utilshttps://test-utils.vuejs.org/Official unit testing library for Vue components.Built for Vue component testing.Official testing library, well-supported, integrates with Jest and Mocha.Can be challenging for complex components.
TestingCypresshttps://www.cypress.io/End-to-end testing framework for web applications, supports Vue 3.Easy-to-use end-to-end testing tool.Real browser testing, powerful debugging tools, great for Vue 3 apps.Requires real browser setup, slower than unit testing.
TestingJesthttps://jestjs.io/JavaScript testing framework with Vue 3 support via vue-jest.Popular testing framework in JavaScript.Fast, easy to configure, great Vue 3 support.Configuration required for Vue 3 with vue-jest.
AnimationGSAP Vue 3https://greensock.com/docs/v3/Installation?ref=platformsVue 3 integration for creating animations with GSAP (GreenSock Animation Platform).Leading animation library with Vue 3 integration.High-performance animations, extensive feature set, works well with Vue 3.Can add to the complexity and size of your app if overused.
Data VisualizationVue Chart 3https://vuechartjs.org/Charting library for Vue 3 built on Chart.js.Chart.js integration for Vue 3.Easy to use, lightweight, built on the popular Chart.js.Limited to what Chart.js supports, not as flexible as some other charting libraries.
TestingVitesthttps://vitest

Django | Debugging Django-App in VS Code

See here how to configure VS Code:

  • Switch to Run view in VS Code (using the left-side activity bar or F5). You may see the message
    “To customize Run and Debug create a launch.json file”.
    This means that you don’t yet have a launch.json file containing debug configurations. VS Code can create that for you if you click on the create a launch.json file link:Django tutorial: initial view of the debug panel
  • Select the link and VS Code will prompt for a debug configuration. Select Django from the dropdown and VS Code will populate a new launch.json file with a Django run configuration.
    The launch.json file contains a number of debugging configurations, each of which is a separate JSON object within the configuration array.
  • Scroll down to and examine the configuration with the name “Python: Django”:
{
  "version": "0.2.0",
  "configurations": [
    {
      "name": "Python: Django",
      "type": "python",
      "request": "launch",
      "program": "${workspaceFolder}\\manage.py",
      "args": ["runserver"],
      "django": true,
      "justMyCode": true
    }
  ]
}
  • This configuration tells VS Code to run "${workspaceFolder}/manage.py" using the selected Python interpreter and the arguments in the args list.
    Launching the VS Code debugger with this configuration, then, is the same as running python manage.py runserver in the VS Code Terminal with your activated virtual environment. (You can add a port number like "5000" to args if desired.)
    The "django": true entry also tells VS Code to enable debugging of Django page templates, which you see later in this tutorial.
  • Test the configuration by selecting the Run > Start Debugging menu command, or selecting the green Start Debugging arrow next to the list (F5):Django tutorial: start debugging/continue arrow on the debug toolbar
  • Ctrl+click the http://127.0.0.1:8000/ URL in the terminal output window to open the browser and see that the app is running properly.
  • Close the browser and stop the debugger when you’re finished. To stop the debugger, use the Stop toolbar button (the red square) or the Run > Stop Debugging command (Shift+F5).
  • You can now use the Run > Start Debugging at any time to test the app, which also has the benefit of automatically saving all modified files.

Angular | Working with Angular Examples

General

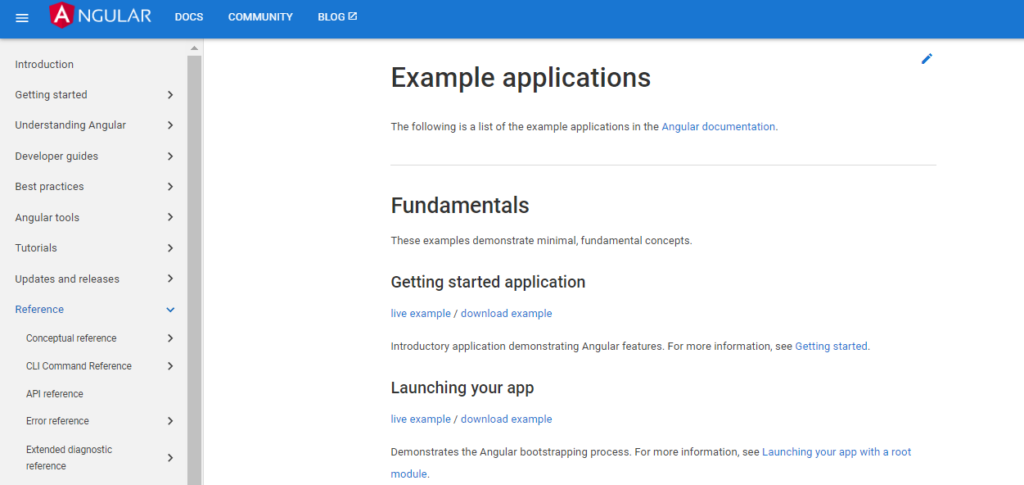
On the Angular Website, there are a lot of examples.

You could download each of them and look around. In this post, i will show you to do this at once for all examples.

So, we will

  • get list of all examples
  • download zip files of examples
  • extract examples

Preparation

First, we define some variables for the Chrom Browser and the resulting output files.

# Mac OS
CHROME=/Applications/Chromium.app/Contents/MacOS/Chromium

# Windows WSL
CHROME='/mnt/c/Program Files/Google/Chrome/Application/chrome.exe'

LISTOFZIPS=listofzips

Download List of examples

Next, we will download the list of examples from https://angular.io/guide/example-apps-list.

This is not a static html file. The list will be created dynamically when viewing the page. So, only download the page with wget or curl does not help, because we need to run the JavaScript code in the browser to create the list.

Therefore, we will use Chrome in headless mode: Load the page and dump the contents of the page (dom) into a file

do_get_list() {
        "$CHROME" --headless --dump-dom https://angular.io/guide/example-apps-list | tr '>' '>\n ' >${LISTOFZIPS}.html

        echo "##. Download List of Examples"
        echo "    #Examples: ($(grep 'href="guide/' listofzips.html | wc -l))"
}

Then, we will extract all the links to the zip examples files.

A quick look into the html file shows, that the html code with the links looks like this:

We need the part in the href of the <a tag.

  • First, we will split the html file, so that every html tag will be on a separate line.
  • Then, we will cut out only the parts between apostrophes.
  • Then, we search all files containing “.zip” and the end of the line ($)
do_extract() {
        cat ${LISTOFZIPS}.html                                          |\
        tr ' ' '\n'                                                     |\
        cut -d \" -f2                                                   |\
        grep -e '.zip$'                                                 > ${LISTOFZIPS}

        echo "generated/zips/component-overview/component-overview.zip" >> ${LISTOFZIPS}

        echo "##. Extract zip files ($(wc -l ${LISTOFZIPS}))"
        echo "    #Examples: ($(wc -l ${LISTOFZIPS}))"
}

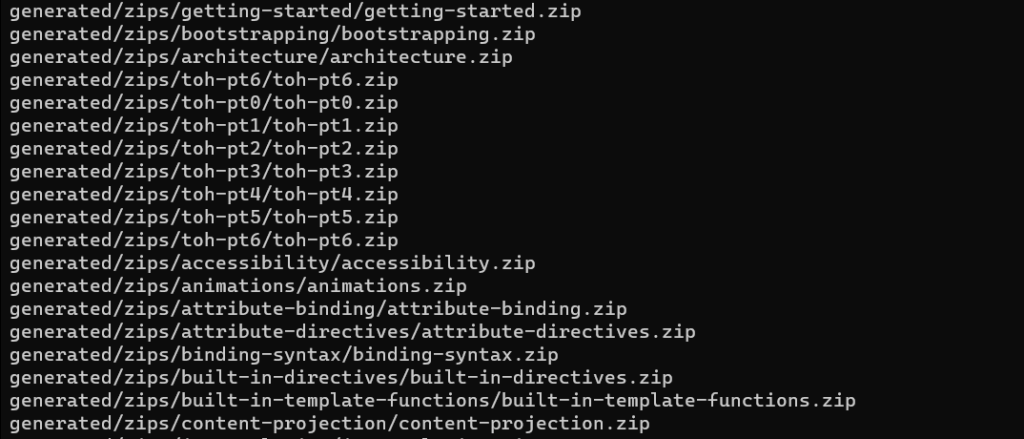
The result will be the list of URL’s for each example.

Download Examples

Next, for each of these example $ZIP, we will download the zip from the Angular Website with wget -q https://angular.io/$ZIP

do_download() {
        echo "##. Download Zips"

        (
                rm    -rf zip
                mkdir -p  zip
                cd        zip

                cat ../$LISTOFZIPS | while read ZIP
                do
                        echo "Download $ZIP"
                        if [ ! -f $ZIP ]; then
                                wget -q https://angular.io/$ZIP
                        fi
                done

                rm *.zip.1
        )
}

Extract ZIP Files

do_unzip() {
        echo "##. Unzip"

        rm    -rf src
        mkdir -p  src

        find zip -type f -exec basename {} \; | \
        while read FILE
        do
                FLDR=${FILE/.zip/}
                echo unzip zip/$FILE -d src/$FLDR
                unzip zip/$FILE -d src/$FLDR
        done
}

Upgrade all node modules to current version

We will need toe tool npm-check-updates for this.

Install it with

npm install -g npm-check-updates

ncu updates all packages to the latest version. Some Angular Examples require an earlier version of Typescript, so, after upgrade i changes the Typescript Version to 4.9.5

do_upgrade() {
	echo "##. Upgrade"

	(
		cd src
		ls | \
		while read FLDR
		do 
			echo "     $FLDR"
			(
				cd $FLDR
				ncu -u
				#     "typescript": "~4.9.3"
				sed -i '1,$s/"typescript": ".*"/"typescript": "~4.9.5"/' package.json
				# pnpm install
			)
		done
	)
}

Appendix

The code for the complete script is here:

#!/bin/bash

# Mac OS
CHROME=/Applications/Chromium.app/Contents/MacOS/Chromium

# Windows WSL
CHROME='/mnt/c/Program Files/Google/Chrome/Application/chrome.exe'

LISTOFZIPS=listofzips

do_get_list() {
        "$CHROME" --headless --dump-dom https://angular.io/guide/example-apps-list | tr '>' '>\n ' >${LISTOFZIPS}.html

        echo "##. Download List of Examples"
        echo "    #Examples: ($(grep 'href="guide/' listofzips.html | wc -l))"
}

do_extract() {
        cat ${LISTOFZIPS}.html                                          |\
        tr ' ' '\n'                                                                     |\
        cut -d \" -f2                                                           |\
        grep -e '.zip$'                                                         > ${LISTOFZIPS}

        echo "generated/zips/component-overview/component-overview.zip" >> ${LISTOFZIPS}

        echo "##. Extract zip files ($(wc -l ${LISTOFZIPS}))"
        echo "    #Examples: ($(wc -l ${LISTOFZIPS}))"
}

do_download() {
        echo "##. Download Zips"

        (
                rm    -rf zip
                mkdir -p  zip
                cd        zip

                cat ../$LISTOFZIPS | while read ZIP
                do
                        echo "Download $ZIP"
                        if [ ! -f $ZIP ]; then
                                wget -q https://angular.io/$ZIP
                        fi
                done

                rm *.zip.1
        )
}

do_unzip() {
        echo "##. Unzip"

        rm    -rf src
        mkdir -p  src

        find zip -type f -exec basename {} \; | \
        while read FILE
        do
                FLDR=${FILE/.zip/}
                echo unzip zip/$FILE -d src/$FLDR
                unzip zip/$FILE -d src/$FLDR
        done
}

do_upgrade() {
	echo "##. Upgrade"

	(
		cd src
		ls | \
		while read FLDR
		do 
			echo "     $FLDR"
			(
				cd $FLDR
				ncu -u
				#     "typescript": "~4.9.3"
				sed -i '1,$s/"typescript": ".*"/"typescript": "~4.9.5"/' package.json
				# pnpm install
			)
		done
	)
}


case "$1" in
        "get")       do_get_list;;
        "extract")   do_extract;;
        "download")  do_download;;
        "unzip")     do_unzip;;
        "upgrade")   do_upgrade;;
        *)

                echo "run $0 get|extract|download|unzip";;
esac

Flutter | Cookbook

Development Workflow

TL;DR

flutter create <app>
cd <app>
flutter run

Run App

flutter
flutter run --release .\lib\go_router.dart

VSCode and DevTools

Change default browser

Press F1, find Preferences: Open Settings (UI) then search for devtoolsbrowser.

Change in DevTools Menu

Working with Modules and Classes

Import all Modules from a Folder

Suppose you have a list of modules located in the folder models and you want to import all of them.

To do this

  • create a file index.dart which exports all files
  • in your dart file, import this index.dart
export 'counter.dart';
export 'number.dart';
import 'data/models/index.dart';

Create custom code for unsupported packages

Create main file to check, if package is available. If not, then switch to custom code

export 'unsupported.dart' if (dart.library.io) 'io.dart';

Use this file in your code

import 'plugins/desktop/desktop.dart';

Create files for supported and unsupported packages

io.dart

import 'dart:io';

import 'package:flutter/foundation.dart';
import 'package:flutter/material.dart';

void setTargetPlatformForDesktop({TargetPlatform platform}) {
  TargetPlatform targetPlatform;
  if (platform != null) {
    targetPlatform = platform;
  }
  if (targetPlatform == null) {
    if (Platform.isMacOS) {
      targetPlatform = TargetPlatform.iOS;
    } else if (Platform.isLinux || Platform.isWindows) {
      targetPlatform = TargetPlatform.android;
    }
  }
  debugDefaultTargetPlatformOverride = targetPlatform;
}

unsupported.dart

import 'package:flutter/material.dart';

void setTargetPlatformForDesktop({TargetPlatform platform}) {}

Working with Themes

Using a Theme in MaterialApp()

return MaterialApp(
      title: 'Flutter Demo',
      theme: ThemeData(
        primarySwatch: Colors.blue,
      ),
      home: const MyHomePage(title: 'Flutter Demo Home Page'),
    );
    return MaterialApp(
      title: 'Flutter Demo',
      theme: ThemeData.light().copyWith(
        primaryColor: Colors.blue,
      ),
      darkTheme: ThemeData.dark(),
      home: MyHomePage(title: 'Flutter Demo Home Page'),
    );

Working with CSS Colors

Import

import 'package:css_colors/css_colors.dart';

Usage

new Container(color: CSSColors.orange)

App Bar

How to remove a DEBUG Banner

MaterialApp(
  debugShowCheckedModeBanner: false,

  home: Scaffold(
    appBar: AppBar(
      title: const Text('Home'),
    ),
  ),  
);

Working With Data and Data Models

Replace Integer Variables with a Data Model

Examining the default Flutter App (Counter Sample), shows, that the real counter is implemented as integer with integer operations:

int _counter = 0;

void _incrementCounter() {
  setState(() {
    _counter++;
  });
}

If you want to customize the varianble and operations, you could replace the interger variable witrh your own data model

import 'data/models/counter.dart';

CounterModel _counter = CounterModel();

void _incrementCounter() {
  setState(() {
    _counter.add(1);
  });
}

The CounterModel is defined in data/models/counter.dart'

class CounterModel {
  int _value = 0;

  int get value => _value;

  void set(int val) => _value = val;
  void add(int val) => _value += val;
  void remove(int val) => _value -= val;

  void reset() => _value = 0;

  @override
  String toString() {
    return value.toString();
  }
}

Interesting Pack

device_preview

Dart | Cookbook

Additional Tools

Grinder

Dart workflows, automated.

Grinder consists of a library to define project tasks (e.g., test, build, doc) and a command-line tool to run them.

mono_repo

Manage multiple Dart packages within a single repository.

❯ dart pub global activate mono_repo
❯ mono_repo
Manage multiple packages in one source repository.

Usage: mono_repo <command> [arguments]

Global options:
-h, --help              Print this usage information.
    --version           Prints the version of mono_repo.
    --[no-]recursive    Whether to recursively walk sub-directories looking for packages.
                        (defaults to on)

Available commands:
  check       Check the state of the repository.
  generate    Generates the CI configuration for child packages.
  presubmit   Run the CI presubmits locally.
  pub         Runs the `pub` command with the provided arguments across all packages.

Run "mono_repo help <command>" for more information about a command.

Protocol Buffers

Protocol buffers are a language-neutral, platform-neutral extensible mechanism for serializing structured data.

Learn more in this Dart Tutorial

very_good_cli

A Very Good Command Line Interface for Dart created by Very Good Ventures 

Dart | Learning Dart

Introduction

Creating a simple class

class Bicycle {
  int cadence;
  int _speed = 0;
  int get speed => _speed;
  int gear;

  Bicycle(this.cadence, this.gear);

  void applyBrake(int decrement) {
    _speed -= decrement;
  }

  void speedUp(int increment) {
    _speed += increment;
  }

  @override
  String toString() => 'Bicycle: $_speed mph';
}

void main() {
  var bike = Bicycle(2, 1);
  print(bike);
}

Using optional parameters

import 'dart:math';

class Rectangle {
  int width = 0;
  int height = 0;
  Point origin = Point(0, 0);

  Rectangle({this.origin = const Point(0, 0), this.width = 0, this.height = 0});

  @override
  String toString() =>
      'Origin: (${origin.x}, ${origin.y}), width: $width, height: $height';
}

main() {
  print(Rectangle(origin: const Point(10, 20), width: 100, height: 200));
  print(Rectangle(origin: const Point(10, 10)));
  print(Rectangle(width: 200));
  print(Rectangle());
}

Create a factory

import 'dart:math';

abstract class Shape {
  // Option 2: Create a factory constructor

  factory Shape(String type) {
    if (type == 'circle') return Circle(2);
    if (type == 'square') return Square(2);
    throw 'Can\'t create $type.';
  }

  num get area;
}

class Circle implements Shape {
  final num radius;
  Circle(this.radius);

  @override
  num get area => pi * pow(radius, 2);
}

class Square implements Shape {
  final num side;
  Square(this.side);

  @override
  num get area => pow(side, 2);
}

// Option 1: Create a top-level function
Shape shapeFactory(String type) {
  if (type == 'circle') return Circle(2);
  if (type == 'square') return Square(2);
  throw 'Can\'t create $type.';
}

main() {
  // final circle = Circle(2);
  // final square = Square(2);

  // Option 1: Create a top-level function
  // final circle = shapeFactory('circle');
  // final square = shapeFactory('square');

  // Option 2: Create a factory constructor
  final circle = Shape('circle');
  final square = Shape('square');
  
  print(circle.area);
  print(square.area);
}

Implement an interface

class CircleMock implements Circle {
  num area = 0;
  num radius = 0;
}

Use Dart for functional programming

String scream(int length) => "A${'a' * length}h!";

main() {
  final values = [1, 2, 3, 5, 10, 50];
  for (var length in values) {
    print(scream(length));
  }
  
  // Functional
  values.map(scream).forEach(print);
}

Language samples

The following is copied from the Dart Website.

Hello World

Every app has a main() function. To display text on the console, you can use the top-level print() function:

void main() {
  print('Hello, World!');
}

Variables

Even in type-safe Dart code, most variables don’t need explicit types, thanks to type inference:

var name = 'Voyager I';
var year = 1977;
var antennaDiameter = 3.7;
var flybyObjects = ['Jupiter', 'Saturn', 'Uranus', 'Neptune'];
var image = {
  'tags': ['saturn'],
  'url': '//path/to/saturn.jpg'
};

Read more about variables in Dart, including default values, the final and const keywords, and static types.

Control flow statements

Dart supports the usual control flow statements:

if (year >= 2001) {
  print('21st century');
} else if (year >= 1901) {
  print('20th century');
}

for (final object in flybyObjects) {
  print(object);
}

for (int month = 1; month <= 12; month++) {
  print(month);
}

while (year > 2016) {
  year += 1;
}

Read more about control flow statements in Dart, including break and continueswitch and case, and assert.

Functions

We recommend specifying the types of each function’s arguments and return value:

int fibonacci(int n) {
  if (n == 0 || n == 1) return n;
  return fibonacci(n - 1) + fibonacci(n - 2);
}

var result = fibonacci(20);

A shorthand => (arrow) syntax is handy for functions that contain a single statement. This syntax is especially useful when passing anonymous functions as arguments:

flybyObjects.where((name) => name.contains('turn')).forEach(print);

Besides showing an anonymous function (the argument to where()), this code shows that you can use a function as an argument: the top-level print() function is an argument to forEach().

Read more about functions in Dart, including optional parameters, default parameter values, and lexical scope.

Comments

Dart comments usually start with //.

// This is a normal, one-line comment.

/// This is a documentation comment, used to document libraries,
/// classes, and their members. Tools like IDEs and dartdoc treat
/// doc comments specially.

/* Comments like these are also supported. */

Read more about comments in Dart, including how the documentation tooling works.

Imports

To access APIs defined in other libraries, use import.

// Importing core libraries
import 'dart:math';

// Importing libraries from external packages
import 'package:test/test.dart';

// Importing files
import 'path/to/my_other_file.dart';

Read more about libraries and visibility in Dart, including library prefixes, show and hide, and lazy loading through the deferred keyword.

Classes

Here’s an example of a class with three properties, two constructors, and a method. One of the properties can’t be set directly, so it’s defined using a getter method (instead of a variable).

class Spacecraft {
  String name;
  DateTime? launchDate;

  // Read-only non-final property
  int? get launchYear => launchDate?.year;

  // Constructor, with syntactic sugar for assignment to members.
  Spacecraft(this.name, this.launchDate) {
    // Initialization code goes here.
  }

  // Named constructor that forwards to the default one.
  Spacecraft.unlaunched(String name) : this(name, null);

  // Method.
  void describe() {
    print('Spacecraft: $name');
    // Type promotion doesn't work on getters.
    var launchDate = this.launchDate;
    if (launchDate != null) {
      int years = DateTime.now().difference(launchDate).inDays ~/ 365;
      print('Launched: $launchYear ($years years ago)');
    } else {
      print('Unlaunched');
    }
  }
}

You might use the Spacecraft class like this:

var voyager = Spacecraft('Voyager I', DateTime(1977, 9, 5));
voyager.describe();

var voyager3 = Spacecraft.unlaunched('Voyager III');
voyager3.describe();

Read more about classes in Dart, including initializer lists, optional new and const, redirecting constructors, factory constructors, getters, setters, and much more.

Enums

Enums are a way of enumerating a predefined set of values or instances in a way which ensures that there cannot be any other instances of that type.

Here is an example of a simple enum that defines a simple list of predefined planet types:

enum PlanetType { terrestrial, gas, ice }

Here is an example of an enhanced enum declaration of a class describing planets, with a defined set of constant instances, namely the planets of our own solar system.

/// Enum that enumerates the different planets in our solar system
/// and some of their properties.
enum Planet {
  mercury(planetType: PlanetType.terrestrial, moons: 0, hasRings: false),
  venus(planetType: PlanetType.terrestrial, moons: 0, hasRings: false),
  // ···
  uranus(planetType: PlanetType.ice, moons: 27, hasRings: true),
  neptune(planetType: PlanetType.ice, moons: 14, hasRings: true);

  /// A constant generating constructor
  const Planet(
      {required this.planetType, required this.moons, required this.hasRings});

  /// All instance variables are final
  final PlanetType planetType;
  final int moons;
  final bool hasRings;

  /// Enhanced enums support getters and other methods
  bool get isGiant =>
      planetType == PlanetType.gas || planetType == PlanetType.ice;
}

You might use the Planet enum like this:

final yourPlanet = Planet.earth;

if (!yourPlanet.isGiant) {
  print('Your planet is not a "giant planet".');
}

Read more about enums in Dart, including enhanced enum requirements, automatically introduced properties, accessing enumerated value names, switch statement support, and much more.

Inheritance

Dart has single inheritance.

class Orbiter extends Spacecraft {
  double altitude;

  Orbiter(super.name, DateTime super.launchDate, this.altitude);
}

Read more about extending classes, the optional @override annotation, and more.

Mixins

Mixins are a way of reusing code in multiple class hierarchies. The following is a mixin declaration:

mixin Piloted {
  int astronauts = 1;

  void describeCrew() {
    print('Number of astronauts: $astronauts');
  }
}

To add a mixin’s capabilities to a class, just extend the class with the mixin.

class PilotedCraft extends Spacecraft with Piloted {
  // ···
}

PilotedCraft now has the astronauts field as well as the describeCrew() method.

Read more about mixins.

Interfaces and abstract classes

Dart has no interface keyword. Instead, all classes implicitly define an interface. Therefore, you can implement any class.

class MockSpaceship implements Spacecraft {
  // ···
}

Read more about implicit interfaces.

You can create an abstract class to be extended (or implemented) by a concrete class. Abstract classes can contain abstract methods (with empty bodies).

abstract class Describable {
  void describe();

  void describeWithEmphasis() {
    print('=========');
    describe();
    print('=========');
  }
}

Any class extending Describable has the describeWithEmphasis() method, which calls the extender’s implementation of describe().

Read more about abstract classes and methods.

Async

Avoid callback hell and make your code much more readable by using async and await.

const oneSecond = Duration(seconds: 1);
// ···
Future<void> printWithDelay(String message) async {
  await Future.delayed(oneSecond);
  print(message);
}

The method above is equivalent to:

Future<void> printWithDelay(String message) {
  return Future.delayed(oneSecond).then((_) {
    print(message);
  });
}

As the next example shows, async and await help make asynchronous code easy to read.

Future<void> createDescriptions(Iterable<String> objects) async {
  for (final object in objects) {
    try {
      var file = File('$object.txt');
      if (await file.exists()) {
        var modified = await file.lastModified();
        print(
            'File for $object already exists. It was modified on $modified.');
        continue;
      }
      await file.create();
      await file.writeAsString('Start describing $object in this file.');
    } on IOException catch (e) {
      print('Cannot create description for $object: $e');
    }
  }
}

You can also use async*, which gives you a nice, readable way to build streams.

Stream<String> report(Spacecraft craft, Iterable<String> objects) async* {
  for (final object in objects) {
    await Future.delayed(oneSecond);
    yield '${craft.name} flies by $object';
  }
}

Read more about asynchrony support, including async functions, FutureStream, and the asynchronous loop (await for).

Exceptions

To raise an exception, use throw:

if (astronauts == 0) {
  throw StateError('No astronauts.');
}

To catch an exception, use a try statement with on or catch (or both):

try {
  for (final object in flybyObjects) {
    var description = await File('$object.txt').readAsString();
    print(description);
  }
} on IOException catch (e) {
  print('Could not describe object: $e');
} finally {
  flybyObjects.clear();
}

Note that the code above is asynchronous; try works for both synchronous code and code in an async function.

Read more about exceptions, including stack traces, rethrow, and the difference between Error and Exception.

Other topics

Many more code samples are in the language tour and the library tour. Also see the Dart API reference, which often contains examples.

Learn more

Articles

Resources

Websites

Flutter | Working with the Flutter Command Line

Introduction

Flutter Command Line

To show all commands, just run flutter

❯ flutter
Manage your Flutter app development.

Common commands:
  flutter create <output directory>
    Create a new Flutter project in the specified directory.

  flutter run [options]
    Run your Flutter application on an attached device or in an emulator.

Usage: flutter <command> [arguments]

Global options:
-h, --help                  Print this usage information.
-v, --verbose               Noisy logging, including all shell commands executed.
                            If used with "--help", shows hidden options. If used with "flutter doctor", shows additional diagnostic information. (Use "-vv" to force verbose logging in those cases.)
-d, --device-id             Target device id or name (prefixes allowed).
    --version               Reports the version of this tool.
    --suppress-analytics    Suppress analytics reporting when this command runs.

Available commands:

Flutter SDK
  bash-completion   Output command line shell completion setup scripts.
  channel           List or switch Flutter channels.
  config            Configure Flutter settings.
  doctor            Show information about the installed tooling.
  downgrade         Downgrade Flutter to the last active version for the current channel.
  precache          Populate the Flutter tool's cache of binary artifacts.
  upgrade           Upgrade your copy of Flutter.

Project
  analyze           Analyze the project's Dart code.
  assemble          Assemble and build Flutter resources.
  build             Build an executable app or install bundle.
  clean             Delete the build/ and .dart_tool/ directories.
  create            Create a new Flutter project.
  drive             Run integration tests for the project on an attached device or emulator.
  format            Format one or more Dart files.
  gen-l10n          Generate localizations for the current project.
  pub               Commands for managing Flutter packages.
  run               Run your Flutter app on an attached device.
  test              Run Flutter unit tests for the current project.

Tools & Devices
  attach            Attach to a running app.
  custom-devices    List, reset, add and delete custom devices.
  devices           List all connected devices.
  emulators         List, launch and create emulators.
  install           Install a Flutter app on an attached device.
  logs              Show log output for running Flutter apps.
  screenshot        Take a screenshot from a connected device.
  symbolize         Symbolize a stack trace from an AOT-compiled Flutter app.

Run "flutter help <command>" for more information about a command.
Run "flutter help -v" for verbose help output, including less commonly used options.
Angular I18N

Angular | Working with I18N

In this post, you will learn how to get started with Angular I18n using ngx-translate, the internationalization (i18n) library for Angular. We will cover the following topics:

  • setup new angular app
  • install required dependencies
  • add bootstrap as ui framework
  • create app with demo page and translation services

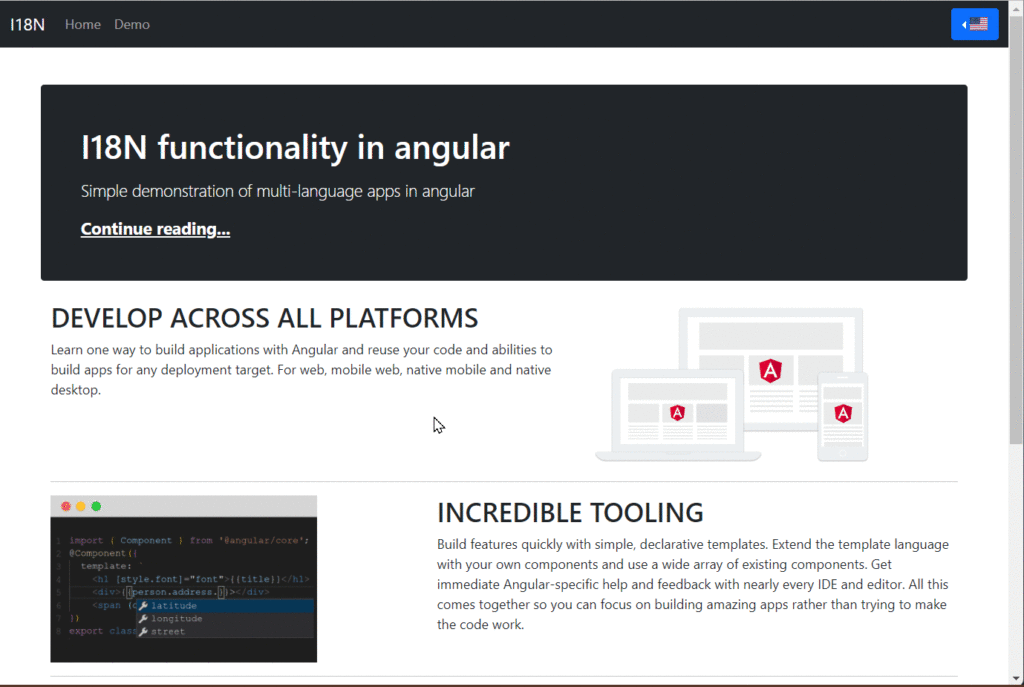
This will be the final result (click to show video). Source code for this post is on GitHub.

Setup new Angular app

➜ ng new app
➜ cd app

Add required modules

➜ npm install @ngx-translate/core @ngx-translate/http-loader rxjs --save

Add Bootstrap as UI framework

We need the libraries for Bootstrap and flag icons. Download the required files into your asset/vendor/bootstrap/5.3.1 folder:

Flags Icons need a CSS file with the corresponding images for the flags, so we use the archive from GitHub.

Download and extract the archive into the folder assets/vendor/flag-icons

Current folder structure

This is our current folder structure:

Setup Application

We choose the following structure for the HTML architecture.

  • index.html contains the required css and js files.
    Also, the <app-root> component, which loads our app
  • app.component.html contains the main structure of every page.
    This includes header, navigation, place for main content and footer
  • The main content is inserted via the <router-outlet>

index.html

We will add the corresponding file in the main index.html in our project.

<!doctype html>
<html lang="en" class="h-100">

<head>
  <meta charset="utf-8">
  <title>I18N</title>
  <base href="/">
  <meta name="viewport" content="width=device-width, initial-scale=1">
  <link rel="icon" type="image/x-icon" href="favicon.ico">

  <link rel="stylesheet" href="/assets/vendor/bootstrap.min.css">
  <link rel="stylesheet" href="/assets/vendor/flag-icons.min.css">

  <link rel="stylesheet" href="/assets/vendor/bootstrap/5.1.3/css/bootstrap.min.css">
  <link rel="stylesheet" href="/assets/vendor/flag-icons/css/flag-icons.min.css">

  <link rel="stylesheet" href="/assets/css/default.css">

</head>

<body class="d-flex flex-column h-100">
  <app-root class="h-100"></app-root>

  <script src="assets/vendor/bootstrap/5.1.3/js/bootstrap.bundle.min.js"></script>
</body>

</html>

app.component.html

We borrow the main structure from the bootstrap example ‘Sticky Footer with Navbar‘ with some changes in the navigation bar.

<header>
    <nav class="navbar navbar-expand-md navbar-dark fixed-top bg-primary">
        <div class="container-fluid">
            <a class="navbar-brand" href="#">
                <img src="assets/img/logo-angular.png" height="40px" width="auto">
            </a>
            <button class="navbar-toggler" type="button" data-bs-toggle="collapse" 
                data-bs-target="#navbarCollapse"
                aria-controls="navbarCollapse" 
                aria-expanded="false"     
                aria-label="Toggle navigation">
                <span class="navbar-toggler-icon"></span>
            </button>
            <div class="collapse navbar-collapse" id="navbarCollapse">
                <ul class="navbar-nav me-auto mb-2 mb-md-0">
                    <li class="nav-item">
                        <a class="nav-link active" aria-current="page" href="#">Home</a>
                    </li>
                </ul>

                <div class="btn-group dropstart">
                    <button class="btn btn-primary dropdown-toggle" type="button" 
                        id="dropdownFlags"
                        data-bs-toggle="dropdown" aria-expanded="false">
                        <span class="flag-icon flag-icon-{{currentlang}}"></span>
                    </button>
                    <ul class="dropdown-menu">
                        <li *ngFor="let lang of languages" [value]="lang" 
                            (click)="useLanguage(lang)">
                            <a class="dropdown-item"
                                [ngClass]="{'active': currentlang == lang}">
                                <span class="flag-icon flag-icon-{{lang}}"></span>
                                &nbsp;
                                {{lang | uppercase}}
                            </a>
                        </li>
                    </ul>
                </div>
            </div>
        </div>
    </nav>
</header>
<main class="flex-shrink-0">
    <div class="container">
        <router-outlet></router-outlet>
    </div>
</main>
<footer class="footer mt-auto py-3 bg-dark">
    <div class="container">
        <span class="text-muted">(C) Ralph Göstenmeier</span>
    </div>
</footer>

app.component.ts

import { Component } from '@angular/core';
import { TranslateService } from '@ngx-translate/core';

import defaultLanguage from '../assets/i18n/de.json';

@Component({
    selector: 'app-root',
    templateUrl: './app.component.html',
    styleUrls: ['./app.component.scss'],
})
export class AppComponent {
    title = 'I18N';

    languages = ['us', 'de', 'fr', 'sp'];
    currentlang = 'us';

    constructor(private translate: TranslateService) {
        this.currentlang = 'de';
        translate.setTranslation(this.currentlang, defaultLanguage);
        translate.setDefaultLang(this.currentlang);
    }

    ngOnInit(): void {}

    useLanguage(language: string): void {
        this.currentlang = language;
        this.translate.use(language.toLowerCase());
    }
}

app.module.ts

import { NgModule } from '@angular/core';
import { BrowserModule } from '@angular/platform-browser';
import { HttpClient, HttpClientModule } from '@angular/common/http';

import { AppRoutingModule } from './app-routing.module';
import { AppComponent } from './app.component';

import { TranslateLoader, TranslateModule } from '@ngx-translate/core';
import { TranslateHttpLoader } from '@ngx-translate/http-loader';

import { HomePageComponent } from './pages/home/component';
import { DemoPageComponent } from './pages/demo/component';

@NgModule({
    declarations: [AppComponent, HomePageComponent, DemoPageComponent],
    imports: [
        BrowserModule,
        AppRoutingModule,
        HttpClientModule,
        TranslateModule.forRoot({
            loader: {
                provide: TranslateLoader,
                useFactory: HttpLoaderFactory,
                deps: [HttpClient],
            },
        }),
    ],
    providers: [],
    bootstrap: [AppComponent],
})
export class AppModule {}

// required for AOT compilation
export function HttpLoaderFactory(http: HttpClient): TranslateHttpLoader {
    return new TranslateHttpLoader(http);
}

How the app works

The translation is done with the ngx-translate component.

Translation works with different JSON files (for each language a separate file), containing the required translation for each text to be displayed. Each text is addressed with a name within the JSON file.

So, the base structure of each JSON file is the following:

Translation files

assets/i18n/de.json

{
  "i18n-demo-header": "I18N Demo",
  "header": "I18N Funktionalität in Angular"
}

assets/i18n/us.json

{
  "i18n-demo-header": "I18N Example",
  "header": "I18N Functionality in Angular"
}

These translations could be used in a html file by using the translate pipe:

<h1>{{'header' | translate }}</h1>

More information and examples are here.

Changing the language is done with the help of the TranslateService

Inject your app with the TranslateService (in app.component.ts)

constructor(private translate: TranslateService) {
    translate.setDefaultLang('de');
}

Change Language

useLanguage(language: string): void {
    this.translate.use(language.toLowerCase());
}

Integrate in our UI

To easy switching the language, we have to do a few steps

Add a dropdown menu to our navigation bar.

And switching the language is done by calling useLanguage within each menu item:

<div class="btn-group dropstart">
    <button class="btn btn-primary dropdown-toggle" type="button"
        id="dropdownFlags"
        data-bs-toggle="dropdown" aria-expanded="false"><span
        class="flag-icon flag-icon-{{currentlang}}"></span>
    </button>
    <ul class="dropdown-menu">
        <li *ngFor="let lang of languages" [value]="lang"
            (click)="useLanguage(lang)">
            <a class="dropdown-item" 
                [ngClass]="{'active': currentlang == lang}">
                <span class="flag-icon flag-icon-{{lang}}"></span>
                &nbsp;
                {{lang | uppercase}}
            </a>
        </li>
    </ul>
</div>

Setup a list for all menu items:

<ul class="dropdown-menu">
<li *ngFor="let lang of languages" [value]="lang" (click)="useLanguage(lang)">

Ionic | Working with jsPDF

Introduction

The javascript library jsPDF, is a Client-side JavaScript PDF generation for everyone.

With a npm-Module, you can integrate this functionality into your Ionic App.

This Git Repository with the code for this blog is here.

Preparation

Create your empty app

❯ mkdir Ionic_Working-with_jsPDF
❯ cd Ionic_Working-with_jsPDF
❯ ionic start app sidemenu  --type angular
√ Preparing directory .app in 2.63ms
√ Downloading and extracting sidemenu starter in 665.67ms
? Integrate your new app with Capacitor to target native iOS and Android? No
❯ cd app

Install npm Module

❯ npm install        jspdf
❯ npm install @types/jspdf

oder

❯ yarn add        jspdf
❯ yarn add @types/jspdf

Start Editor and serve your app

❯ vscode .
❯ ionic serve

Add new Page for PDF functionality

Create new Page

❯ ionic generate page pages/PDF

Add page to sidemenu

Edit app.components.ts

public appPages = [
	{	title: 'PDF',	url: '/pdf',		icon: print'	},
	{	title: 'Inbox',	url: '/folder/Inbox',	icon: 'mail',	},

Add jsPDF functionality

Add jspfs reference to pages/pdf/pdf.page.ts

import { jsPDF } from 'jspdf';

Create a function for converting to PDF

public downloadPDF() {
	var data = document.getElementById('printcontent') as HTMLElement;

	let pdf = new jsPDF('p', 'mm', 'a4');

	pdf.html(data, {
		callback: (pdf) => {pdf.output('dataurlnewwindow');}
	});
}

Add download button

Change pages/pdf/pdfhtml

<div>
	<input type="button" value="Convert" (click)="downloadPDF()" />
</div>

Summary

A lot more examples could be found in my repository. Just create a starter app with this template and begin to play