Developer Blog

Tipps und Tricks für Entwickler und IT-Interessierte

Ionic | Working with jsPDF

Introduction

The javascript library jsPDF, is a Client-side JavaScript PDF generation for everyone.

With a npm-Module, you can integrate this functionality into your Ionic App.

This Git Repository with the code for this blog is here.

Preparation

Create your empty app

❯ mkdir Ionic_Working-with_jsPDF
❯ cd Ionic_Working-with_jsPDF
❯ ionic start app sidemenu  --type angular
√ Preparing directory .app in 2.63ms
√ Downloading and extracting sidemenu starter in 665.67ms
? Integrate your new app with Capacitor to target native iOS and Android? No
❯ cd app

Install npm Module

❯ npm install        jspdf
❯ npm install @types/jspdf

oder

❯ yarn add        jspdf
❯ yarn add @types/jspdf

Start Editor and serve your app

❯ vscode .
❯ ionic serve

Add new Page for PDF functionality

Create new Page

❯ ionic generate page pages/PDF

Add page to sidemenu

Edit app.components.ts

public appPages = [
	{	title: 'PDF',	url: '/pdf',		icon: print'	},
	{	title: 'Inbox',	url: '/folder/Inbox',	icon: 'mail',	},

Add jsPDF functionality

Add jspfs reference to pages/pdf/pdf.page.ts

import { jsPDF } from 'jspdf';

Create a function for converting to PDF

public downloadPDF() {
	var data = document.getElementById('printcontent') as HTMLElement;

	let pdf = new jsPDF('p', 'mm', 'a4');

	pdf.html(data, {
		callback: (pdf) => {pdf.output('dataurlnewwindow');}
	});
}

Add download button

Change pages/pdf/pdfhtml

<div>
	<input type="button" value="Convert" (click)="downloadPDF()" />
</div>

Summary

A lot more examples could be found in my repository. Just create a starter app with this template and begin to play

Django | Cookbook

Installation

Install current Version (3.2.8)

❯ pip install django==3.2.8

Install next Version (4.0)

❯ pip install --pre django

Check installed version

❯ python -m django --version
❯ django-admin.exe version

First steps

The following steps are based on a summary of the Django Tutorial

Create project

django-admin startproject main
cd working_with_django
python manage.py migrate
python manage.py runserver 8080
python manage.py startapp app_base

Create view

Create view in app_base/views.py

from django.http import HttpResponse

def index(request):
    return HttpResponse("Hello, world. You're at the polls index.")

Add view to app_base/urls.py

from django.urls import path
from . import views

urlpatterns = [
    path('', views.index, name='index'),
]

Add urls to project main/urls.py

from django.contrib import admin
from django.urls import include, path

urlpatterns = [
    path('admin/', admin.site.urls),
    path('app_base/', include('app_base.urls')),
]

Create admin user

$ python manage.py createsuperuser
Username (leave blank to use 'user'): admin
Email address: admin@localhost
Password: 
Password (again): 
Superuser created successfully.

Create data and database

Create database model in app_base/models.py

from django.db import models

class Question(models.Model):
    question_text = models.CharField(max_length=200)
    pub_date = models.DateTimeField('date published')

class Choice(models.Model):
    question = models.ForeignKey(Question, on_delete=models.CASCADE)
    choice_text = models.CharField(max_length=200)
    votes = models.IntegerField(default=0)

Activating models in main/settings.py

INSTALLED_APPS = [
    'app_base.apps.AppBaseConfig',

    'django.contrib.admin',
    'django.contrib.auth',
    'django.contrib.contenttypes',
    'django.contrib.sessions',
    'django.contrib.messages',
    'django.contrib.staticfiles',
]
$ python manage.py makemigrations app_base
$ python manage.py sqlmigrate app_base 0001

Make app modifiable in the admin (app_base/admin.py)

from django.contrib import admin
from .models import Question

admin.site.register(Question)

Writing more views

Create views in app_base/views.py

def detail(request, question_id):
    return HttpResponse("You're looking at question

def results(request, question_id):
    response = "You're looking at the results of question
    return HttpResponse(response

def vote(request, question_id):
    return HttpResponse("You're voting on question

Add new views into app_base/urls.py

from django.urls import path
from . import views

urlpatterns = [
    path('', views.index, name='index'),

    path('<int:question_id>/', views.detail, name='detail'),
    path('<int:question_id>/results/', views.results, name='results'),
    path('<int:question_id>/vote/', views.vote, name='vote'),
]

Add template in app_base/templates/polls/index.html

    <ul>
    
        <li><a href="/polls/{{ question.id }}/">{{ question.question_text }}</a></li>
    
    </ul>

    <p>No polls are available.</p>


Modify view in app_base/views.py

from django.shortcuts import render
...
def index(request):
    latest_question_list = Question.objects.order_by('-pub_date')[:5]
    context = {'latest_question_list': latest_question_list}
    return render(request, 'polls/index.html', context)

Raising a 404 error in app_base/views.py

from django.http import HttpResponse
from django.shortcuts import render, get_object_or_404

from .models import Question
# ...
def detail(request, question_id):
    question = get_object_or_404(Question, pk=question_id)
    return render(request, 'polls/detail.html', {'question': question})

Create template app_base/templates/polls/detail.html

<h1>{{ question.question_text }}</h1>
<ul>

    <li>{{ choice.choice_text }}</li>

</ul>

Removing hardcoded URLs in app_base/templates/polls/index.html

<li>
   <a href="
</li>

The way this works is by looking up the URL definition as specified in the app_base/urs.py

...
# the 'name' value as called by the 
path('<int:question_id>/', views.detail, name='detail'),
...

Namespacing URL names in app_base/urls.py

app_name = 'app_base'

urlpatterns = [
...

Then, modify link in app_base/templates/polls/index.html

from url ‘detail’ to url ‘app_base:detail’

<li>
    <a href="
</li>

Use generic views: Less code is better

Create class in app_views/views.py

class HomeView(generic.TemplateView):
    template_name = 'index.html'

Create template app_views/templates/index.html

<h1>App Views:</h1>
Welcome

Modify app_views/urls.py

urlpatterns = [
    path('', views.HomeView.as_view(), name='home'),
]

Add another app to main project

Create app

$ python manage.py startapp app_view

Modify main/urls.py

urlpatterns = [
    path('admin/',     admin.site.urls),
    path('app_base/',  include('app_base.urls')),
    path('app_views/', include('app_views.urls')),
]

Add data model in app_views/models.py

from django.db import models

class DataItem(models.Model):
    text = models.CharField(max_length=200)
    data = models.IntegerField(default=0)

    def __str__(self):
        return self.text

Register data in app_views/admin.py

from django.contrib import admin
from .models import DataItem

admin.site.register(DataItem)

Activate models

$ python manage.py makemigrations app_views
$ python manage.py sqlmigrate app_views 0001
$ python manage.py migrate app_views

Navigation / Redirection

Set root page of Django project

When accessing your Django project, the root page will normaly doesn’n show your app homepage.

To change this, you hate to modiy the url handling.

In the following sample, replace <appname> with the name of your app

Define a redirection view in your app (/<appname>/urls.py)

def redirect_to_home(request):
    return redirect('/<appname>')

Define path in the global urls.py (/main/urls.py)

from django.contrib import admin
from django.urls import include, path
from django.shortcuts import redirect

from <appname> import views

urlpatterns = [
    path('',            views.redirect_to_home, name='home'),
    path('<appname>/',  include('<appname>.urls')),
    path('admin/',      admin.site.urls)
]

Highlight current page in navigation menu

<div class="list-group">
    <a href="
            Basic Upload
    </a>
    <a href="
            Progress Bar Upload
    </a>
</div>

Using PostgresSQL Database

Install PostgresSQL

Create Superuser

createuser.exe --interactive --pwprompt

Logging

Additional reading

Tutorials

Testing

Blogs and Posts

Resolving problems

Wrong template is used

The template system is using a search approach to find the specified template file, e.g. ‘home.html’.

If you created more than one apps with the same filenames for templates, the first one will be used.

Change the template folders and add the app name, e.g.

template/
        app_base/
                home.html

Resolving error messages and erors

‘app_name’ is not a registered namespace

One reason for this error is the usage of a namespace in a link.

Back to <a href="


If you want to use this way of links, you have to define the namespace/appname in your <app>/urls.py file

app_name = 'app_views'
urlpatterns = [
    path('', views.HomeView.as_view(), name='home'),
]

dependencies reference nonexistent parent node

  • Recreate database and migration files
  • Remove all migration files under */migrations/00*.py
  • Remove all pycache folders under */__pycache__ and */*/__pycache__
  • Run migration again
$ python manage.py makemigrations
$ python manage migrate

ValueError: Dependency on app with no migrations: customuser

$ python manage.py makemigrations

Project Structure

Running tasks with Makefile

PREFIX_PKG := app

default:
	grep -E ':\s+#' Makefile

clearcache:	# Clear Cache
	python3 manage.py clearcache

run:		# Run Server
	python3 manage.py runserver 8000

deploy:		# Deploy
	rm -rf dist $(PREFIX_PKG)*
	rm -rf polls.dist
	cd polls && python3 setup.py sdist
	mkdir polls.dist && mv polls/dist/* polls/$(PREFIX_PKG)* polls.dist

install_bootstrap:	# Install Bootstrap Library
	cd .. && yarn add bootstrap
	rm -rf  polls/static/bootstrap
	mkdir   polls/static/bootstrap
	cp -R ../node_modules/bootstrap/dist/* polls/static/bootstrap

install_jquery:		# Install jQuery Library
	cd .. && yarn add jquery
	rm -rf polls/static/jquery
	mkdir  polls/static/jquery
	cp ../node_modules/jquery/dist/* polls/static/jquery

install_bootstrap_from_source:	# Install Bootstrap from Source
	mkdir -p install && \
	wget https://github.com/twbs/bootstrap/releases/download/v4.1.3/bootstrap-4.1.3-dist.zip -O install/bootstrap-4.1.3-dist.zip && \
	unzip install/bootstrap-4.1.3-dist.zip -d polls/static/bootstrap/4.1.3

Angular | Getting Started with matter.js

Matter.js is a 2D rigid body physics engine for the web written in JavaScript.

Creating an angular app with pages using matter.js is easy. Complete code is here.

For a more details post, please take a look at here: Angular | Working with matter.js

Create starter app

First, create a default angular app with ng new.

❯ ng new app-starter
? Do you want to enforce stricter type checking and stricter bundle budgets in the workspace?
  This setting helps improve maintainability and catch bugs ahead of time.
  For more information, see https://angular.io/strict Yes
? Would you like to add Angular routing? Yes
? Which stylesheet format would you like to use? SCSS
cd app-starter

Add matter.js

Matter.js is a javascript library, so we have to add the corresponding files to our angular app. We will use the npm module matter-js.

npm install matter-js

We also add the type definitions, so that Visual Studio code knows how to check our code.

npm install @types/matter-js --save-dev 

Clear content of app.component.html

To keep out demopage clean, we will remove unnecessary code from app.component.html.

Remove all of the content and just keep the last line

<router-outlet></router-outlet>

Create pager for MatterJS democode

We will use a seperate Angular component/page for our matter.js demo

 ng generate component pages/Demo

app-routing.module.ts

Next, we add a routing for our demopage.

import { NgModule } from '@angular/core';
import { Routes, RouterModule } from '@angular/router';
import { DemoComponent } from './pages/demo/demo.component';

const routes: Routes = [
  { path: 'demo', component: DemoComponent },
  { path: '',   redirectTo: '/demo', pathMatch: 'full' },
  { path: '**', redirectTo: '/demo', pathMatch: 'full' },
];

@NgModule({
  imports: [RouterModule.forRoot(routes)],
  exports: [RouterModule],
})
export class AppRoutingModule {}

Start App

Ready to take a first look at our app.

yarn start

demo.component.scss

Now, we do a little styling

.demo {
    background-color: lightgray;
    border: 4 dotted black;
}

demo.component.ts

And finally the matter.js code. Starting with the default imports for a angular app

import { Component, OnInit } from '@angular/core'

Next, we import the required matter.js parts

import { Engine, Runner, Render, World, Constraint, MouseConstraint, Bodies} from 'matter-js'

Following the definition for our DemoComponent

@Component({
	selector: 'app-minimal',
	templateUrl: './demo.component.html',
	styleUrls: ['./demo.component.scss'],
})
export class DemoComponent implements OnInit {
	constructor() {}

	ngOnInit() {
		this.demo()
	}

	demo() {
	}
}

The main code of out demo will be in the function demo()

	demo() {
		var engine = Engine.create()
		var render = Render.create({
			element: document.body,
			engine: engine,
			options: {
				width: 800,
				height: 400,
				wireframes: false,
			},
		})

		var boxA = Bodies.rectangle(400, 200, 80, 80)
		var ballA = Bodies.circle(380, 100, 40, {})
		var ballB = Bodies.circle(460, 10, 40, {})
		var ground = Bodies.rectangle(400, 380, 810, 60, {
			isStatic: true,
		})

		World.add(engine.world, [boxA, ballA, ballB, ground])

		Engine.run(engine)
		Render.run(render)
	}
}

ReactJS | Cookbook

General Readings

Create App

Run the following commands to create a new React Native project called “app-getting-started”:

npx create-react-app  app-getting-started
cd app-getting-started

Start App

npm start

Add Typescript Support

yarn create react-app app-getting-started-with-typescript --folder-name
cd app-getting-started-with-typescript
yarn add typescript @types/node @types/react @types/react-dom @types/jest

Testing: Tools and Frameworks

ReactJS related

  • React Testing Utilities – Home
  • Jest – Delightful JavaScript Testing Framework with a focus on simplicity – Home
  • Jasmine – Home | Github
  • Enzyme – Home | Github

Others

ReactJS | Getting Started

Readings

Learning Path

  • Fundamentals Props and State
    • Create React App
    • JSX
    • Function Components
    • Class Components
    • useState and useEffect Hooks
    • setState and Component Lifecycle Methods
    • Conditional Rendering
    • Lists and Keys
    • Building Simple Forms
  • Advanced Topics
    • Hooks
      • useContext
      • useReducer
      • useRef
      • useMemo
      • useCallback
      • Custom Hooks
    • Context
    • Higher Order Components
    • Render Props
    • Refs
    • Error Boundaries
    • Portals
    • HTTP Requests
      • GET
      • POST
  • Ecosystem
    • State Management
      • Redux/ Mobx
      • Apollo Client
    • Routing
      • React Router
    • Styling
      • Styled Components/ Emotion
      • Tailwind CSS
      • Chakra UI / Material UI / Ant Design
    • Forms
      • Formik
      • React Hook Form
    • Testing
      • Jest + React Testing Library
      • Cypress
    • Misc
      • TypeScript
      • React i18Next
      • Storybook
      • Firebase
      • Practical React Libraries
    • Next Steps
      • Gatsby
      • Next.js
      • React Native

Topics

  • Create React App
  • Functional Components
  • Class Components
  • JSX
  • Props And State
  • useState and useEffect Hooks
  • setState and Component Lifecycle Methods
  • Conditional Rendering
  • Lists and Keys
  • Building Simple Forms

Get Started

Create App

Run the following commands to create a new React Native project called “app-getting-started”:

npx create-react-app  app-getting-started
cd app-getting-started

Start App

npm start

React Native | Getting Started

General Readings

Create App

Expo CLI Quickstart

Assuming that you have Node 12 LTS or greater installed, you can use npm to install the Expo CLI command line utility:

npm install -g expo-cli

Then run the following commands to create a new React Native project called “GettingStarted”:

expo init app-getting-started
cd app-getting-started
npm start # you can also use: expo start

React Native CLI Quickstart

npx react-native init app-getting-started

or create new project based on a template

npx react-native init app-getting-started--template react-native-template-typescript

Start App

Step 1: Start Metro

First, you will need to start Metro (Docs), the JavaScript bundler that ships with React Native. Metro “takes in an entry file and various options, and returns a single JavaScript file that includes all your code and its dependencies.”

npx react-native start

Then, visit the Website or the Metro Page (http://localhost:8081/)

Step 2: Start your application

Let Metro Bundler run in its own terminal. Open a new terminal inside your React Native project folder. Run the following:

# For running app on iOS
npx react-native run-ios

# For running app on Android
npx react-native run-android

NestJS | Getting started – Part 1

Introduction

NestJS (just Nest from here on out), is a Node framework meant to build server-side applications. Not only is it a framework, but it is also a platform to meet many backend application needs, like writing APIs, building microservices, or doing real-time communications through web sockets.

Nest is also heavily influenced by Angular, and you will immediately find its concepts familiar. The creators of Nest strived to make the learning curve as small as possible, while still taking advantage of many higher level concepts such as modules, controllers, and dependency injection.

Installation

Install NodeJS

Download NodeJS from here and install as described here.

For example, on macOS using Homebrew

brew install node

Or download the package

curl "https://nodejs.org/dist/latest/node-${VERSION:-$(wget -qO- https://nodejs.org/dist/latest/ | sed -nE 's|.*>node-(.*)\.pkg</a>.*|\1|p')}.pkg" > "$HOME/Downloads/node-latest.pkg" && sudo installer -store -pkg "$HOME/Downloads/node-latest.pkg" -target "/"

Install NextJS

npm i -g @nestjs/cli

Create server App

Create new server App

nest new demo.server

Start server App

cd demo.server
npm run start:dev

Now open browser on http: localhost:3000

App Structure

main.ts

import { NestFactory } from '@nestjs/core';
import { AppModule } from './app.module';

async function bootstrap() {
  const app = await NestFactory.create(AppModule);
  await app.listen(3000);
}
bootstrap();

app.module.ts

import { Module } from '@nestjs/common';
import { AppController } from './app.controller';
import { AppService } from './app.service';

@Module({
  imports: [],
  controllers: [AppController],
  providers: [AppService],
})
export class AppModule {}

app.controller.ts

import { Controller, Get } from '@nestjs/common';
import { AppService } from './app.service';

@Controller()
export class AppController {
  constructor(private readonly appService: AppService) {}

  @Get()
  getHello(): string {
    return this.appService.getHello();
  }
}

app.service.ts

import { Injectable } from '@nestjs/common';

@Injectable()
export class AppService {
  getHello(): string {
    return 'Hello World!';
  }
}

Add Functionality

Create service and controller

nest g service missions
nest g controller missions

Modify mission service

@Injectable()
export class MissionsService {
  missions: Mission[] = [
    { id: 1, title: 'Rescue cat stuck in asteroid', reward: 500, active: true, },
    { id: 2, title: 'Escort Royal Fleet', reward: 5000, active: true, },
    { id: 3, title: 'Pirates attacking the station', reward: 2500, active: false, },
  ];

  async getMissions(): Promise<Mission[]> {
    return this.missions;
  }
}

Modify mission controller

@Controller('missions')
export class MissionsController {
  constructor(private missionsService: MissionsService) {}

  @Get()
  getMissions() {
    return this.missionsService.getMissions();
  }
}

Open in browser: http://localhost:3000

Create Frontend App

Create new frontend App

ionic start demo.frontend sidemenu

Working with Database and TypeORM

Create / Sync database with schema

Add command to package.json

"scripts": {
    "typeorm": "ts-node -r tsconfig-paths/register ./node_modules/typeorm/cli.js"
}
npm run typeorm schema:sync

TypeORM Commands

schema:sync         
Synchronizes your entities with database schema. It runs schema update queries on all connections you have. To run update queries on a concrete connection use -c option.
schema:log          
Shows sql to be executed by schema:sync command. It shows sql log only for your default connection. To run update queries on a concrete connection use -c option.
schema:drop         
Drops all tables in the database on your default connection. To drop table of a concrete connection's database use -c option.
query               
Executes given SQL query on a default connection. Specify connection name to run query on a specific connection.
entity:create       
Generates a new entity.
subscriber:create   
Generates a new subscriber.
migration:create    
Creates a new migration file. [Aliase: migrations:create]
migration:generate  Generates a new migration file with sql needs to be executed to update schema. [Aliase: migrations:generate]
migration:run       
Runs all pending migrations. [Aliase: migrations:run]
migration:show      
Show all migrations and whether they have been run or not
migration:revert    
Reverts last executed migration. [Aliase: migrations:revert]
version             
Prints TypeORM version this project uses.
cache:clear         
Clears all data stored in query runner cache.
init                
Generates initial TypeORM project structure. If name specified then creates files inside directory called as name. If its not specified then creates files inside current directory.

Additional readings

Django | Build a Dashboard with Django and Bootstrap: Part 3
This is Part 3 of Building a Dashboard with Django and Bootstrap:

Introduction

If you follow the first part of this blog topic, you have a running Django dashboard.

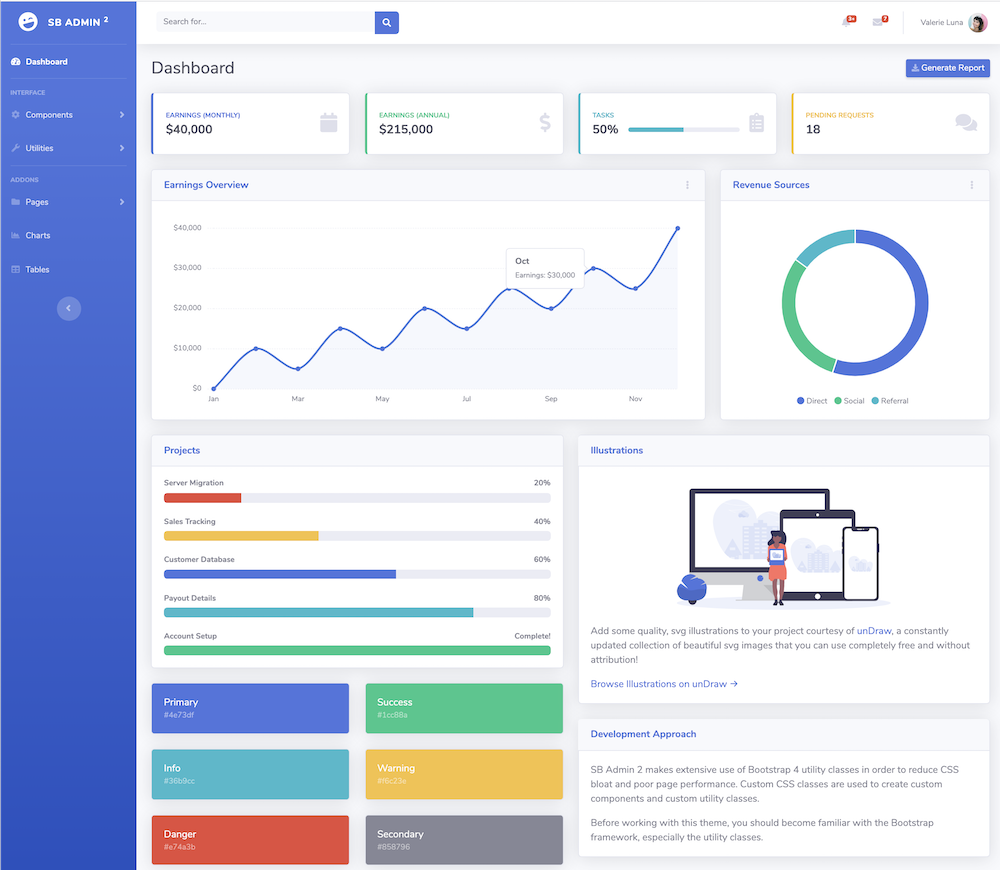
But, the content ist still static. Lets review the current state:

Prepare our Django project

Right now, the whole content of our Django project is provided by the dashboard template

dashboard/template/site/base.html

Looking at our web site, you will see the different side menu items. So, intentionally, our web site should display different pages. And each page should provide the dynamic content.

The final goal of this part is to change our web app, so that each side item navigates us to a different page. For this, we have to take care about two things:

  • Navigation: how to we get to another page in our app
  • Project Structure: where to place the required components for each page

Basics of Navigation

Navigation usually is the process of getting from one page to another by clicking on a link.

So, we need to things:

  • the source page, containing the link
  • the destination page
  • the link, pointing to the destination page

Let’s take a look into the site template with the side menu:

The corresponding code in the side template is

<div id="collapseTwo" class="collapse" aria-labelledby="headingTwo">
	<div class="bg-white py-2 collapse-inner rounded">
		<h6 class="collapse-header">Custom Components:</h6>
		<a class="collapse-item" href="buttons.html">Buttons</a>
		<a class="collapse-item" href="cards.html">Cards</a>
	</div>
</div>

This is the result:

Linking to a html page is not possible, because Django does not work with html pages. Navigation in Django works with urls (in urls.py) and views in (views.py).

We must replace the html link tag (<a href="buttons.html">) with an Django-conform code. Read here for more details and the basics.

The idea behind the navigation is

Define the needed links/buttons
Give each link a name“buttons”
Define, which view to call for this linkcomponents/buttons/views.py
Tell Django, how to insert this link in a html page<a href="

With this in mind, we change our site template for the side navigation (e. g. for the components menu):

But, if you save the template and try to view the web page, you will see this error:

We missed to tell Django, what to do when the corresponding link for this name is requested. We have to tell Django to use the view defined in buttons/views.py to generate the resulting view/page.

So, change the global url mapping file dashboard/urls.py

import dashboard.apps.components.buttons.views as ButtonsViews
import dashboard.apps.components.cards.views as CardsViews

urlpatterns = [
    path('', include('dashboard.apps.urls')),

    path('buttons', 	ButtonsViews.IndexView.as_view(),   name='buttons'),
    path('cards',       CardsViews.IndexView.as_view(),     name='cards'),

    path('admin/', admin.site.urls),
]

dashboard/apps/components/buttons/views.py

from django.shortcuts import render
from django.views import generic

class IndexView(generic.TemplateView):
    template_name = 'buttons/base.html'

dashboard/apps/components/cards/views.py

from django.shortcuts import render
from django.views import generic

class IndexView(generic.TemplateView):
    template_name = 'cards/base.html'

dashboard/apps/components/cards/templates/cards/base.html


<h1 style="text-align: center">CARDS</h1>


dashboard/apps/components/cards/templates/buttons/base.html


<h1 style="text-align: center">BUTTONS</h1>


Save everything and view at the resulting page

What happens, from showing the page, clicking on the link until you see the final result:

  • Django create the side menu item Cards
  • with the corresponding link localhost:9000/cards
  • which will be the destination page, if you click on the link
  • and finally, Django creates the desired page (through view.py)

Namespaces and structure

Now, think about the names, e. g. buttons and cards in our Components.

Your project is getting bigger and you plan to add an additional page info with general information for both Components and Utilities menu.

So, you will have to additional files, for example

  • dashboard/apps/components/info/views.py
  • dashboard/apps/utilities/info/views.py

The corresponding url mapping (urls.py) could look like this:

import dashboard.apps.components.info.views as ComponentInfoViews
import dashboard.apps.utilities.info.views as UtilitiesInfoViews

urlpatterns = [
    path('', include('dashboard.apps.urls')),

    path('info', ComponentInfoViews.IndexView.as_view(), name='info'),
    path('info', UtilitiesInfoViews.IndexView.as_view(), name='info'),

Two pages with the same name (info) in different views.py!

Of course, we could choose different names and link (component_info, utilities_info), but this not a good programming style.

We will choose a more modern way of programming

  • Spread the responsibility over separate, independent modules
  • Name these modules with different names

What does this mean? We will have

  • a separate module frontend, only responsible for the start page (frontend)
  • a separate module components, responsible for all components
  • a separate module utilities, responsible for all utilities
  • a separate module pages, responsible for all pages

Resulting folder structure and file content

File dashbard/urls.py

urlpatterns = [
    path('', include('dashboard.apps.urls')),
    path('admin/',	admin.site.urls),
]

File dashbard/apps/urls.py

from django.urls import path
from django.urls.conf import include

from dashboard.apps.frontend.views import IndexView

app_name = 'app'

urlpatterns = [
    path('', IndexView.as_view(), name='index'),
    path('pages/', include('dashboard.apps.pages.urls')),
    path('components/', include('dashboard.apps.components.urls')),
    path('utilities/', include('dashboard.apps.utilities.urls')),
]

File dashbard/apps/components/urls.py

from django.urls import path

import dashboard.apps.components.buttons.views as ButtonsViews
import dashboard.apps.components.cards.views as CardsViews

app_name = 'components'

urlpatterns = [
    path('', ButtonsViews.IndexView.as_view(), name='index'),
    path('buttons/', ButtonsViews.IndexView.as_view(), name='buttons'),
    path('cards/', CardsViews.IndexView.as_view(), name='cards'),
]

File dashbard/apps/utilities/urls.py

from django.urls import path

import dashboard.apps.utilities.colors.views as ColorsViews
import dashboard.apps.utilities.borders.views as BordersViews
import dashboard.apps.utilities.animations.views as AnimationsViews
import dashboard.apps.utilities.others.views as OthersViews

app_name = 'utilities'

urlpatterns = [
    path('', BordersViews.IndexView.as_view(), name='index'),
    path('animations/', AnimationsViews.IndexView.as_view(), name='animations'),
    path('borders/', BordersViews.IndexView.as_view(), name='borders'),
    path('colors/', ColorsViews.IndexView.as_view(), name='colors'),
    path('others/', OthersViews.IndexView.as_view(), name='others'),
]

File dashbard/apps/pages/urls.py

from django.urls import path

import dashboard.apps.pages.blank.views as BlankViews
import dashboard.apps.pages.login.views as LoginViews
import dashboard.apps.pages.pagenotfound.views as PageNotFoundViews
import dashboard.apps.pages.password.views as PasswordViews
import dashboard.apps.pages.register.views as RegisterViews
import dashboard.apps.pages.charts.views as ChartsViews
import dashboard.apps.pages.tables.views as TablesViews

app_name = 'pages'

urlpatterns = [
    path('', ChartsViews.IndexView.as_view(), name='index'),
    path('blank', BlankViews.IndexView.as_view(), name='blank'),
    path('charts', ChartsViews.IndexView.as_view(), name='charts'),
    path('login', LoginViews.IndexView.as_view(), name='login'),
    path('pagenotfound', PageNotFoundViews.IndexView.as_view(), name='pagenotfound'),
    path('password', PasswordViews.IndexView.as_view(), name='password'),
    path('register', RegisterViews.IndexView.as_view(), name='register'),
    path('tables', TablesViews.IndexView.as_view(), name='tables'),
]

Let’s finally check the namespace structure:

$ find . -name urls.py
./dashboard/urls.py
./dashboard/apps/utilities/urls.py
./dashboard/apps/components/urls.py
./dashboard/apps/urls.py
./dashboard/apps/pages/urls.py

We create three levels for our namespaces:

Djane URL FileNamespace
./dashboard/urls.py
./dashboard/apps/urls.pyapp
./dashboard/apps/utilities/urls.py
./dashboard/apps/components/urls.py
./dashboard/apps/pages/urls.py
app:utilities
app:components
app:pages

These namespaces must be used in the template files, for example:

<a href="
<a href="


<a class="collapse-item" href="


Install the Django Extensions for additional commands:

pip install django-extensions

Add Django Extensions to the INSTALLED_APPS

INSTALLED_APPS = [
    ...

    'django_extensions'
]

Show URLs and Namespaces (only for out apps, admin urls are removed)

python3 manage.py show_urls

Preparing required components and pages

In summary, these are the steps to create the desired folder structure:

mkdir -p dashboard/apps/components/buttons/templates/buttons
mkdir -p dashboard/apps/components/cards/templates/cards
mkdir -p dashboard/apps/pages/blank/templates/blank
mkdir -p dashboard/apps/pages/charts/templates/charts
mkdir -p dashboard/apps/pages/login/templates/login
mkdir -p dashboard/apps/pages/pagenotfound/templates/pagenotfound
mkdir -p dashboard/apps/pages/password/templates/password
mkdir -p dashboard/apps/pages/register/templates/register
mkdir -p dashboard/apps/pages/tables/templates/tables
mkdir -p dashboard/apps/utilities/animations/templates/animations
mkdir -p dashboard/apps/utilities/borders/templates/borders
mkdir -p dashboard/apps/utilities/colors/templates/colors
mkdir -p dashboard/apps/utilities/others/templates/others
python3 manage.py startapp buttons dashboard/apps/components/buttons
python3 manage.py startapp cards dashboard/apps/components/cards
python3 manage.py startapp blank dashboard/apps/pages/blank
python3 manage.py startapp charts dashboard/apps/pages/charts
python3 manage.py startapp login dashboard/apps/pages/login
python3 manage.py startapp pagenotfound dashboard/apps/pages/pagenotfound
python3 manage.py startapp password dashboard/apps/pages/password
python3 manage.py startapp register dashboard/apps/pages/register
python3 manage.py startapp tables dashboard/apps/pages/tables
python3 manage.py startapp animations dashboard/apps/utilities/animations
python3 manage.py startapp borders dashboard/apps/utilities/borders
python3 manage.py startapp colors dashboard/apps/utilities/colors
python3 manage.py startapp others dashboard/apps/utilities/others
echo "


cp base.html dashboard/apps/components/buttons/templates/buttons
cp base.html dashboard/apps/components/cards/templates/cards
cp base.html dashboard/apps/pages/blank/templates/blank
cp base.html dashboard/apps/pages/charts/templates/charts
cp base.html dashboard/apps/pages/login/templates/login
cp base.html dashboard/apps/pages/pagenotfound/templates/pagenotfound
cp base.html dashboard/apps/pages/password/templates/password
cp base.html dashboard/apps/pages/register/templates/register
cp base.html dashboard/apps/pages/tables/templates/tables
cp base.html dashboard/apps/utilities/animations/templates/animations
cp base.html dashboard/apps/utilities/borders/templates/borders
cp base.html dashboard/apps/utilities/colors/templates/colors
cp base.html dashboard/apps/utilities/others/templates/others
rm base.html

Each of the folders has the same structure, for example the buttons component. We will delete some unnecessary files

Replacing Projects with dynamic data

Replacing the static parts with dynamic content could be achieved by the following approach:

  • Identify the dynamic parts
  • Move these parts from the site template into the view template base.html of the component
  • Modify frontend view.py to generate dynamic content from data

The steps are the same for all components (all items of the side menu).

Find the

Identify dynamic parts in template

Create templates for side menu pages

For every side menu item, their is a corresponding html file in the install folder of the sb-admin-2 template:

Remember the environment variable we create in part 1 for the start of our project

DASHBOARD_ROOT=$(pwd)
cd $DASHBOARD_ROOT
find dashboard/apps install/sb-admin-2 -name *.html

Each template file base.html has a corresponding html file unter sb-admin-2. Look at the following table to find the mapping:

apps/components/buttons/templates/buttons/base.htmlsb-admin-2/buttons.html
apps/components/cards/templates/cards/base.htmlsb-admin-2/cards.html
apps/pages/blank/templates/blank/base.htmlsb-admin-2/blank.html
apps/pages/charts/templates/charts/base.htmlsb-admin-2/charts.html
apps/pages/login/templates/login/base.htmlsb-admin-2/login.html
apps/pages/pagenotfound/templates/pagenotfound/base.htmlsb-admin-2/404.html
apps/pages/password/templates/password/base.htmlsb-admin-2/forgot-password.html
apps/pages/register/templates/register/base.htmlsb-admin-2/register.html
apps/pages/register/templates/tables/base.htmlsb-admin-2/tables.html
apps/utilities/animations/templates/animations/base.htmlsb-admin-2/utilities-animation.html
apps/utilities/borders/templates/borders/base.htmlsb-admin-2/utilities-border.html
apps/utilities/colors/templates/colors/base.htmlsb-admin-2/utilities-color.html
apps/utilities/others/templates/others/base.htmlsb-admin-2/utilities-html

Each template base.html should have the following content:


And each corresponding view.py file should have the following content, only the template_name should be different (the name of the template base.html file)

from django.views import generic

class IndexView(generic.TemplateView):
    template_name = 'buttons/base.html'

So, for each template file, we have to

  • locate the corresponding html file from the install folder (see table above)
  • copy the content between these tags to the template file:
        <!-- Begin Page Content -->
        <div class="container-fluid">
        ....
        </div>
        <!-- /.container-fluid -->

Django | Build a Dashboard with Django and Bootstrap: Part 2

This is Part 2 of Building a Dashboard with Django and Bootstrap:

Introduction

If you follow the first part of this blog topic, you have a running Django dashboard.

But, unfortunately, the content is still static. Let’s review the current state:

Perfect. We are done with the basic setup.

Still, some work to do, because our dashboard is only a static dashboard. All content is programmed in the dashboard template file dashboard/templates/site/sb-admin-2/base.html

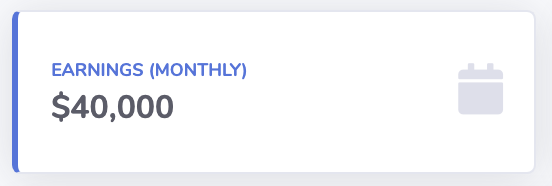
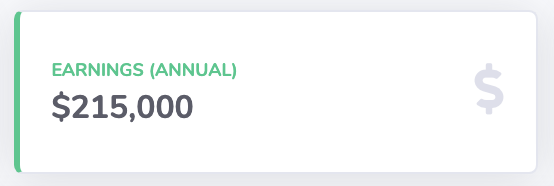
For example, look at the cards with the earnings at the top:

To achieve a more dynamic content, we need to move the desired parts of the dashboard from the template file to the frontend view file.

We will do this by following these steps:

  • Identify the dynamic parts
  • Move these parts from the template into for frontend view template index.html
  • Modify frontend view.py to generate dynamic content from data

Identify dynamic parts

How to find the parts, which are dynamic.

One way is to ask:

  • Which parts should be on every page (unchanged) and
  • What should change on every page

You mostly get the same answers by the question:

  • What are the main components of a web page (including navigation and content)

For answer the first question, take a look at the current page and “name” the areas:

So, these “names” are also the answer for the 3. Question:

  • sidemenu
  • top bar
  • content

And maybe you find additional “names”

  • header
  • footer
  • top menu
  • left and right sidebar

Find identified parts in template

Next step is, to find the identified parts in our dashboard template

dashboard/templates/site/sb-admin-2/base.html

This is an easy step, because the developer of the SB Admin 2 template documented their template well:

Looking into the code of the template, you will find comment lines describing the content:

  • <!-- Sidebar -->
  • <!-- Topbar -->
  • <!-- Top Search -->
  • <!-- Top Navbar -->
  • <!-- Begin Page Content-->

So, it is obvious what do to next:

  • get the dynamic part (lines under)<!-- Begin Page Content-->
    the green box in the following image
  • move it to the frontend template
  • place some information in the dashboard template, that the real content should be displayed here
    the blue curly braces in the following image

This is the way, the template system of django works:

Let’s explain this with a simple example: the page title

We declare a title (which should be considered as the default title). And in the frontend page, we declare the title for this page (the frontend page).

To achieve this, we have to tell our template system the following:

Now, we do the same with the content:

Looking at our resulting page, nothing changes. This is the desired result, but how could we be sure, that we really change the structure?

Well, let’s make a test and try to include a different content in the dashboard template.

Change the lines, where we include the content into this:

MISSING CONTENT


Did you notice the other name of the content: content_missing?

Change the template, save the file and have a look at the result:

Change content back, so your template is working again:

MISSING CONTENT


The final step in Part 3 will be replacing all static content of the dashboard with dynamic content.

Django | Build a Dashboard with Django and Bootstrap: Part 1

This is Part 1 of Building a Dashboard with Django and Bootstrap:

Introduction

Building a complete web app isn’t always an easy task. Designing and Implementing on both sides (backend and front-end) requires mostly a lot of knowledge. So, why don’t using tools or framework, which helps and makes our life easier. Django is one of these frameworks:

Django is a high-level Python Web framework that encourages rapid development and clean, pragmatic design. Built by experienced developers, it takes care of much of the hassle of Web development

So, let’s get started.

Create project

For subsequent steps, we will remember our starting directory

❯ DASHBOARD_ROOT=$(pwd)
❯ echo $DASHBOARD_ROOT
... here you will see your current folder...

First step is to create our main Django project

❯ django-admin startproject dashboard
❯ mv dashboard project
❯ cd project
❯ python manage.py migrate
❯ python manage.py runserver 8080
...

Starting development server at http://127.0.0.1:8080/
Quit the server with CTRL-BREAK.

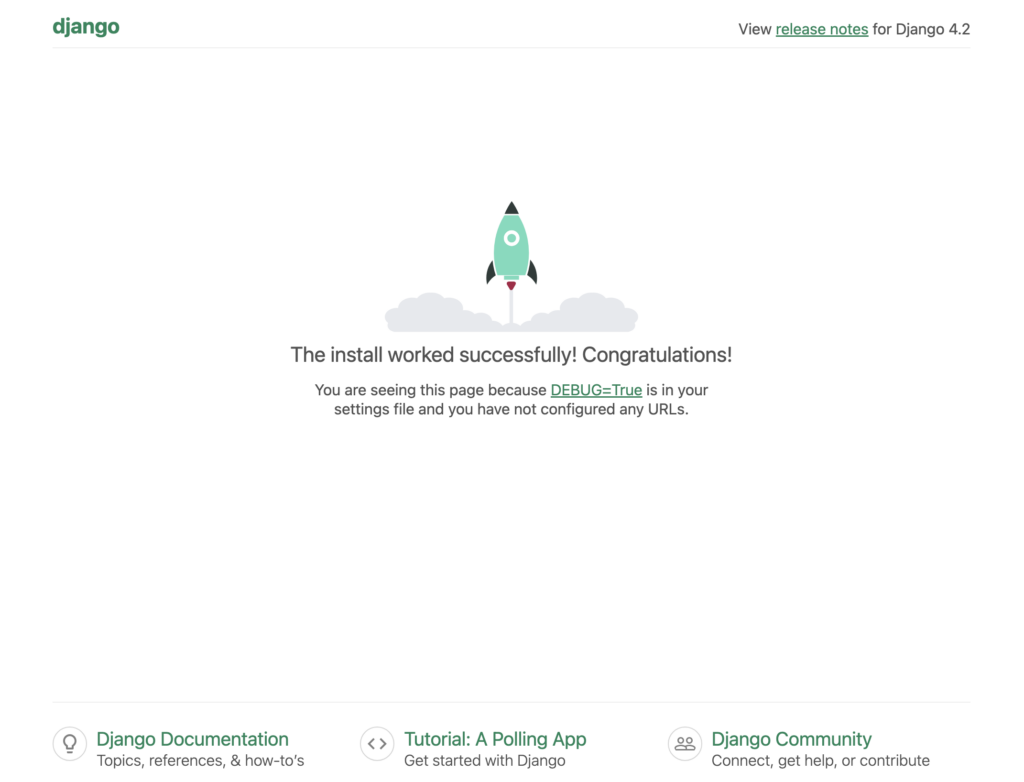
View current project in browser

Create first apps

❯ mkdir -p apps/core
❯ python manage.py  startapp Core apps/core

❯ mkdir -p apps/frontend
❯ python manage.py startapp Frontend apps/frontend

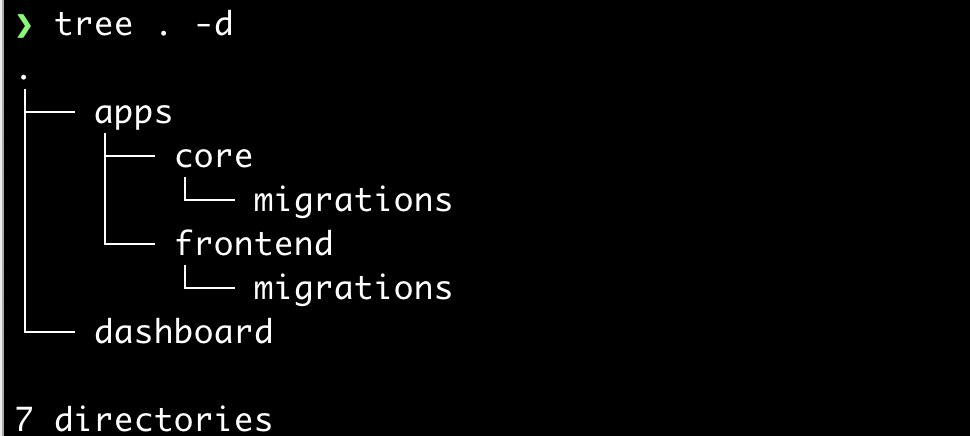
The folder structure should look like this:

Add new apps to project

Modify name in apps/core/apps.py

class CoreConfig(AppConfig):
    default_auto_field = 'django.db.models.BigAutoField'
    name = 'apps.core'

Modify name in apps/frontend/apps.py

class FrontendConfig(AppConfig):
    default_auto_field = 'django.db.models.BigAutoField'
    name = 'apps.frontend'

Modify dashboard/settings.py

INSTALLED_APPS = [
   ...

    'apps.core',
    'apps.frontend',
]

Modify dashboard/urls.py

from django.contrib import admin
from django.urls import path

import apps.frontend.views as views

urlpatterns = [
    path('', views.IndexView.as_view(), name='index'),
    path('admin/', admin.site.urls),
]

Create view

Modify view in apps/frontend/views.py

from django.shortcuts import render
from django.views import generic


class IndexView(generic.TemplateView):
    """
    IndexView:
    """
    module = 'indexView'
    template_name = 'frontend/index.html'

Create template for frontend View

Create template file apps/frontend/templates/frontend/index.html

<h1>
Frontend: Let's get started
</h1>

Add template folder to configuration

In dashboard/settings.py, add template folder to TEMPLATES

TEMPLATES = [
    {
        'BACKEND': 'django.template.backends.django.DjangoTemplates',
        'DIRS': [BASE_DIR / 'templates'],
]

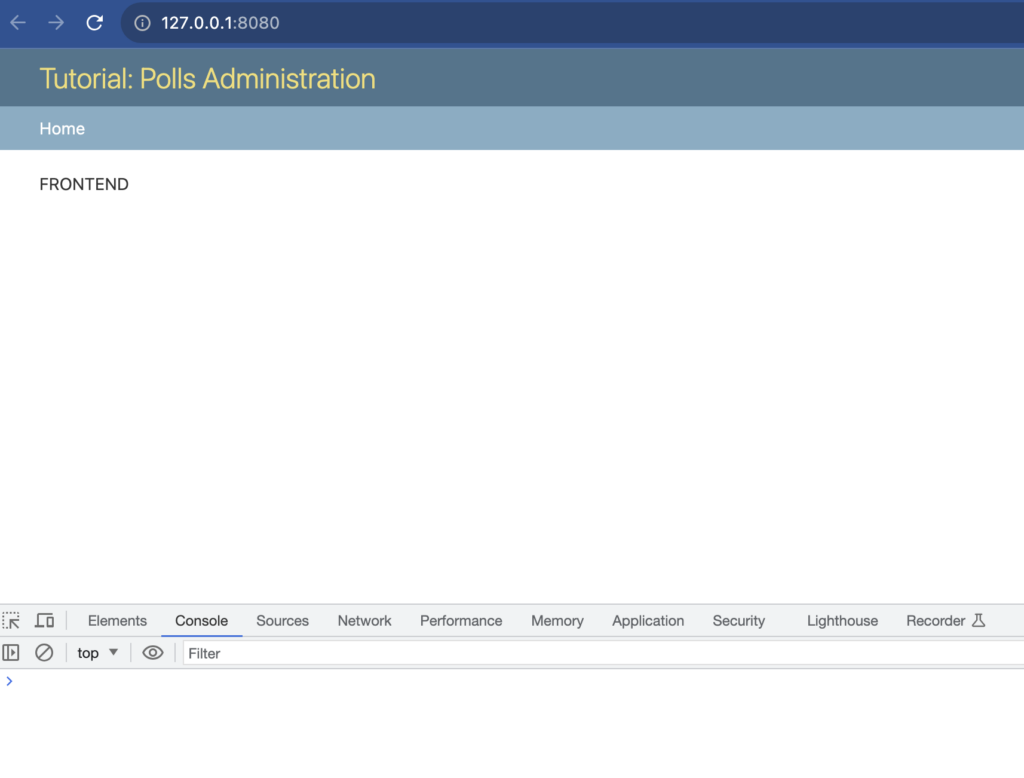
View current project in browser

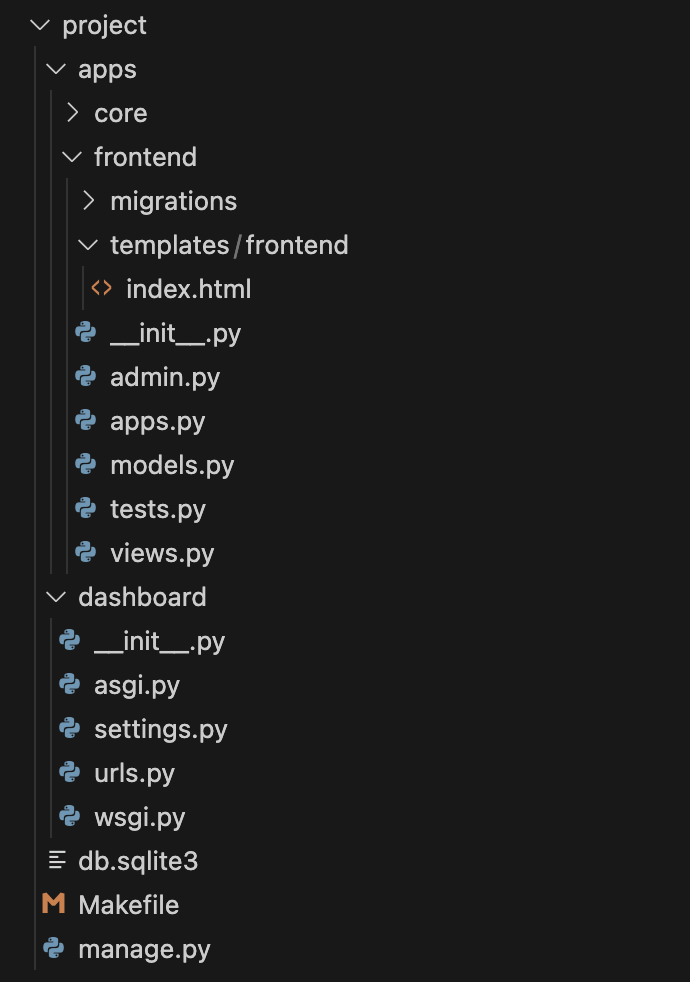
Current folder Structure

So far, we have the following folder structure

Prepare for administrate your project

Create admin user

❯ python manage.py createsuperuser
Username (leave blank to use 'user'): admin
Email address: admin@localhost
Password: 
Password (again): 
Superuser created successfully.

Add Bootstrap support

Download requires files for Bootstrap, jQuery and PopperJS.

Or download this prepared archiv and unzip the files unter dashboard.

Run the scripts in $DASHBOARD_ROOT

Hint: You need to install PowerShell before running the scripts.

> cd $DASHBOARD_ROOT
> ./download_bootstrap.ps1
> ./download_jquery.ps1
> ./download_popperjs.ps1

download_bootstrap.ps1

#!/usr/bin/env pwsh

$ROOT = Split-Path -Parent $PSSCRIPTROOT

$global:ProgressPreference  = 'SilentlyContinue'  
$response = Invoke-WebRequest https://getbootstrap.com/ 
$downloadlink = $response.links | Where-Object { $_.href -like "*download/" } | foreach-object { $_.href } | select-object -first 1 
$downloadpage = Invoke-WebRequest https://getbootstrap.com$downloadlink

$dist_download_url = $downloadpage.links | where-object { $_.href -like "*-dist.zip" } | foreach-object { $_.href }
$dist_version      = $dist_download_url.split("/")[-2].replace("v","")
$dist_zip          = "$ROOT\${dist_version}.zip"

Write-Host "Download $dist_zip from $dist_download_url"
Invoke-WebRequest $dist_download_url -O $dist_zip

Write-Host "Unpack to assets\vendor\bootstrap\${dist_version}"

$fldr_bootstrap = "project\dashboard\static\assets\vendor\bootstrap"

if (Test-Path -Path $fldr_bootstrap) {
    Remove-Item -recurse -force           $fldr_bootstrap
}

New-Item -type directory                  $fldr_bootstrap > $null 
Expand-Archive $dist_zip -destinationpath $fldr_bootstrap

Move-Item $fldr_bootstrap\bootstrap* $fldr_bootstrap\${dist_version}

$global:ProgressPreference  = 'Continue'

download_jquery.ps1

#!/usr/bin/env pwsh

$ROOT = Split-Path -Parent $PSSCRIPTROOT

$version = "3.7.0"

$url_base = "https://code.jquery.com"

$destination = "project\dashboard\static\assets\vendor\jquery\$version\js"

Write-Host "Prepare  destination $destination"
if (Test-Path -Path $destination) {
    Remove-Item -recurse -force           $destination > $null
}

New-Item -type directory                  $destination > $null 

Invoke-WebRequest $url_base/jquery-${version}.js      -O $destination/jquery-${version}.js
Invoke-WebRequest $url_base/jquery-${version}.min.map -O $destination/jquery-${version}.min.map

download_popperjs.ps1

#!/usr/bin/env pwsh

$ROOT = Split-Path -Parent $PSSCRIPTROOT

$version = "2.11.8"

$url_base = "https://cdnjs.cloudflare.com/ajax/libs/popper.js/${version}/umd/"

$destination = "project\dashboard\static\assets\vendor\popperjs\$version\js"

Write-Host "Prepare  destination $destination"
if (Test-Path -Path $destination) {
    Remove-Item -recurse -force           $destination > $null
}

New-Item -type directory                  $destination > $null 

Invoke-WebRequest $url_base/popper.js -O  $destination/popper.js

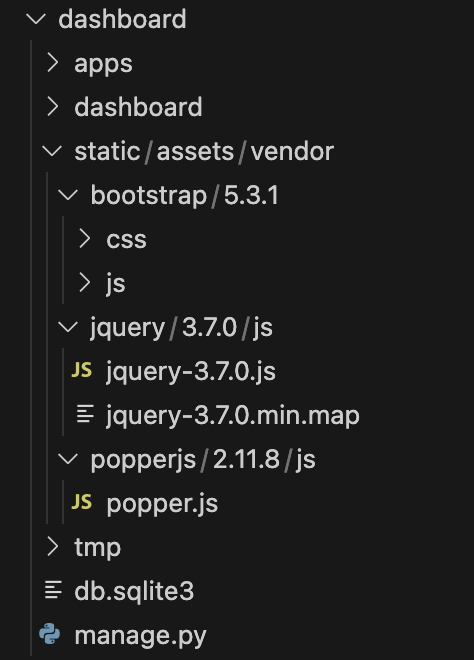
Finally, the folder structure should look like this:

Create site templates in dashboard/templates/site

Add templates path to settings

File dashboard/settings.py

TEMPLATES = [
    {
        'BACKEND': 'django.template.backends.django.DjangoTemplates',
        'DIRS': [
            BASE_DIR / '/dashboard/templates',
        ],
        ...

Add static path to settings

File dashboard/settings.py

Add as first line

import os

Then add / replace at STATIC_URL=...

STATIC_URL = 'static/'
STATICFILES_DIRS = [
    os.path.join(BASE_DIR, 'dashboard/static')
]

Modify frontend view template

File dashboard/apps/frontend/templates/index.html


<main>
	<div class="p-5 mb-4 bg-body-tertiary rounded-3">
		<div class="container-fluid py-5">
			<h1 class="display-5 fw-bold">Custom jumbotron</h1>
			<p class="col-md-8 fs-4">Using a series of utilities, you can create this jumbotron, just like the one in
				previous versions of Bootstrap. Check out the examples below for how you can remix and restyle it to
				your liking.</p>
			<button class="btn btn-primary btn-lg" type="button">Example button</button>
		</div>
	</div>
	</div>
</main>


File dashboard/apps/frontend/templates/site/base.html

<!DOCTYPE html>
<html>

<head>
    <title>
    <link rel="stylesheet" href="
</head>

<body>

    <nav class="navbar navbar-expand-md navbar-dark bg-dark mb-4">
        <div class="container-fluid">
          <a class="navbar-brand" href="#">Navigation</a>
          <button class="navbar-toggler" type="button" data-bs-toggle="collapse" data-bs-target="#navbarCollapse" aria-controls="navbarCollapse" aria-expanded="false" aria-label="Toggle navigation">
            <span class="navbar-toggler-icon"></span>
          </button>
          <div class="collapse navbar-collapse" id="navbarCollapse">
            <ul class="navbar-nav me-auto mb-2 mb-md-0">
              <li class="nav-item"><a class="nav-link active" aria-current="page" href="#">Home</a></li>
              <li class="nav-item"><a class="nav-link" href="polls">Polls</a>
              </li>
            </ul>
          </div>
        </div>
      </nav>

    <div class="container">
        
        
    </div>

    <script src="
</body>

</html>

View current status of project

Final Result

The final result could be found here.

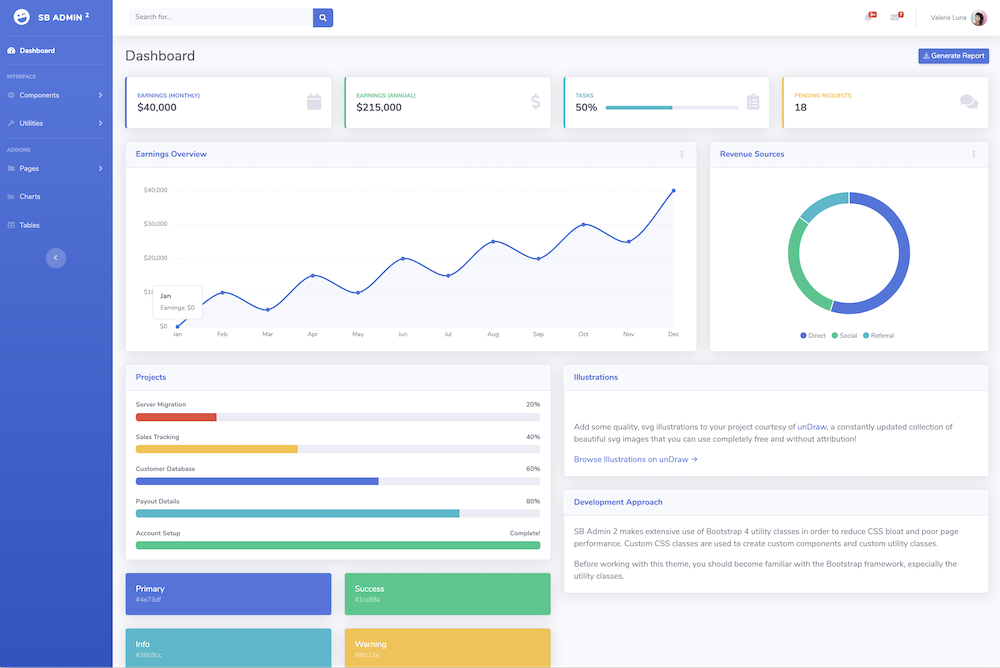
Add dashboard from an existing template

For a first start, we will use this sb-admin-2 dashboard template from here:

Download required files

Bootstrap templates consist of at least 3 different types of files

  • main index.html page, responsible for collection all elements and set up your page
  • CSS files defining the style of your page
  • JavaScript files, containing needed frameworks and code

So, first start by downloading the sample template from here. Be sure, you start in our project root folder:

❯ cd $DASHBOARD_ROOT
❯ git clone https://github.com/BlackrockDigital/startbootstrap-sb-admin-2 install/sb-admin-2

Next, find out, what we need for our template in addition to the file index.html

❯ cd install/sb-admin-2
❯ grep -E "<(link|script)" index.html | grep -E "(href|src)="
  <link href="vendor/fontawesome-free/css/all.min.css" rel="stylesheet" type="text/css">
  <link href="https://fonts.googleapis.com/css?family=Nunito:200,200i,300,300i,400,400i,600,600i,700,700i,800,800i,900,900i" rel="stylesheet">
  <link href="css/sb-admin-2.min.css" rel="stylesheet">
  <script src="vendor/jquery/jquery.min.js"></script>
  <script src="vendor/bootstrap/js/bootstrap.bundle.min.js"></script>
  <script src="vendor/jquery-easing/jquery.easing.min.js"></script>
  <script src="js/sb-admin-2.min.js"></script>
  <script src="vendor/chart.js/Chart.min.js"></script>
  <script src="js/demo/chart-area-demo.js"></script>
  <script src="js/demo/chart-pie-demo.js"></script>

That’s a lot of additional files.

To keep the file structure consistent, these files should be stored under the dashboard/static folder (same as the bootstrap files before).

To achieve this, there are two possibilities:

  • Create desired folder and copy each of the source files to the destination folder
  • Copy the complete static folder from the Github Repository for this post.

We use the second option to keep the focus on creating our dashboard.

So, first, clone the repository:

cd $DASHBOARD_ROOT/install
https://github.com/r14r/Django_Dashboard-with-Django-and-Bootstrap

Then, copy the requred files

cd $DASHBOARD_ROOT

cp -R install/Django_Dashboard-with-Django-and-Bootstrap/project/dashboard/static project/dashboard
cp -R install/Django_Dashboard-with-Django-and-Bootstrap/project/dashboard/templates dashboard

Having everything needed for the dashboard template, the next step is to modify the front-end template

File dashboard/apps/frontend/templates/frontend/index.html

View current project in browser

Perfect. We are done with the basic setup.

Still some work to do, because our dashboard is only a static dashboard. All content is programmed in the dashboard template file dashboard/templates/site/sb-admin-2/base.html

For example, look at the cards with the earnings at the top:

To achieve a more dynamic content, we need to move the desired parts of the dashboard from the template file to the front-end view file.

This will be described in the next step: Part 2: Prepare for dynamic content

Copyright © 2024 | Powered by WordPress | Aasta Blog theme by ThemeArile