Developer Blog

Tipps und Tricks für Entwickler und IT-Interessierte

Ionic | Working with moments.js

Introduction

With moment.js, you can

Parse, validate, manipulate, and display dates and times in JavaScript.

With a npm-Module, you can integrate this functionality into your Ionic App

Preparation

Create your empty app

$ ionic start working-with-moments blank --no-git --no-link

Install npm Module

$ cd  working-with-moments
$ npm install moment
+ moment@2.20.1
added 1 package in 3.001s

Start Editor and serve your app

$ vscode .
$ ionic serve

Add moments.js functionality

Change pages/home/home.ts

Add the moments.js reference to pages/home/home.ts

import { Component } from '@angular/core'; 
import { NavController } from 'ionic-angular';
import * as moment from 'moment';

Create a var for the current date/time

export class HomePage {
  public date: any;

  constructor(public navCtrl: NavController) {
    this.date = moment();
  }
}

Change pages/home/home.html

<ion-content padding>
  The current date/time is {{ date }}
</ion-content>

Summary

A lot more examples could be found in my repository. Just create a starter app with this template and begin to play

$ ionic start app https://github.com/ionic4-toolbox/Working-with-moment.js

Build separated development environments with direnv

TL;DR

Working with Ionic sometimes means to handle different versions of Ionic/Cordova and Ionic/Cordova Plugins. My goal was, to setup an Ionic environment specify for each project. And I want do activate the environments automatically.

I started with autoenv, but unfortunately there is no unload/deactivate mechanism. So, finally, i switched to direnv. But i also tried different solutions with Vagrant or Docker.

Requirements

You will need a package manager to install the different software packages. There are a variety of package manager for the different platforms. 

For macOS, i will use Homebrew.

Things about my directory structure

Mostly, i try to group files in different directories, depending on their functionality.

Environment files goes to a directory .env. But, wait: there could be more environments (node.js, ruby, python), which all could be used in my project.

So, i decide to use subfolders for each possible environment. Here it looks like:

$ tree myproject
myproject
└── .env
    ├── nvm
    ├── pyenv
    └── ruby

Some small example

Suppose, you have this directory structure

.
├── home
│   ├── .envrc
│   └── bath
│       └── .envrc
└── office
    └── .envrc

If you walk between this different rooms, you will see how direnv follow you

~/tmp$ cd home
direnv: loading .envrc
You are at home
~/tmp/home$ cd bath
direnv: loading .envrc
You are in the bath
~/tmp/home/bath$ cd ..
direnv: loading .envrc
You are at home
~/tmp/home$ cd ..
direnv: unloading
~/tmp$ cd office
direnv: loading .envrc
You are at work
~/tmp/office$ cd ../home/bath
direnv: loading .envrc
You are in the bath
~/tmp/home/bath$

Installation

There is a detailed installation instruction here, but for macOS, here is the simple step

$ brew install direnv
==> Downloading https://homebrew.bintray.com/bottles/direnv-2.14.0.high_sierra.bottle.tar.gz
Already downloaded: /home/user/Library/Caches/Homebrew/direnv-2.14.0.high_sierra.bottle.tar.gz
==> Pouring direnv-2.14.0.high_sierra.bottle.tar.gz
  /usr/local/Cellar/direnv/2.14.0: 8 files, 3.7MB

Finally, check if installation has succeed

$ direnv version
2.14.0

Configuration

Directory specific configuration is made through the file .envrc. It’s like a normal Shell profile script, so mostly all commands are allowed and possible.

Entering the directory triggers this configuration file, so a normal cd into the directory does the environment setup.. pretty cool!

In my simple example, i used this configuration files

~/tmp$ find . -name .envrc
./home/.envrc
./home/bath/.envrc
./office/.envrc
~/tmp$ find . -name .envrc -exec cat {} \;
echo "You are at home"
echo "You are in the bath"
echo "You are at work"

Setting up a sample project

Ionic heavily depends on node.js So, the challenge is to setup different node.js environments. Luckily, there is already a solution for that: Node Version Manager nvm.

Install nvm

For macOS, this is quit simple (details could be found here)

$ brew install nvm

Or, manually

$ wget -qO- https://raw.githubusercontent.com/creationix/nvm/v0.33.8/install.sh | bash

Setup directory structure

Create the desired directory structure

$ cd $HOME/tmp
$ mkdir -p myproject2/.env/nvm

Configure direnv

Add the following lines (with some additional lines) into your direnv configuration file .envrc

#!/bin/bash

export NVM_DIR=$HOME/tmp/.env/nvm

echo setup nvm with NVM_DIR=$NVM_DIR
. /usr/local/opt/nvm/nvm.sh

nvm --version

Hint: When you created the file (for example with vi), you get the error message, that the .envrc file is blocked

$ vi .envrc
direnv: error .envrc is blocked. Run `direnv allow` to approve its content.

Follow the suggested solution: run direnv allow

$ direnv allow
direnv: loading .envrc
setup nvm with NVM_DIR=/home/user/tmp/myproject/.env/nvm
0.33.8
direnv: export +NVM_CD_FLAGS +NVM_DIR +NVM_RC_VERSION

Now, test the configuration: Leave the directory and enter it again

$ cd ..
direnv: unloading
$ cd myproject
direnv: loading .envrc
setup nvm with NVM_DIR=/home/user/tmp/myproject/.env/nvm
0.33.8
direnv: export +NVM_CD_FLAGS +NVM_DIR +NVM_RC_VERSION

Hint: If this does not work, try to start the configuration file manually for the first time, 

$ cd $HOME/tmp/myproject
$ . .envrc
setup nvm with NVM_DIR=/home/user/tmp/myproject/.env/nvm
0.33.8

Fix possibile warnings and errors

If you get this error message

nvm is not compatible with the npm config "prefix" option: currently set to ...

Then, issue this command

$ npm config delete prefix

Install node

Now, the real task: install node.js

$ cd $HOME/tmp/myproject
$ nvm --version
0.33.8
$ node --version
-bash: node: command not found
$ nvm install 9.4.0
Downloading and installing node v9.4.0...
Downloading https://nodejs.org/dist/v9.4.0/node-v9.4.0-darwin-x64.tar.xz...
######################################################################## 100,0%
Computing checksum with shasum -a 256
Checksums matched!
Now using node v9.4.0 (npm v5.6.0)
Creating default alias: default -> 9.4.0 (-> v9.4.0)

Test the installation

$ which node
/home/user/tmp/myproject/.env/nvm/versions/node/v9.4.0/bin/node
$ node --version
v9.4.0

If you want to use an additional node version (maybe the latest LTS version), just install it

$ nvm install lts/carbon
Downloading and installing node v8.9.4...
Downloading https://nodejs.org/dist/v8.9.4/node-v8.9.4-darwin-x64.tar.xz...
######################################################################## 100,0%
Computing checksum with shasum -a 256
Checksums matched!
Now using node v8.9.4 (npm v5.6.0)

You can switch between the different versions with nvm use

$ nvm use lts/carbon
Now using node v8.9.4 (npm v5.6.0)
$ node --version; npm --version
v8.9.4
5.6.0
$ nvm use default
Now using node v9.4.0 (npm v5.6.0)
$ node --version; npm --version
v9.4.0
5.6.0

Setting up Ionic Environment

After this required preparation, we can start setting up our Ionic Environment

For this example, I choose the following start path: ~/Workspace/Ionic3

Setup directory structure

$ mkdir -p $HOME/Workspace/Ionic3/.env/nvm
$ cd $HOME/Workspace/Ionic3
$ vi .envrc

Create the direnv configuration file

Configuration file

#!/bin/bash
#-------------------------------------------------------------------------------
#
#-------------------------------------------------------------------------------
  HERE="$PWD"

#-------------------------------------------------------------------------------
#
#-------------------------------------------------------------------------------
  _USE_NODE_VERSION=9.4.0

#-------------------------------------------------------------------------------
#
#-------------------------------------------------------------------------------
  export NVM_DIR="$HERE/.env/nvm"

  echo "setup nvm: $NVM_DIR"
  . /usr/local/opt/nvm/nvm.sh

  nvm use $_USE_NODE_VERSION --silent

  echo "enabled nvm :  $(nvm  --version) $(which nvm  | sed 's#'$NVM_DIR'/##')"
  echo "enabled node:  $(node --version) $(which node | sed 's#'$NVM_DIR'/##')"
  echo "enabled npm :  $(npm  --version) $(which npm  | sed 's#'$NVM_DIR'/##')"

Allow the configuration file for use

$ direnv allow
direnv: loading .envrc
setup nvm: /home/user/Workspace/Ionic3/.env/nvm
enabled nvm : 0.33.8
enabled node: v9.4.0 versions/node/v9.4.0/bin/node
enabled npm : 5.6.0 versions/node/v9.4.0/bin/npm
direnv: export +NVM_CD_FLAGS +NVM_DIR

Test the configuration

~$ cd
~$ cd Workspace/Ionic3
direnv: loading .envrc
setup nvm: /home/user/Workspace/Ionic3/.env/nvm
enabled nvm :  0.33.8
enabled node:  v9.4.0 versions/node/v9.4.0/bin/node
enabled npm :  5.6.0 versions/node/v9.4.0/bin/npm
direnv: export +NVM_CD_FLAGS +NVM_DIR

Well done!

Setup Ionic

Install required parts

$ npm -g install ionic@latest cordova@latest

Test your installation

~/Workspace/Ionic3$ ionic --version
3.19.1
~/Workspace/Ionic3$ cordova --version
8.0.0
~/Workspace/Ionic3$ $ which ionic
/home/user/Workspace/Ionic3/.env/nvm/versions/node/v9.4.0/bin/ionic

And, finally, work with Ionic

$ ionic start super super --cordova --no-link
$ cd super
$ ionic serve

Next steps

Happy with this, maybe you want to try other things.

Docker

Docker | Cookbook

Useful apps

portainer.io: MAKING DOCKER MANAGEMENT EASY. Build and manage your Docker environments with ease today.

dive: About A tool for exploring each layer in a docker image

Useful commands

  • docker ps — Lists running containers.
    Some useful flags include: -a / -all for all containers (default shows just running) and —-quiet /-q to list just their ids (useful for when you want to get all the containers).
  • docker pull — Most of your images will be created on top of a base image from the Docker Hub registry. Docker Hub contains many pre-built images that you can pull and try without needing to define and configure your own. To download a particular image, or set of images (i.e., a repository), use docker pull.
  • docker build — Builds Docker images from a Dockerfile and a “context”.
    A build’s context is the set of files located in the specified PATH or URL. Use the -t flag to label the image, for example docker build -t my_container . with the . at the end signalling to build using the currently directory.
  • docker run — Run a docker container based on an image.
    You can follow this on with other commands, such as -it bash to then run bash from within the container. 
    Also see Top 10 options for docker run — a quick reference guide for the CLI command
    docker run my_image -it bash
  • docker logs —  Display the logs of a container.
    You must specify a container and can use flags, such as --follow to follow the output in the logs of using the program. 
    docker logs --follow my_container
  • docker volume ls — Lists the volumes,.
    Volumes are the preferred mechanism for persisting data generated by and used by Docker containers.
  • docker rm — Removes one or more containers.
    docker rm my_container
  • docker rmi — Removes one or more images. 
    docker rmi my_image
  • docker stop — Stops one or more containers.
    docker stop my_containerstops one container, while docker stop $(docker ps -a -q) stops all running containers. A more direct way is to use docker kill my_container, which does not attempt to shut down the process gracefully first.
  • Use them together, for example to clean up all your docker images and containers:
  • kill all running containers with docker kill $(docker ps -q)
  • delete all stopped containers with docker rm $(docker ps -a -q)
  • delete all images with docker rmi $(docker images -q)

Create new container

Start a new docker image with a given name

You can start a new container by using the run command and specify the desired image 

$ docker run -it --name playground ubuntu:17.10 /bin/bash
....
root@c106fbb48b20:/# exit

As a result, you are in the container at the bash command line

Reconnect to image
$ docker attach playground
Commit changes in container
$ docker start playground
$ docker attach playground
root@c106fbb48b20:/# echo 1.0 >VERSION
root@c106fbb48b20:/# exit
$ docker commit playground playground:1.0
$ docker tag playground:1.0 playground:latest
$ docker images
REPOSITORY TAG IMAGE ID CREATED SIZE
playground 1.0 01703597322b Less than a second ago 94.6MB
playground latest 01703597322b Less than a second ago 94.6MB

Add tools and utilities

Python

$ apt-get update 
$ apt-get upgrade 
$ apt-get install python3 python3-pip

Java

$ apt-get install default-jre

Manage File Shares

File shares with Docker Desktop on Mac OS

Configuration is stored under

~/Library/Group Containers/group.com.docker/settings.json

Monitor Docker Logs

Logs with Docker Desktop on Mac OS

pred='process matches ".*(ocker|vpnkit).*" || (process in {"taskgated-helper", "launchservicesd", "kernel"} && eventMessage contains[c] "docker")'
/usr/bin/log stream --style syslog --level=debug --color=always --predicate "$pred"

Alternative you can run

/usr/bin/log show --style syslog --debug --info --last 1d --predicate "$pred" >/tmp/logs.txt

Add Timezone Konfiguration

ENV TZ 'Europe/Berlin'

RUN echo $TZ > /etc/timezone 
RUN    apt-get install -y tzdata \
    && rm /etc/localtime \
    && ln -snf /usr/share/zoneinfo/$TZ /etc/localtime \
    && dpkg-reconfigure -f noninteractive tzdata \
    && apt-get clean

Install local apps in a docker container

Install Atom Editor

Start docker image

$ docker run -it --name docker-atom -v /Dockerfiles/HOME:/home -e DISPLAY=192.168.99.1:0 ubuntu /bin/bash

Install Atom

# apt-get update
# apt-get install curl
# curl -sL https://deb.nodesource.com/setup_7.x | bash -
# apt-get install nodejs
# node -v
v7.4.0
# apt-get -y install git
# apt-get -y install software-properties-common
# add-apt-repository -y ppa:webupd8team/atom
# apt-get update
# apt-get -y install atom
# apt-get install libxss1

Commit changes  and build a image

# docker commit -a "Docker Tutorial 1.0.0" -m ionic d378e8647af9 atom:1.0.0
# docker tag atom:1.0.0 atom:latest

Links and Resources

Docker quick reference guides

Docker in more depth

Working with networks

I’ve got a lot of inspiration from wsargent/docker-cheat-sheet.

Goal

We will setup to applications, each in his one container, running on the smae network, so they can communication together.

Setup

Starting with the default configuration, you will see 4 networks

$ docker network ls
NETWORK ID          NAME                DRIVER              SCOPE
6742a11bff1e        bridge              bridge              local
3af0a1c9eaac        host                host                local
e60f68aad9d6        none                null                local

Create a bridged network for running two apps inside: web and database

$ docker network create -d bridge playground_bridge
c97a80b449d9b6b28ddffa0a7bd4a7938e0b8261773080ab33ae4b7ab08826b1
$ docker network ls
NETWORK ID          NAME                DRIVER              SCOPE
6742a11bff1e        bridge              bridge              local
3af0a1c9eaac        host                host                local
e60f68aad9d6        none                null                local
c97a80b449d9        playground_bridge   bridge              local

Start the database application using the bridges network

$ docker run -d --net=playground_bridge --name playground_db training/postgres
88abb9d018c628ed1abe7da0466289846a8342a28b2cbef3305ea5313c46d647
$ docker inspect --format='{{json .NetworkSettings.Networks}}' playground_db| python -m json.tool
{
    "playground_bridge": {
        "Aliases": [
            "88abb9d018c6"
        ],
        "DriverOpts": null,
        "EndpointID": "9fdfe9baf5b159471a39601779ee451aa555a9a9be72be4472e56bd3fcfd1350",
        "Gateway": "172.18.0.1",
        "GlobalIPv6Address": "",
        "GlobalIPv6PrefixLen": 0,
        "IPAMConfig": null,
        "IPAddress": "172.18.0.2",
        "IPPrefixLen": 16,
        "IPv6Gateway": "",
        "Links": null,
        "MacAddress": "02:42:ac:12:00:02",
        "NetworkID": "c97a80b449d9b6b28ddffa0a7bd4a7938e0b8261773080ab33ae4b7ab08826b1"
    }
}

Now, start the web application with the default network (not the playground_bridge used by the database)

$ docker run -d --name playground_web training/webapp python app.py
2f31761168d75d10c2f1bffc805fb8963a18529e17c2592c2b279afd9e364e7b

They cannot communication, because they are running in different networks:

$ docker exec -it playground_db ifconfig | grep inet
         inet addr:172.18.0.2 Bcast:0.0.0.0 Mask:255.255.0.0
         inet addr:127.0.0.1 Mask:255.0.0.0
$ docker exec -it playground_web ifconfig | grep inet
         inet addr:172.17.0.2 Bcast:0.0.0.0 Mask:255.255.0.0
         inet addr:127.0.0.1 Mask:255.0.0.0

Now check the connectivity. The Web application can reach itself:

$ docker exec -it playground_web ping -c 5 172.17.0.2
PING 172.17.0.2 (172.17.0.2) 56(84) bytes of data.
64 bytes from 172.17.0.2: icmp_seq=1 ttl=64 time=0.027 ms
64 bytes from 172.17.0.2: icmp_seq=2 ttl=64 time=0.033 ms
64 bytes from 172.17.0.2: icmp_seq=3 ttl=64 time=0.036 ms
64 bytes from 172.17.0.2: icmp_seq=4 ttl=64 time=0.031 ms
64 bytes from 172.17.0.2: icmp_seq=5 ttl=64 time=0.029 ms

But could not reach the database application (because of the different network):

$ docker exec -it playground_web ping -c 5 172.18.0.2
PING 172.18.0.2 (172.18.0.2) 56(84) bytes of data.

--- 172.18.0.2 ping statistics ---
5 packets transmitted, 0 received, 100% packet loss, time 4126ms

To connect both apps together, put them in the same network:

Before, they use different networks:

$ docker inspect --format='{{json .NetworkSettings.Networks}}' playground_web | python -m json.tool|grep NetworkID
        "NetworkID": "6742a11bff1ebcdeaee9151f146a74b1c3d77db95d4931e4e79f48f7d7f491f7"
$ docker inspect --format='{{json .NetworkSettings.Networks}}' playground_db | python -m json.tool|grep NetworkID
        "NetworkID": "c97a80b449d9b6b28ddffa0a7bd4a7938e0b8261773080ab33ae4b7ab08826b1"

Connect Web Application to network playground_bridge:

$ docker network connect playground_bridge playground_web

 Now, they use the same network:

$ docker inspect --format='{{json .NetworkSettings.Networks}}' playground_web | python -m json.tool|grep NetworkID
        "NetworkID": "6742a11bff1ebcdeaee9151f146a74b1c3d77db95d4931e4e79f48f7d7f491f7"
        "NetworkID": "c97a80b449d9b6b28ddffa0a7bd4a7938e0b8261773080ab33ae4b7ab08826b1"
$ docker inspect --format='{{json .NetworkSettings.Networks}}' playground_db | python -m json.tool|grep NetworkID
        "NetworkID": "c97a80b449d9b6b28ddffa0a7bd4a7938e0b8261773080ab33ae4b7ab08826b1"

And they can communication

$ docker exec -it playground_web ping -c 5 172.17.0.2
PING 172.17.0.2 (172.17.0.2) 56(84) bytes of data.
64 bytes from 172.17.0.2: icmp_seq=1 ttl=64 time=0.044 ms
64 bytes from 172.17.0.2: icmp_seq=2 ttl=64 time=0.032 ms
64 bytes from 172.17.0.2: icmp_seq=3 ttl=64 time=0.033 ms
64 bytes from 172.17.0.2: icmp_seq=4 ttl=64 time=0.032 ms
64 bytes from 172.17.0.2: icmp_seq=5 ttl=64 time=0.033 ms

--- 172.17.0.2 ping statistics ---
5 packets transmitted, 5 received, 0% packet loss, time 4144ms
rtt min/avg/max/mdev = 0.032/0.034/0.044/0.008 ms

$ docker exec -it playground_web ping -c 5 172.18.0.2
PING 172.18.0.2 (172.18.0.2) 56(84) bytes of data.
64 bytes from 172.18.0.2: icmp_seq=1 ttl=64 time=0.134 ms
64 bytes from 172.18.0.2: icmp_seq=2 ttl=64 time=0.052 ms
64 bytes from 172.18.0.2: icmp_seq=3 ttl=64 time=0.056 ms
64 bytes from 172.18.0.2: icmp_seq=4 ttl=64 time=0.052 ms
64 bytes from 172.18.0.2: icmp_seq=5 ttl=64 time=0.053 ms

--- 172.18.0.2 ping statistics ---
5 packets transmitted, 5 received, 0% packet loss, time 4156ms
rtt min/avg/max/mdev = 0.052/0.069/0.134/0.033 ms

Usefull Links

https://blog.docker.com/2019/07/intro-guide-to-dockerfile-best-practices/

Ionic | App from Scratch | Linkes und Rechtes Menu

Definieren der beiden Seitenmenüs in app.html

<ion-menu [content]="contentLeft"> ....</ion-menu>
<ion-menu side="right" [content]="contentRight">....</ion-menu>
 ....

 <ion-nav [root]="rootPage" #contentLeft #contentRight swipeBackEnabled="false"></ion-nav>
<ion-menu [content]="contentLeft"> 
	....
</ion-menu> 
<ion-menu side="right" [content]="contentRight">
	....
</ion-menu> 
.... 
<ion-nav [root]="rootPage" 
	#contentLeft 
	#contentRight 
	swipeBackEnabled="false">
</ion-nav>

Zwei Schaltflächen hinzufügen

<ion-header>
   <ion-navbar>
      <button ion-button start menuToggle>
         <ion-icon name="menu"></ion-icon>
      </button>
      <ion-title>Demo of two Sidemenus</ion-title>
      <button ion-button end menuToggle="right">
         <ion-iconname="menu"></ion-icon>
      </button>
   </ion-navbar>
</ion-header>
<ion-content padding>
</ion-content>

Ergebnis

Github Repository

Hier liegt der Beispielcode.

Ionic | App from Scratch – Two Sidemenus

Prepare your starter App

ionic start App sidemenu --type angular --no-git

Change into the newly create folder and start the Ionic App

cd App
ionic serve

You will see the default Ionic Sidemenu App

The entries of the sSidemenu are defined in app.components.ts:

export class AppComponent {
	public appPages = [
		{ title: 'Home', url: '/home', icon: 'home' },
		{ title: 'List', url: '/list', icon: 'list' }
	];

The sidemenu itself and his apperance are defined in app.component.html:

<ion-app>
  <ion-split-pane contentId="main-content">
    <ion-menu contentId="main-content" type="overlay">
      <ion-header>
        <ion-toolbar>
          <ion-title>Menu</ion-title>
        </ion-toolbar>
      </ion-header>
      <ion-content>
        <ion-list>
          <ion-menu-toggle auto-hide="false" *ngFor="let p of appPages">
            <ion-item [routerDirection]="'root'" [routerLink]="[p.url]">
              <ion-icon slot="start" [name]="p.icon"></ion-icon>
              <ion-label>{{p.title}}</ion-label>
            </ion-item>
          </ion-menu-toggle>
        </ion-list>
      </ion-content>
    </ion-menu>
    <ion-router-outlet id="main-content"></ion-router-outlet>
  </ion-split-pane>
</ion-app>

The Sidemenu entries and the Icon are added in line 13 and 14 to the sidemenu.

Define two sidemenus in app.html

<ion-menu [content]="contentLeft"> ....</ion-menu>
<ion-menu side="right" [content]="contentRight">....</ion-menu>
 ....

<ion-nav [root]="rootPage" #contentLeft #contentRight swipeBackEnabled="false"></ion-nav>

Add buttons to page

<ion-header>
   <ion-navbar>
      <button ion-button start menuToggle>
         <ion-icon name="menu"></ion-icon>
      </button>
      <ion-title>Demo of two Sidemenus</ion-title>
      <button ion-button end menuToggle="right">
         <ion-iconname="menu"></ion-icon>
      </button>
   </ion-navbar>
</ion-header>
<ion-content padding>
</ion-content>
Result
Github Repository

You can find the code here

Ionic | App from Scratch

Prepare Environment

Install Node.JS

$ LATEST=18.16.0 
$ nvm install $LATEST --latest-npm node --version  
$ npm --version 
$ nvm alias latest $LATEST
$ nvm alias default $LATEST 

Install Ionic

$ npm -g install ionic@latest
$ ionic -version

Create an app from Template

ionic start --list
ionic start sidemenu sidemenu
ionic start super super

Introduction: First App

Prepare the base Application

Create basic structure from template

$ ionic start app_from_scratch sidemenu --type angular
$ cd app_from_scratch

Some name changing

To keep the structure of the filenames the same, i like to change the name for the routing module (changing the dash to a dot)

from

app-routing.module.ts

to

app-routing.module.ts

Show base app

$ ionic serve -c
bildschirmfoto-2016-11-16-um-18-04-31

Add a page

Create a new page with the name “About”

$ ionic generate page About

Add import to app.components.ts

  public appPages = [
    { title: 'Home', url: '/home', icon: 'home' },
    { title: 'List', url: '/list', icon: 'list' },
    { title: 'About', url: '/about', icon: '' }
  ];

Add item to app-routing.module.ts

const routes: Routes = [
  { path: '', redirectTo: 'home', pathMatch: 'full' },
  { path: 'home', loadChildren: './home/home.module#HomePageModule' },
  { path: 'list', loadChildren: './list/list.module#ListPageModule' },
  { path: 'about', loadChildren: './about/about.module#AboutPageModule' }
];

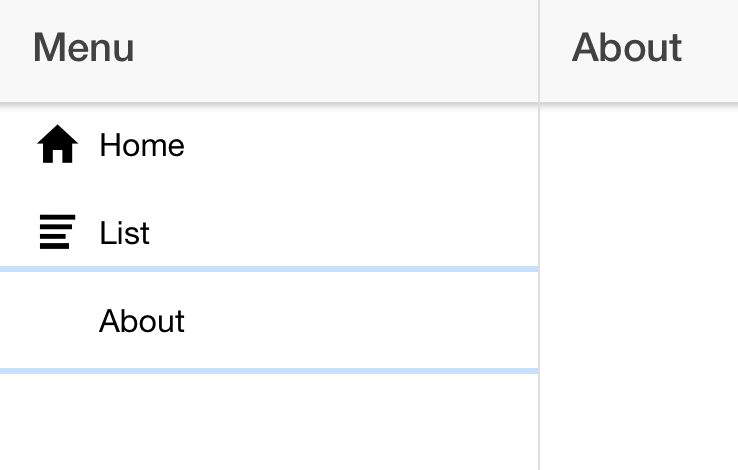
Save the file now, and you will see the sidemenu entry:

Looks great, but… where is the sidemenu?

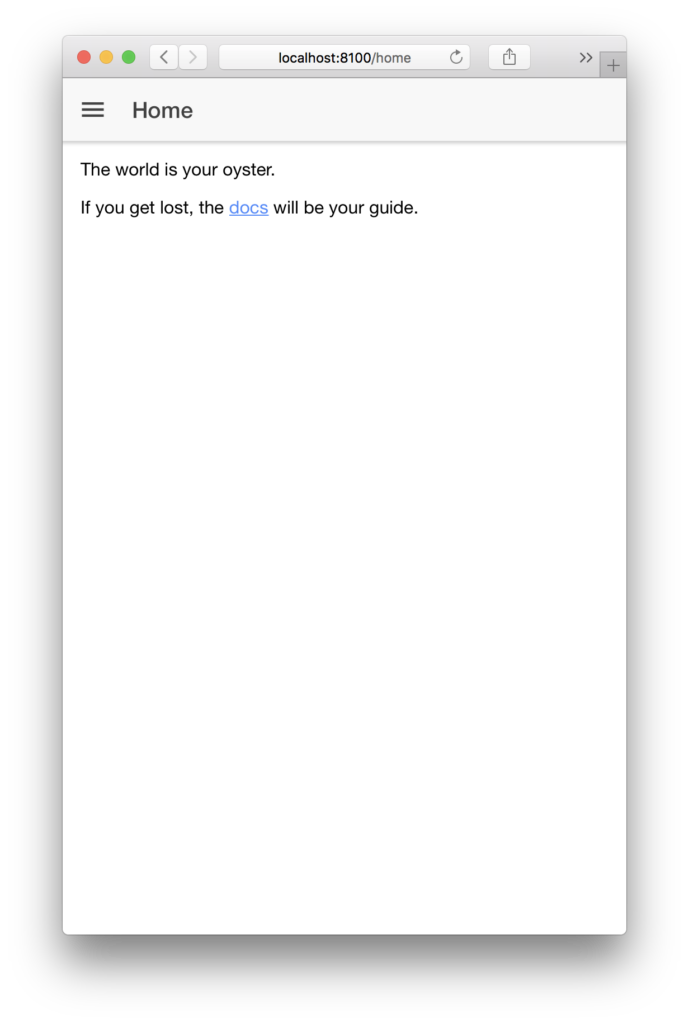
Ok, if you check the home page html code (home.page.html), you will find a button for the side menu

<ion-header>
  <ion-toolbar>
    <ion-buttons slot="start">
      <ion-menu-button></ion-menu-button>
    </ion-buttons>
    <ion-title>Home</ion-title>
  </ion-toolbar>
</ion-header>

Missing in about.page.html:

<ion-header>
  <ion-toolbar>
    <ion-title>About</ion-title>
  </ion-toolbar>
</ion-header>

So, we had to add the desired code snippet

<ion-header>
    <ion-toolbar>
      <ion-buttons slot="start">
        <ion-menu-button></ion-menu-button>
      </ion-buttons>
      <ion-title>About</ion-title>
    </ion-toolbar>
  </ion-header>

Add some Ionic Components

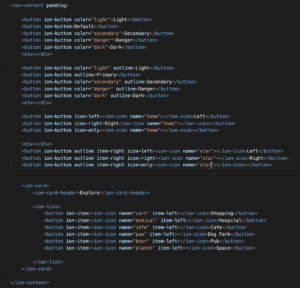
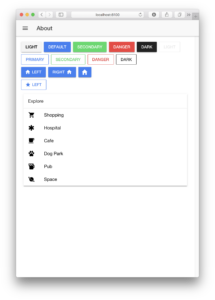
Look at the Ionic Preview App, or read the documentation, if you what to dive in immediately.

Or just copy some code from the documentation page and try by yourself:

bildschirmfoto-2016-11-16-um-19-01-22
bildschirmfoto-2016-11-16-um-18-58-48

We describe the steps to add additional components in detail in this blog.

Directory structure of an application

One possible way to build an app is:

  • create a base app from blank template
  • add desired pages, code and components

To find out the necessary steps to add an new page or component, look into the templates and compare a template with the blank template. the differences are the required steps to an a component.

For example, if you want to add tabs to your app, then compare the blank template with the tabs template:

$ ionic start starter_tabs  tabs  --type angular --no-deps --no-git --no-link
$ ionic start starter_blank blank --type angular --no-deps --no-git --no-link

The diff command shows the changes between the two templates:

$ diff -r -w starter_tabs starter_blank
diff -r -w starter_blank/ionic.config.json starter_tabs/ionic.config.json
2c2
<   "name": "starter_blank",
---
>   "name": "starter_tabs",
diff -r -w starter_blank/package.json starter_tabs/package.json
2c2
<   "name": "starter_blank",
---
>   "name": "starter_tabs",
Only in starter_tabs/src/app: about
diff -r -w starter_blank/src/app/app-routing.module.ts starter_tabs/src/app/app-routing.module.ts
5,6c5
<   { path: '', redirectTo: 'home', pathMatch: 'full' },
<   { path: 'home', loadChildren: './home/home.module#HomePageModule' },
---
>   { path: '', loadChildren: './tabs/tabs.module#TabsPageModule' }
8d6
< 
diff -r -w starter_blank/src/app/app.module.ts starter_tabs/src/app/app.module.ts
3c3
< import { RouterModule, RouteReuseStrategy, Routes } from '@angular/router';
---
> import { RouterModule, RouteReuseStrategy } from '@angular/router';
9d8
< import { AppComponent } from './app.component';
10a10
> import { AppComponent } from './app.component';
Only in starter_tabs/src/app: contact
diff -r -w starter_blank/src/app/home/home.module.ts starter_tabs/src/app/home/home.module.ts
0a1,2
> import { IonicModule } from '@ionic/angular';
> import { RouterModule } from '@angular/router';
3d4
< import { IonicModule } from '@ionic/angular';
5,6d5
< import { RouterModule } from '@angular/router';
< 
10a10
>     IonicModule,
13,19c13
<     IonicModule,
<     RouterModule.forChild([
<       {
<         path: '',
<         component: HomePage
<       }
<     ])
---
>     RouterModule.forChild([{ path: '', component: HomePage }])
diff -r -w starter_blank/src/app/home/home.page.html starter_tabs/src/app/home/home.page.html
3,5c3
<     <ion-title>
<       Ionic Blank
<     </ion-title>
---
>     <ion-title>Home</ion-title>
diff -r -w starter_blank/src/app/home/home.page.spec.ts starter_tabs/src/app/home/home.page.spec.ts
14,15c14
<     })
<       .compileComponents();
---
>     }).compileComponents();
diff -r -w starter_blank/src/app/home/home.page.ts starter_tabs/src/app/home/home.page.ts
6c6
<   styleUrls: ['home.page.scss'],
---
>   styleUrls: ['home.page.scss']
8,10c8
< export class HomePage {
< 
< }
---
> export class HomePage {}
Only in starter_tabs/src/app: tabs

Some differences come from the different names (starter_blank vs. starter_tabs, HomePage vs. TabsPage). The significant changes are those, which are new in the starter_tabs directory.

PostgreSQL | Getting started

Install

PostgreSQL Server

Mac OS

brew install postgres

Windows (Installer)

Windows (Zip-ARchiv)

Download postgresql from https://www.enterprisedb.com/download-postgresql-binaries

Configure

Initialize database:

initdb.exe -D ../data –-username=postgres –-auth=trust

Start the database:

pg_ctl.exe start -D ../data

Log into the database:

psql –-username=postgres

Create a password for your user:

ALTER USER postgres WITH PASSWORD ‘VeryVerySecret’;

Install adminpack extension:

CREATE EXTENSION adminpack;

Manage Users

Preparation

psql postgres

List all Users

postgres=# \du+

Create Superuser

 create role superuser superuser login password 'pAssw8rd';

Change Password

Postgres Utilities

Documentation

Working with