Developer Blog

Tipps und Tricks für Entwickler und IT-Interessierte

Ionic | Cookbook

Routing and Navigation

Basic Angular Router configuration

Create a routing module that is ‘visible’ to all components in your app

With Angular CLI

ng generate module app-routing

With Ionic

ionic start my-app blank --type=angular

Match URL paths to Pages/Components

app-routing.modules.ts

const routes: Routes = [
    { path: '', redirectTo: '/home', pathMatch: 'full' },
    { path: '**', redirectTo: '/home', pathMatch: 'full' },
    { path: 'home',  loadChildren: './home/home.module#HomePageModule'    },
    { path: 'list',  loadChildren: './list/list.module#ListPageModule'    },
    { path: 'about', loadChildren: './about/about.module#AboutPageModule' }
]

Update routing module imports and exports

app-routing.modules.ts

imports { RouterModule, Routes } from '@angular/routes';
@NgModule({
    imports: [RouterModule.forRoot(routes)],
    exports: [RouterModule]
})

Do not forget to import the routing module to you main app module

app.module

import { AppRoutingModule } from './app-routing.module';
imports:[
    AppRoutingModule
]

Add a router-outlet to indicate where the pages will be rendered

app.component.html

<router-outlet></router-outlet>

Basics

src/app/app-routing.module.ts

const routes: Routes = [
   { path: 'hello', component: HelloPage }
];

app.component.html

<router-outlet></router-outlet>
  // Regular Route
  { path: 'eager', component: MyComponent },

  // Lazy Loaded Route (Page)
  { path: 'lazy', loadChildren: './lazy/lazy.module#LazyPageModule' },

    // Redirect
  { path: 'here', redirectTo: 'there', pathMatch: 'full' }
];
<ion-button href="/hello">Hello</ion-button>
<a routerLink="/hello">Hello</a>
<a [routerLink]="['/product',product.id]"></a>

Navigate Programmatically

import { Component } from '@angular/core';
import { Router } from '@angular/router';

@Component({ ... })
export class HomePage {
  constructor(private router: Router) {}

  go() {
    this.router.navigateByUrl('/animals');
  }
}

Navigate to Dynamic URLS

const routes: Routes = [
  // Regular Route
  { path: 'items/:id', component: MyComponent },
];
<ion-button href="/items/abc">ABC</ion-button>
<ion-button href="/items/xyz">XYZ</ion-button>

Passing parameter

Passing parameter with state service

export class ComponentA {
   constructor(private stateService: StateService) {}
   goToComponentB(): void {
        this.stateService.data = {...};
        this.router.navigate(['/b']);
    }
}
export class ComponentB implements OnInit {
    constructor(private stateService: StateService) {}
    ngOnInit(): void {
        this.data = this.stateService.data;
        this.stateService.data = undefined;
    }
}

Passing parameter in link

export class ComponentA {
   constructor(private router: Router) {}
   
   goToComponentB(): void {
      this.router.navigate(['/b'], {state: {data: {...}}});
   }
}
go() {
   this.router.navigate(['../list'], { relativeTo: this.route });
}

Passing parameter in routerlink directive

<a [routerLink]=”/b” [state]=”{ data: {...}}”>Go to B</a>

Extracting the data

The state property was added to Navigation which is available through Router.getCurrentNavigation().extras.state.

Problem is that getCurrentNavigation returns Navigation only during the navigation and returns null after the navigation ended. So the Navigationis no longer available in Component’s B onInit lifecycle hook. We need to read the data from browser’s history object:

history.state.data

Extract Data from Routes with ActivatedRoute

When working with dynamic data, you need to extract the params from the URL.

For example, you might want to read from the database when the user navigates to /items/:id, using the ID from the route to make a query.

Angular has an ActivatedRoute service that allows us to grab information from the current route as a plain object or Observable.

import { Component, OnInit } from '@angular/core';
import { ActivatedRoute } from '@angular/router';

@Component({ ... })
export class ProfileComponent implements OnInit {

  id: string;

  constructor(private route: ActivatedRoute) {}

  ngOnInit() {
    this.id = this.route.snapshot.paramMap.get('id');
  }
}

Or if we need to react to changes, we can subscribe to an Observable.

ngOnInit() {
   this.route.paramMap.subscribe(params => {
      this.products.forEach((p: Product) => {
        if (p.id == params.id) {
          this.product = p;
        }
      });
    });
}
ngOnInit() {
   this.products.forEach((p: Product) => {
      if (p.id == this.route.snapshot.params.id) {
         this.product = p;
      }
   });
}

Migrate from Ionic X to Ionic 4 Routing

Set Root

<ion-button href="/support" routerDirection="root">

or in class

this.navCtrl.navigateRoot('/support');

Push

<ion-button href="/products/12" routerDirection="forward">
this.navCtrl.navigateForward('/products/12');

Pop

<ion-button href="/products" routerDirection="backward">
<ion-back-button defaultHref="/products"></ion-back-button>

Navigate backwards programatically:

this.navCtrl.navigateBack('/products');

Routing in Tabs

{
  path: 'contact',
  outlet: 'modal',
  component: ContactModal
}
http://.../(modal:contact)

Lazy Loading

Code Snippets

// home.module.ts
@NgModule({
  imports: [
    IonicModule,
    RouterModule.forChild([{ path: '', component: HomePage }])
  ],
  declarations: [HomePage]
})
export class HomePageModule {}
// app.module.ts
@NgModule({
  declarations: [AppComponent],
  imports: [
    BrowserModule,
    IonicModule.forRoot(),
    RouterModule.forRoot([
      { path: 'home', loadChildren: './pages/home/home.module#HomePageModule' },
      { path: '', redirectTo: 'home', pathMatch: 'full' }
    ])
  ],
  bootstrap: [AppComponent]
})
export class AppModule {}

Code Snippet

app-routing.module.ts
const routes: Routes = [
  { path: 'about', loadChildren: './about/about.module#AboutPageModule' },
];
about/about.module.ts
const routes: Routes = [
  { path: '', component: AboutPage },
];

Using Guards

@Injectable({
  providedIn: 'root'
})
export class AuthGuard implements CanActivate {
  constructor(private router: Router) {}

  canActivate(
    next: ActivatedRouteSnapshot,
    state: RouterStateSnapshot
  ): boolean {

    const loggedIn = false; // replace with actual user auth checking logic

    if (!loggedIn) {
      this.router.navigate(['/']);
    }

    return loggedIn;
  }
}
const routes: Routes = [
  { path: 'special', component: SpecialPage, canActivate: [AuthGuard] },
];

Troubleshooting of Routing

Enable tracing

 @NgModule({
    imports: [
        RouterModule.forRoot(routes, 
            { enableTracing: true }
        )],
    exports: [RouterModule],
})
export class AppRoutingModule {}

Common Errors and mistakes

Placing global routing patterns at the front ot routing array

const routes: Routes = [
    { path: '', redirectTo: '/home', pathMatch: 'full' },
    { path: '**', redirectTo: '/home', pathMatch: 'full' },
    { path: 'home', component: HomePageComponent },

Finding the right path is a sequential process in search all entries in route[] and select the first with a matting path. So, in our wrong example, every path matches the common pattern ‘**’.

Solution: Put this matting pattenr at the end of the routes[] array

const routes: Routes = [
    { path: '', redirectTo: '/home', pathMatch: 'full' },
    { path: 'home', component: HomePageComponent },
    { path: '**', redirectTo: '/home', pathMatch: 'full' },

Storage

Configuration

import { IonicStorageModule } from '@ionic/storage';

@NgModule({
  declarations: [
    // ...
  ],
  imports: [
    BrowserModule,
    IonicModule.forRoot(MyApp),
    IonicStorageModule.forRoot()
  ],
  bootstrap: [IonicApp],
  entryComponents: [
    // ...
  ],
  providers: [
    // ...
  ]
})
export class AppModule {}
Finally, inject it into any of your components or pages:

import { Storage } from '@ionic/storage';

export class MyApp {
  constructor(private storage: Storage) {
      storage.set('name', 'Max');

      storage.get('age').then((val) => {
          console.log('Your age is',  val);
});
}
}

Code sample

class MyClass {
  constructor(public storage: Storage) {}

  async setData(key, value) {
    const res = await this.storage.set(key, value);
    console.log(res);
  }

  async getData(key) {
    const keyVal = await this.storage.get(key);
    console.log('Key is', keyVal);
  }
}

Storage with Capacitor

import { Plugins } from '@capacitor/core';

const { Storage } = Plugins;

async setObject() {
  await Storage.set({
    key: 'user',
    value: JSON.stringify({
      id: 1,
      name: 'Max'
    })
  });
}

async getObject() {
  const ret = await Storage.get({ key: 'user' });
  const user = JSON.parse(ret.value);
}

async setItem() {
  await Storage.set({
    key: 'name',
    value: 'Max'
  });
}

async getItem() {
  const value = await Storage.get({ key: 'name' });
  console.log('Got item: ', value);
}

async removeItem() {
  await Storage.remove({ key: 'name' });
}

async keys() {
  const keys = await Storage.keys();
  console.log('Got keys: ', keys);
}

async clear() {
  await Storage.clear();
}

Components

Alerts

Code Snippets

showAlert() {
  this.alertCtrl.create({
    message: "Hello There",
    subHeader: "I'm a subheader"
  }).then(alert => alert.present());
}

// Or using async/await

async showAlert() {
  const alert = await this.alertCtrl.create({
    message: "Hello There",
    subHeader: "I'm a subheader"
  });

  await alert.present();
}

Local Notifications

import { Plugins } from '@capacitor/core';
const { LocalNotifications } = Plugins;

LocalNotifications.schedule({
  notifications: [
    {
      title: "Title",
      body: "Body",
      id: 1,
      schedule: { at: new Date(Date.now() + 1000 * 5) },
      sound: null,
      attachments: null,
      actionTypeId: "",
      extra: null
    }
  ]
});

Custom Components

Create custom component

$ ionic generate component components/Sample
> ng generate component components/Sample
CREATE src/app/components/sample/sample.component.scss (0 bytes)
CREATE src/app/components/sample/sample.component.html (25 bytes)
CREATE src/app/components/sample/sample.component.spec.ts (628 bytes)
CREATE src/app/components/sample/sample.component.ts (270 bytes)
UPDATE src/app/components/components.module.ts (621 bytes)
[OK] Generated component!
$ ionic generate module components/Components --flat
> ng generate module components/Components --flat
CREATE src/app/components/components.module.ts (194 bytes)
[OK] Generated module!

Modify selector for component in app/components/sample/sample.component.ts

@Component({
    selector: 'c-sample',
    templateUrl: './c-sample.component.html',
    styleUrls: [ './c-sample.component.scss' ]
})

Rename files for component

cd src/app/components/sample
mv sample.component.html c-sample.component.scss
mv sample.component.html c-sample.component.html
mv sample.component.html c-sample.component.spec.ts
mv sample.component.html c-sample.component.ts

Export created component in app/components/components.module.ts

import { NgModule } from '@angular/core';
import { CommonModule } from '@angular/common';
import { IonicModule } from '@ionic/angular';

import { SampleComponent } from './sample/sample.component';

@NgModule({
    imports: [ CommonModule, IonicModule.forRoot(), ],
    declarations: [ SampleComponent ],
    exports: [ SampleComponent ],
    entryComponents: [],
})
export class ComponentsModule { }

Add page to display the component

$ ionic generate page pages/Sample
> ng generate page pages/Sample
CREATE src/app/pages/sample/sample.module.ts (543 bytes)
CREATE src/app/pages/sample/sample.page.scss (0 bytes)
CREATE src/app/pages/sample/sample.page.html (133 bytes)
CREATE src/app/pages/sample/sample.page.spec.ts (691 bytes)
CREATE src/app/pages/sample/sample.page.ts (256 bytes)
UPDATE src/app/app-routing.module.ts (539 bytes)
[OK] Generated page!

Add custom component to new page sample.page.html

<ion-content padding>
    <c-sample></c-sample>
</ion-content>

Register components module in sample.module.ts

import { NgModule, CUSTOM_ELEMENTS_SCHEMA } from '@angular/core';
import { CommonModule } from '@angular/common';
import { FormsModule } from '@angular/forms';
import { Routes, RouterModule } from '@angular/router';
import { IonicModule } from '@ionic/angular';

import { ComponentsModule } from 'src/app/components/components.module';
import { SamplePage } from './sample.page';

const routes: Routes = [ { path: '', component: SamplePage } ];

@NgModule({
    declarations: [SamplePage],
    imports: [
        CommonModule,  IonicModule,
        RouterModule.forChild(routes),
        ComponentsModule
    ],
    schemas: [CUSTOM_ELEMENTS_SCHEMA]
})
export class SamplePageModule {}

Check Routing in app-routing.modules.ts

const routes: Routes = [
  { path: '', redirectTo: 'home', pathMatch: 'full' },
  { path: 'home',   loadChildren: './pages/home/home.module#HomePageModule' },
  { path: 'list',   loadChildren: './pages/list/list.module#ListPageModule' },
  { path: 'sample', loadChildren: './pages/sample/sample.module#SamplePageModule' }
];

Add new page to sidemenu in app.components.ts

  public appPages = [
    { title: 'Home', url: '/home', icon: 'home' },
    { title: 'List', url: '/list', icon: 'list' },
    { title: 'Sample Component', url: '/sample', icon: 'list' }
  ];

Directives

Pipes

HTML Elements

Access HTML Element from Page Class

<div #box></div>
@ViewChild('box', {static: false}) el_box:ElementRef;
box: any;

constructor() {
    this.box = this.el_box.nativeElement;
}

Grabbing Ionic Components with ViewChild

Let’s imagine we have a HomePage component that looks like this and we want to close the menu when an item is clicked.

<ion-menu>
</ion-menu>

Our goal is to access the ion-menu from the TypeScript code so we can call its API methods, like open() and close().

import { Component, ViewChild } from '@angular/core';
import { Menu } from '@ionic/angular';

@Component(...)
export class HomePage {

  @ViewChild(Menu, {static: false})) menu: Menu;

  onDrag() {
    this.menu.close();
  }
}

Explanation:

{ static: false }

If you set static false, the component ALWAYS gets initialized after the view initialization in time for the ngAfterViewInit/ngAfterContentInit callback functions.

{ static: true}

If you set static true, the initialization will take place at the view initialization at ngOnInit

Shortcut: Use Template Variables

There’s actually a very convenient shortcut to using ViewChild in a component. We never have to leave the HTML by setting a template variable in Angular. In this example we reference the menu component with a hashtag and variable name #mymenu.

<ion-menu #mymenu>
  <ion-item (click)="mymenu.close()"></ion-item>

Grabbing Multiple Components with ViewChildren

You might also run into a situation where there are multiple components of the same type on the page, such as multiple FABs:

<ion-fab></ion-fab>
<ion-fab></ion-fab>
<ion-fab></ion-fab>

ViewChildren is almost the same, but it will grab all elements that match this component and return them as an Array.

import { Component, ViewChildren } from '@angular/core';
import { Fab } from '@ionic/angular';

@Component(...)
export class HomePage {

  @ViewChildren(Fab, {static: false})) fabs: Fab[];


  closeFirst() {
    this.fabs[0].close();
  }
}

Now that you know about ViewChild, you should have no problem accessing the API methods found on Ionic’s web components.

Loops in HTML Elements

<ul>
   <li *ngFor="let number of [0,1,2,3,4]">
      {{number}}
   </li>
</ul>
<ul>
  <li *ngFor='#key of [1,2]'>
    {{key}}
  </li>
</ul>
<ul>
  <li *ngFor='#val of "0123".split("")'>{{val}}</li>
</ul>
<ul>
  <li *ngFor='#val of counter(5) ;#i= index'>{{i}}</li>
</ul>

export class AppComponent {
  demoNumber = 5 ;

  counter = Array;

  numberReturn(length){
    return new Array(length);
  }
}

Display Array

<ion-grid class="board">
  <ion-row *ngFor="let r of [0,1,2]">
    <ion-col col-4 class="cell" *ngFor="let c of [0,1,2]" (click)="handle(c+r*3)">
            {{squares[c+r*3]}}
    </ion-col>
  </ion-row>
</ion-grid>

Add function to Button click

<ion-item (click)="onClick($event)">
onClick(ev: any){
	this.log('onClick', 'event=' + ev);
}

Change CSS class on click

Add handler to html element

<a class="btn" (click)='toggleClass($event)'>
    <ion-icon class="icon" name="bluetooth"></ion-icon>
</a>

Import Render2 in page.ts

import { Component, OnInit, Renderer2 } from '@angular/core';
...

constructor(private renderer: Renderer2) { }

Write handler to toggle class

toggleClass(event: any) {
    const classname = 'active';

    if (event.target.classList.contains(classname)) {
        this.renderer.removeClass(event.target, classname);
    } else {
        this.renderer.addClass(event.target, classname);
    }
}

Migrating to Ionic 4

Replace Http Module with HttpClient

Changes in app.module.ts

import { HttpClientModule } from '@angular/common/http';
@NgModule({
    declarations: [AppComponent],
    entryComponents: [],
    imports: [
        ...
        HttpClientModule
        ...
    ],

Changes in service.ts

import { Http } from '@angular/http';
import { HttpClient } from '@angular/common/http';
constructor(public http: Http) { }
constructor(public httpClient: HttpClient) { }

Troubleshooting

ERROR: Unexpected end of JSON input while parsing near

npm cache clean --force
npm install -g @angular/cli

Ionic | Advanced Know-How

Working on Android

Start emulator

$ emulator -list-avds
6
6_x86_64
7
$ emulator @6

Show logfile messages

$ adb logcat

Run on Device

$ adb uninstall io.ionic.conference
$ ionic run android

Working on iOS

List available devices

$ ios-sim showdevicetypes

Run on Emulator

$ ionic emulate ios --target="iPhone-6, 10.1"

Run on Device

Ionic | Create a simple Calculator

Sources for this tutorial are here.

Preparation

Clone the example

git clone https://github.com/ionic4-toolbox/App-Calculator.git

Starting from new

Before starting, make sure that you are using the current ionic version.If you are new to ionic , then look here for an installation guide.

npm -g install ionic@latest

Create App

ionic start Calculator sidemenu --type angular --no-link --no-git
cd Calculator

Add a new page for our calculator

ionic generate page Calculator

Add new page to sidemenu

Add link to page in app.components.ts file

  public appPages = [
    { title: 'Home', url: '/home', icon: 'home' },
    { title: 'List', url: '/list', icon: 'list' },
    { title: 'Calculator', url: '/calculator', icon: 'grid'
    }
  ];

Add calculation logic to typescript file

4public appPages = [
    { title: 'Home', url: '/home', icon: 'home' },
    { title: 'List', url: '/list', icon: 'list' },
    { title: 'Calculator', url: '/calculator', icon: 'grid' }
];

Add html layout

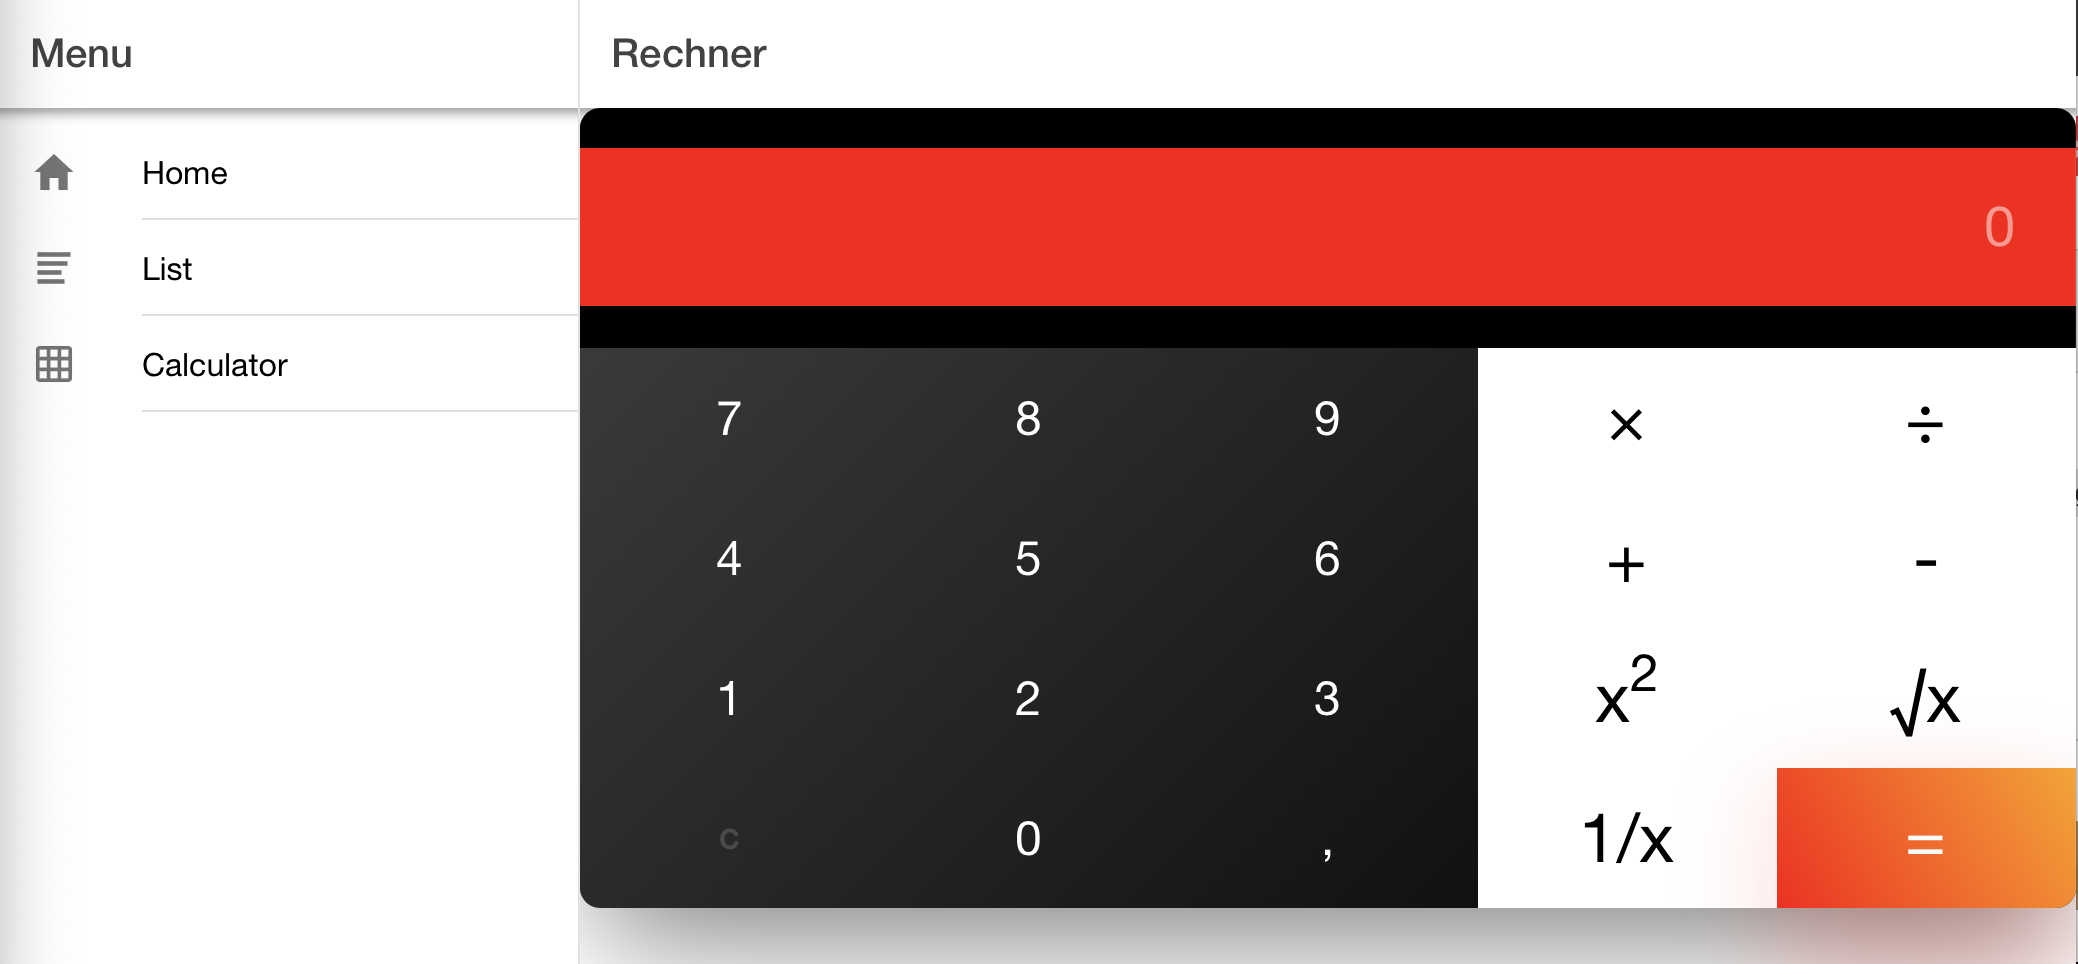
The layout of our page consists of a header row containing the result and 4 rows containing the buttons of our calculator.

Header
Row 1
Row 2
Row 3

Each row for our keys is build with 5 columns.

Header
Row1, Col1Row1, Col2Row1, Col3Row1, Col4Row1, Col5
Row2, Col1Row2, Col2Row2, Col3Row2, Col4Row2, Col5
Row3, Col1Row3, Col2Row3, Col3Row3, Col4Row3, Col5
Row4, Col1Row4, Col2Row4, Col3Row4, Col4Row4, Col5

Add within the table cells, we place our buttons

Header
789×÷
456+
123x2√x
C0,1/x=

We implement our layout with div’s instead of a html table.

So every row is a

<div class="row">
...
</div>

And within the row we define our buttons also as divs

<div class="number">
   <span (click)="btnClicked('4')">4</span>
   <span (click)="btnClicked('5')">5</span>
   <span (click)="btnClicked('6')">6</span>
</div>
<div class="symbol"><span (click)="btnClicked('+')">+</span></div>
<div class="symbol"><span (click)="btnClicked('-')">-</span></div>

The final html layout looks like this:

<ion-header>
  <ion-toolbar>
    <ion-buttons slot="start">
      <ion-menu-button></ion-menu-button>
    </ion-buttons>
    <ion-title>Rechner</ion-title>
  </ion-toolbar>
</ion-header>
<ion-content>
  <div class="calculator">
    <div class="header">
      <div class="window"></div>
      <div class="input"><span>
          <ion-input type="text" placeholder="0" name="display"
                     [(ngModel)]="result">
          </ion-input>
        </span></div>
    </div>
    <div class="keys">
      <div class="row">
        <div class="number">
          <span (click)="btnClicked('7')">7</span>
          <span (click)="btnClicked('8')">8</span>
          <span (click)="btnClicked('9')">9</span>
        </div>
        <div class="symbol"><span (click)="btnClicked('*')">×</span></div>
        <div class="symbol"><span (click)="btnClicked('/')">÷</span></div>
      </div>
      <div class="row">
        <div class="number">
          <span (click)="btnClicked('4')">4</span>
          <span (click)="btnClicked('5')">5</span>
          <span (click)="btnClicked('6')">6</span>
        </div>
        <div class="symbol"><span (click)="btnClicked('+')">+</span></div>
        <div class="symbol"><span (click)="btnClicked('-')">-</span></div>
      </div>
      <div class="row">
        <div class="number">
          <span (click)="btnClicked('1')">1</span>
          <span (click)="btnClicked('2')">2</span>
          <span (click)="btnClicked('3')">3</span>
        </div>
        <div class="symbol">
          <span (click)="btnClicked('square')">x<sup>2</sup></span>
        </div>
        <div class="symbol">
          <span (click)="btnClicked('squareroot')">√x</span>
        </div>
      </div>
      <div class="row">
        <div class="number">
          <span class=dull (click)="btnClicked('C')">C</span>
          <span (click)="btnClicked('0')">0</span>
          <span (click)="btnClicked(',')">,</span>
        </div>
        <div class="symbol">
          <span (click)="btnClicked('reciproc')">1/x</span>
        </div>
        <div class="symbol action">
          <span (click)="btnClicked('=')">=</span>
        </div>
      </div>
    </div>
  </div>
</ion-content>

Add css definitions

html,
body {
    width: 100%;
    height: 100%;
    margin: 0;
    padding: 0;
    font-family: "Trebuchet MS", Helvetica, sans-serif;
    font-size: 28px;
}
body {
    display: flex;
    justify-content: center;
    align-items: center;
    background-color: #f5f5f5;
}
.calculator {
    margin: 20px;
    widows: 100px;
    border-radius: 10px;
    box-shadow: 0 25px 60px -10px rgba(0, 0, 0, 0.5);
    .header {
        background-color: #000;
        height: 120px;
        border-radius: 10px 10px 0 0;
        .window {
            height: 15px;
            display: flex;
            justify-content: flex-start;
            padding: 10px;
            span {
                width: 10px;
                height: 10px;
                border-radius: 50%;
                margin-right: 5px;
                cursor: pointer;
                &.red {
                    background-color: #ff5252;
                }
                &.yellow {
                    background-color: #f5a623;
                }
                &.green {
                    background-color: #73c21d;
                }
            }
        }
        .input {
            background-color: #ff0300;
            color: #ffffff;
            padding: 10px 30px;
            font-size: 28px;
            span {
                text-align: right;
                color: #ffffff;
            }
        }
    }
    .keys {
        background: linear-gradient(135deg, #3a3a3a, #000000);
        height: 280px;
        border-radius: 0 0 10px 10px;
        font-size: 24px;
        .row {
            height: 70px;
            display: flex;
            flex-direction: row;
            .number {
                width: 75%;
                display: flex;
                color: #ffffff;
                span {
                    width: calc(100%/3);
                    height: 70px;
                    text-align: center;
                    display: flex;
                    justify-content: center;
                    align-items: center;
                    user-select: none;
                    cursor: pointer;
                }
            }
            .symbol {
                width: 25%;
                background-color: #ffffff;
                font-size: 34px;
                span {
                    width: 100%;
                    height: 70px;
                    text-align: center;
                    display: flex;
                    justify-content: center;
                    align-items: center;
                    user-select: none;
                    cursor: pointer;
                }
                &.action {
                    background: linear-gradient(60deg, #ff0300, #ffa100);
                    border-radius: 0 0 10px 0;
                    color: #ffffff;
                    box-shadow: 0 25px 60px -10px rgba(255, 10, 0, 0.5);
                }
            }
        }
    }
}
.dull {
    font-size: 14px;
    font-weight: bold;
    color: #4a4a4a;
}

Add javascript code for page

import { Component, OnInit } from '@angular/core';
@Component({
	selector: 'app-calculator1',
	templateUrl: './calculator.page.html',
	styleUrls: ['./calculator.page.scss'],
})
export class CalculatorPage implements OnInit {
	result = "";
	constructor() { }
	ngOnInit() {
	}
	btnClicked(btn) {
		console.log('CalculatorPage::btnClicked = ' + btn);
		if (btn == "C") {
			this.result = "";
		} else if (btn == "=") {
			this.result = eval(this.result);
		} else if (btn == "squareroot") {
			this.result = Math.sqrt(eval(this.result)) + "";
		} else if (btn == "square") {
			this.result = eval("(" + this.result + ") * ( " + this.result + ")");
		} else if (btn == "reciproc") {
			this.result = eval(1 + "/ (" + this.result + ")");
		} else {
			this.result += btn;
		}
	}
}

The final result

Installation on Unix

Prepare environment

Install nvm and Node

Change to users home and create users’s profile .bash_profile (if not exist)

cd $HOME
touch .bash_profile

Download nvm install script and run it. The installation script also modifies the users’s profile .bash_profile

curl -o- https://raw.githubusercontent.com/creationix/nvm/v0.33.11/install.sh | bash

Run users’s profile, so nvm will be installed. This ist done automatically after login.

. .bash_profile

Install latest Node LTS version

# install latest version
nvm install node --reinstall-packages-from=node

# install a specific version
npm -install 8.12.0

# set nvm aliases (used in direnv configuration)
nvm alias latest 8.12.0
nvm alias default 8.12.0

# install additional packages
npm -g install ionic@latest
npm -g install capacitor@latest

Create Ionic sample Apps

mkdir -p daten
cd daten
ionic start tabs tabs --type angular —-no-link
ionic start sidemen sidemenu --type angular —-no-link

Install direnv

Installation on mac OS. For more  information read here

brew install direnv

Installation on Linux

sudo apt-get update  <br>
sudo apt-get install direnv 

Configfile for direnv

#!/bin/bash

#-------------------------------------------------------------------------------

	SELF=$BASH_ARGV
	HERE="$(cd $(dirname "$SELF"); pwd)"
	SELF="$(basename "$SELF")"

#-------------------------------------------------------------------------------
PRINT()
{
	GRP="$1"; shift
	CMD="$1"; shift
	PAR="$*"

        printf 
}

#-------------------------------------------------------------------------------
	PRINT "config" "$HERE" "$SELF"

	PYTHON_VERSION=2.7.14
	NODE_VERSION=latest

	export NVM_DIR="$HERE/.env/nvm"

	PRINT "setup" "nvm" "$NVM_DIR"
	. /usr/local/opt/nvm/nvm.sh

	PRINT "set latest" "nvm" "$NODE_VERSION"
        nvm use $NODE_VERSION --silent

	PRINT "set latest" "pyenv" "$PYTHON_VERSION"
	pyenv local $PYTHON_VERSION 2>&-

	PRINT "Enabled" "nvm"      "$(nvm      --version)"
	PRINT "Enabled" "node"     "$(node     --version | sed '1,$s/v//g')"
	PRINT "Enabled" "npm"      "$(npm      --version)"
	PRINT "Enabled" "python"   "$(python   --version 2>&1)"
	PRINT "Enabled" "python2"  "$(python2  --version 2>&1)"

.bashrc

# setup direnv
eval "$(direnv hook bash)"

Ionic | App from Scratch – Adding Content

In this blog, we will discus the steps to add additional content (pages, components) to your existing app. We will start with the App From Scratch we create here.

Preparation

Configure Visual Studio Code

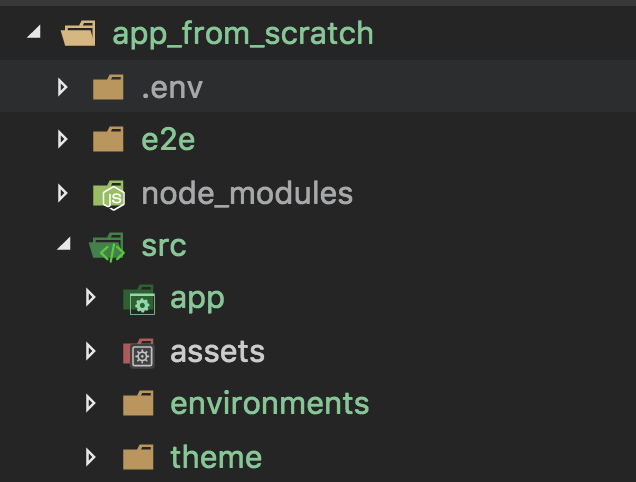
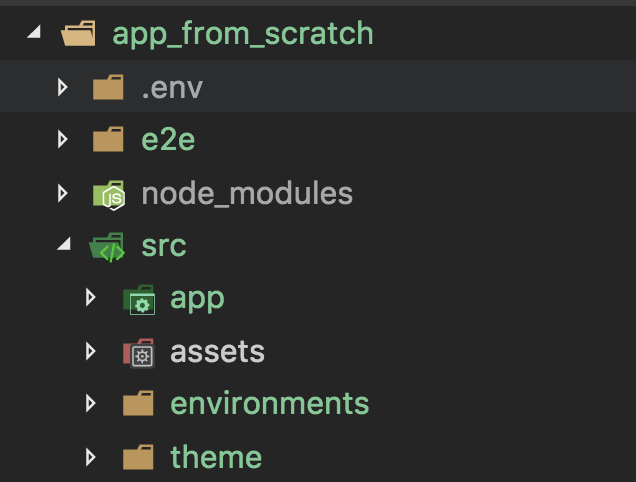
First, we will configure Visual Studio Code to show only the desired folders for this tutorial.

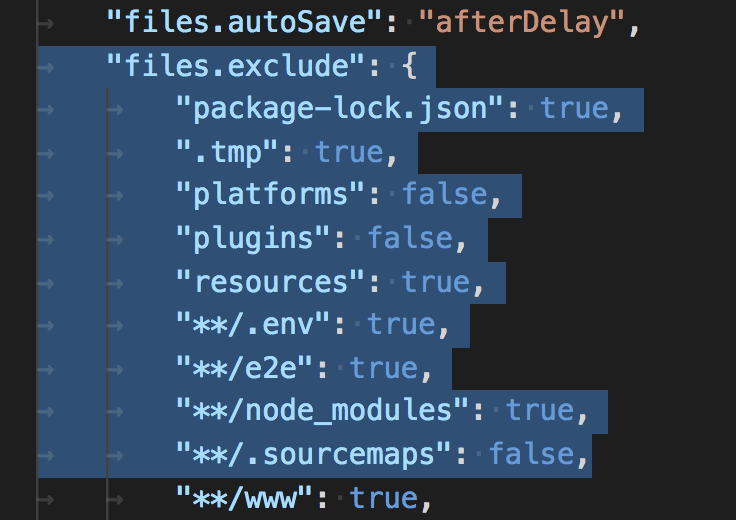
We will hide the folders node_modules, e2e and .env

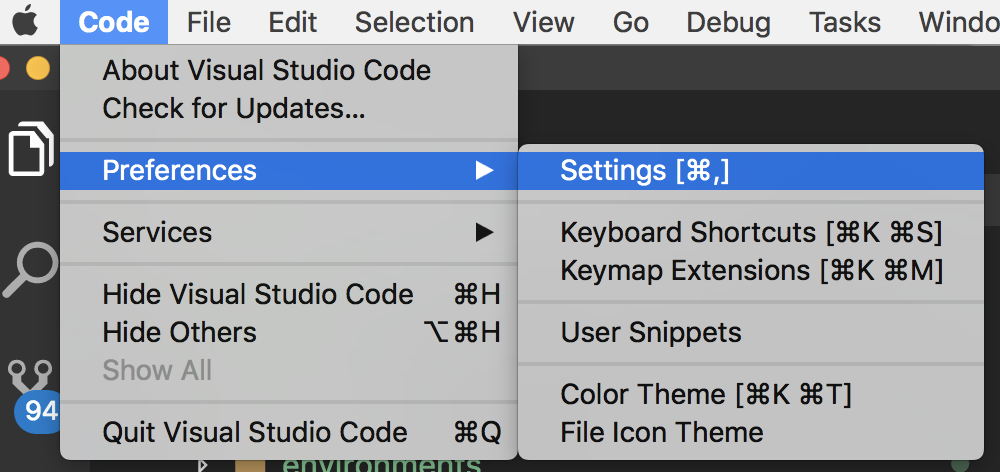
To do this, select Code / Prefecences / Settings

Visual Studio Code will open the settings in a editor window. You will see the default user settings on the left, and the current user settings on the right.

Look for the lines unter “files.exclude” and add or edit the desired content.

Setting to true means exclude (remember the title of the group: files.exclude)

Open required windows

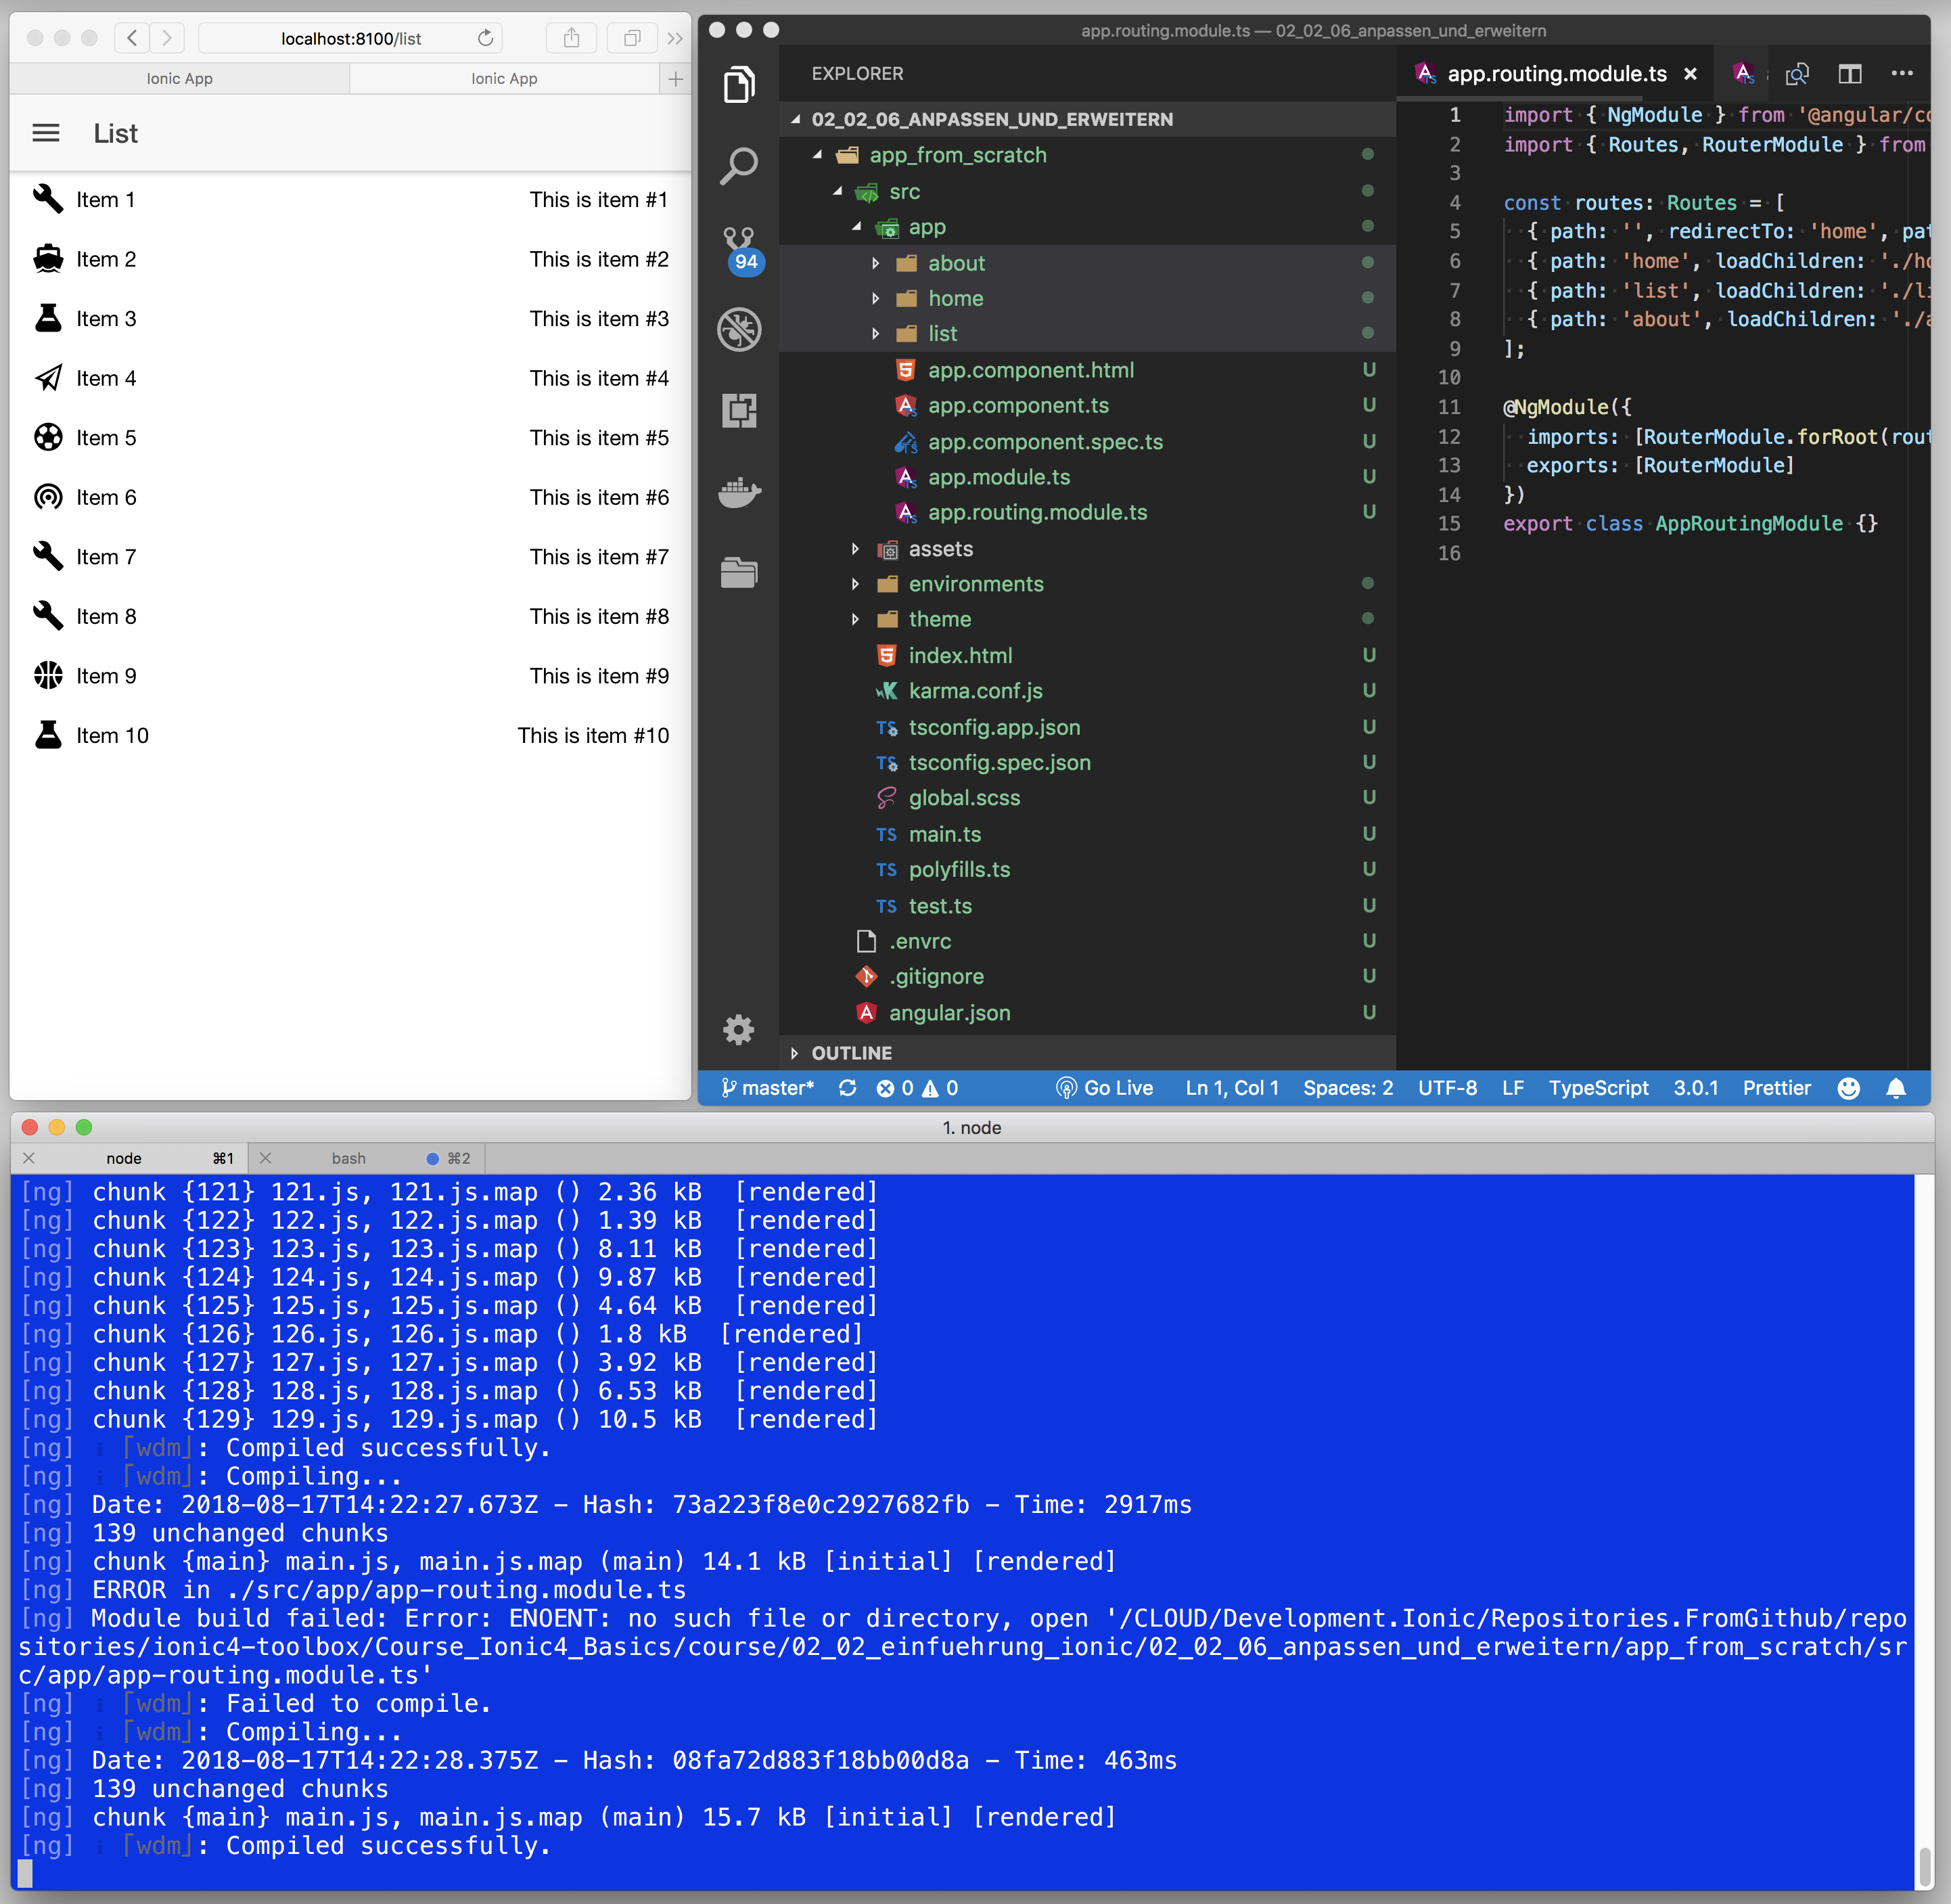
As we add some content, we want to see immediately the results.

So,  i opened three windows

  • Visual Studio Code
  • Browser Windows
  • Console, where we start the ionic server

Change directory structure

Now we can start: Lets add some pages we will use to contain Ionic Components (Buttons, Text, Switches, Lists, Grids, …)

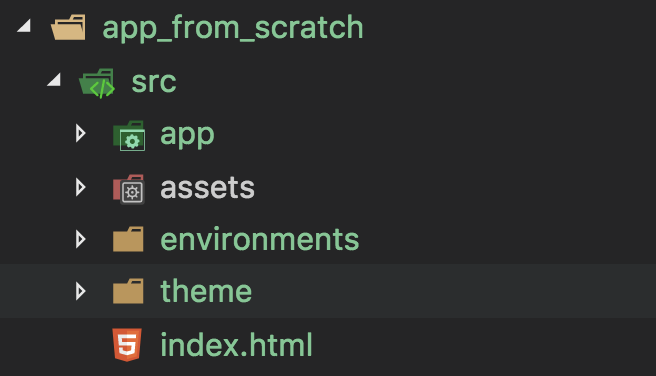
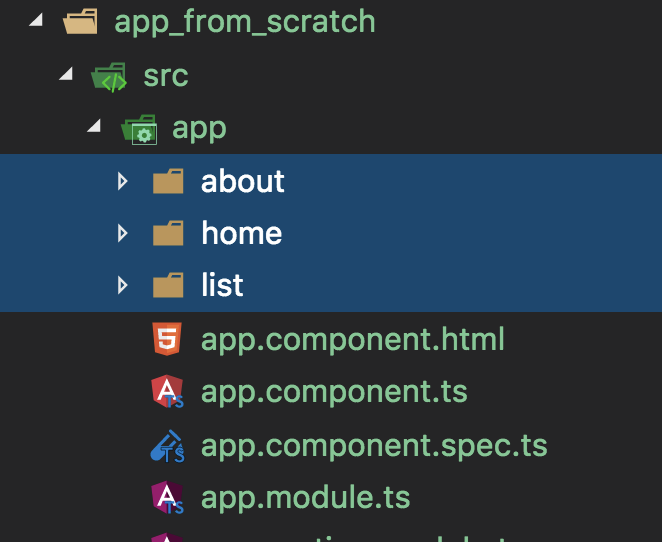
Out app have 3 pages. You will find them in them explorer window

First, i want to change the directory structure.

For each component type, we will add, i want to a a separate folder.

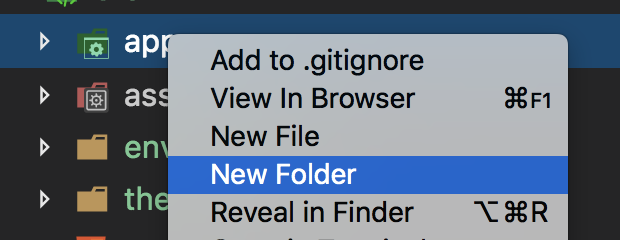
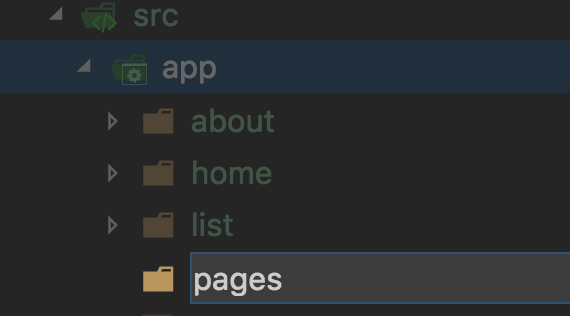
So, first: create a folder pages for our pages

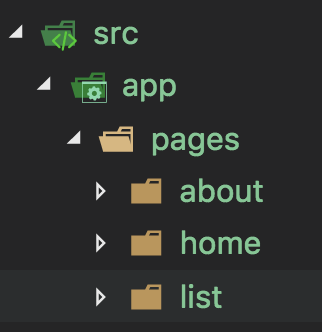
Next, move the pages folders home, list and about into the newly create folder

After that, go into the console, stop the running ionic serve command and restart it to force a new compilation of our app

$ ionic serve
> ng run app:serve --host=0.0.0.0 --port=8100

In the console window, we will see an error

[ng] ERROR in Could not resolve module ./home/home.module relative to .../app_from_scratch/src/app/app-routing.module.ts

This is, because we changes the directory path of the pages. We had to adjust the new path in out app: in app-routing.module.ts

const routes: Routes = [
  { path: '', redirectTo: 'home', pathMatch: 'full' },
  { path: 'home', loadChildren: './pages/home/home.module#HomePageModule' },
  { path: 'list', loadChildren: './pages/list/list.module#ListPageModule' },
  { path: 'about', loadChildren: './pages/about/about.module#AboutPageModule' }
];

Add page: ActionSheet

Ionic offers a huge amount of amazing components. So, we will demonstrate the use of this components step by step. We will take the inspiration from here.

Starting with Action Sheets.

  • Documentation is here
ionic generate page ActionSheet
> ng generate page ActionSheet
CREATE src/app/action-sheet/action-sheet.module.ts (569 bytes)
CREATE src/app/action-sheet/action-sheet.page.scss (0 bytes)
CREATE src/app/action-sheet/action-sheet.page.html (138 bytes)
CREATE src/app/action-sheet/action-sheet.page.spec.ts (727 bytes)
CREATE src/app/action-sheet/action-sheet.page.ts (279 bytes)
UPDATE src/app/app-routing.module.ts (736 bytes)
[OK] Generated page!

To add the new page to the sidemenu, change the AppPages array in app.component.ts

public appPages = [
  { title: 'Home', url: '/home', icon: 'home' },
  { title: 'List', url: '/list', icon: 'list' },
  { title: 'About', url: '/about', icon: '' },
  { title: 'ActionSheet', url: '/ActionSheet', icon: 'list' }
];

Notice the different spelling of the url (different case of letters). Whatever spelling you choose, it has to fit to the path value in the app-routing.module.ts

Next, move the page to the pages folder and change the path in app-routing.modules.ts

Add the sidemenu button to the actionSheet Page (in action-sheet.page.html)

<ion-header>
  <ion-toolbar>
    <ion-buttons slot="start">
      <ion-menu-button></ion-menu-button>
    </ion-buttons>
    <ion-title>ActionSheet</ion-title>
  </ion-toolbar>
</ion-header>

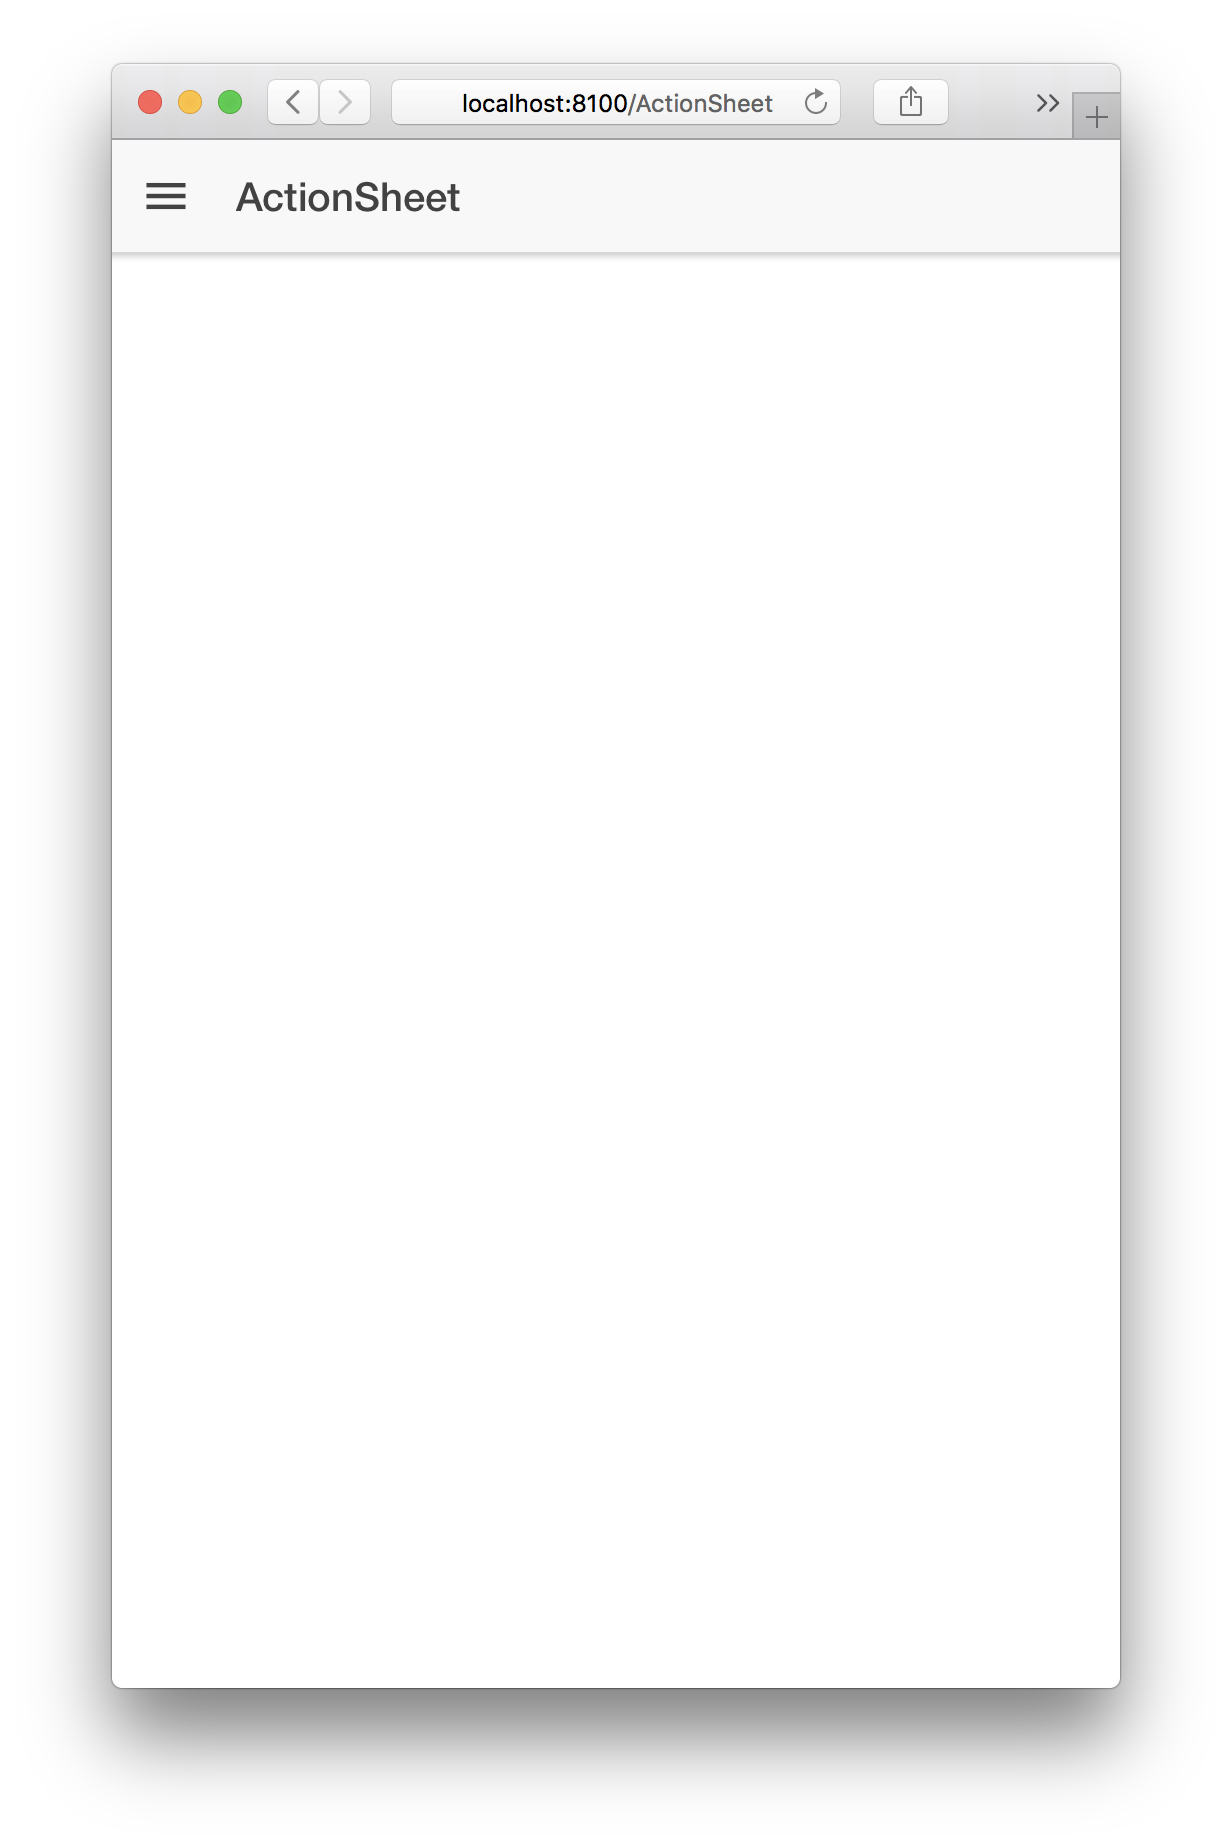
Ok, well done

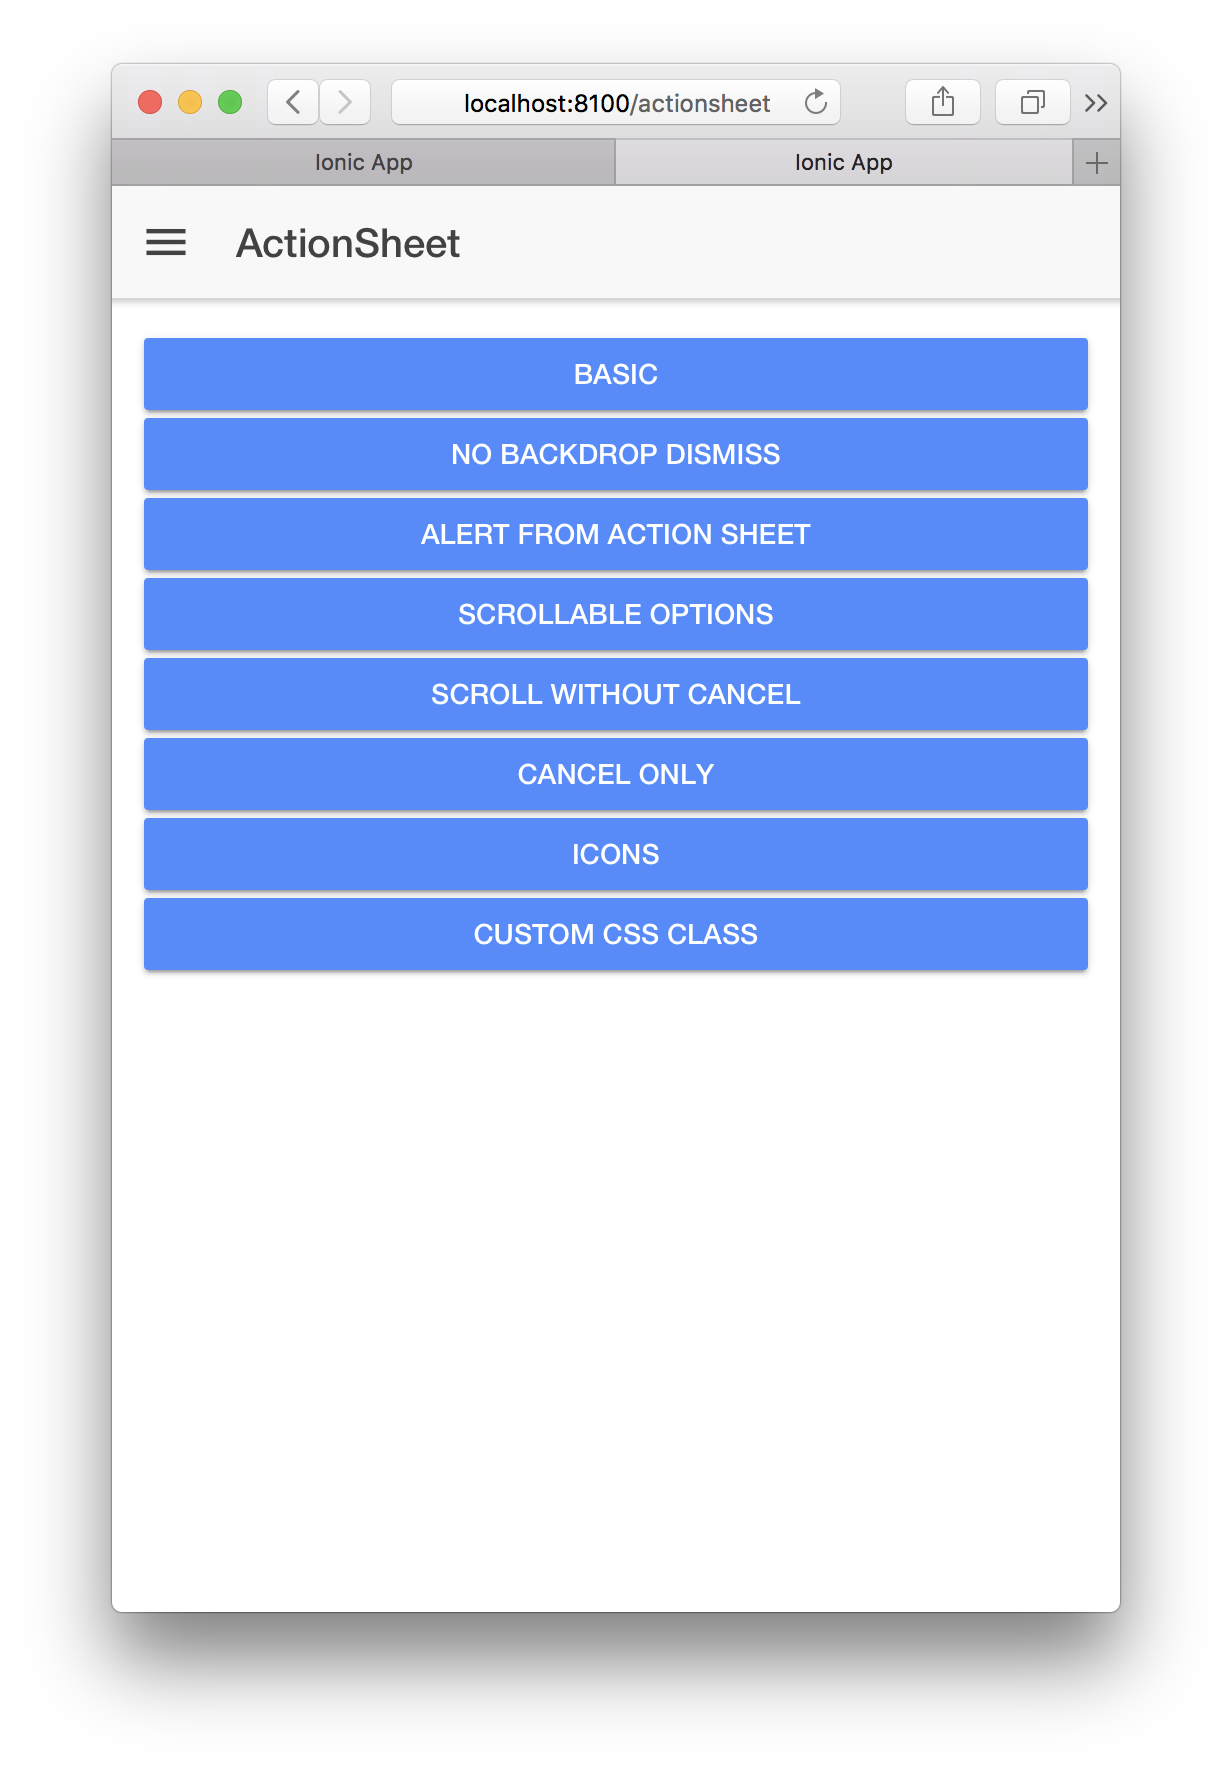
Next, add a button and the code for displaying the action sheet. The source is here.

Change your html page: action-sheet.page.html

<ion-header>
  <ion-toolbar>
    <ion-buttons slot="start">
      <ion-menu-button></ion-menu-button>
    </ion-buttons>
    <ion-title>ActionSheet</ion-title>
  </ion-toolbar>
</ion-header>

<ion-content padding fullscreen>
  <ion-button expand="block" id="basic" (click)="presentBasic()">Basic</ion-button>
  <ion-button expand="block" id="noBackdropDismiss" (click)="presentNoBackdropDismiss()">No Backdrop Dismiss</ion-button>
  <ion-button expand="block" id="alertFromActionSheet" (click)="presentAlert()">Alert from Action Sheet</ion-button>
  <ion-button expand="block" id="scrollableOptions" (click)="presentScroll()">Scrollable Options</ion-button>
  <ion-button expand="block" id="scrollWithoutCancel" (click)="presentScrollNoCancel()">Scroll Without Cancel</ion-button>
  <ion-button expand="block" id="cancelOnly" (click)="presentCancelOnly()">Cancel Only</ion-button>
  <ion-button expand="block" id="icons" (click)="presentIcons()">Icons</ion-button>
  <ion-button expand="block" id="cssClass" (click)="presentWithCssClass()">Custom CSS Class</ion-button>
</ion-content>

Change your Style: action-sheet.page-scss

app-action-sheet {
}

Change the Code: action-sheet.page.ts. Source is here

import { Component, OnInit } from "@angular/core";
import { Platform, ActionSheetController } from "@ionic/angular";

@Component({
  selector: "app-action-sheet",
  templateUrl: "./action-sheet.page.html",
  styleUrls: ["./action-sheet.page.scss"]
})
export class ActionSheetPage implements OnInit {
  constructor(
    public platform: Platform,
    public actionSheetController: ActionSheetController
  ) {}

  ngOnInit() {}


  public changeColor(ev) {

  }

  async presentActionSheet() {
    const actionSheet = await this.actionSheetController.create({
      header: "Albums",
      buttons: [{
        text: 'Delete',
        role: 'destructive',
        icon: 'trash',
        handler: () => {
          console.log('Delete clicked');
        }
      }, {
        text: 'Share',
        icon: 'share',
        handler: () => {
          console.log('Share clicked');
        }
      }, {
        text: 'Play (open modal)',
        icon: 'arrow-dropright-circle',
        handler: () => {
          console.log('Play clicked');
        }
      }, {
        text: 'Favorite',
        icon: 'heart',
        handler: () => {
          console.log('Favorite clicked');
        }
      }, {
        text: 'Cancel',
        icon: 'close',
        role: 'cancel',
        handler: () => {
          console.log('Cancel clicked');
        }
      }]
    });
    await actionSheet.present();
  }

  async presentBasic() {
    console.log('ActionSheetPage:presentBasic');

    const actionSheet = await this.actionSheetController.create({
      header: "Albums",
      buttons: [{
        text: 'Delete',
        role: 'destructive',
        icon: 'trash',
        handler: () => {
          console.log('Delete clicked');
        }
      }, {
        text: 'Share',
        icon: 'share',
        handler: () => {
          console.log('Share clicked');
        }
      }, {
        text: 'Play (open modal)',
        icon: 'arrow-dropright-circle',
        handler: () => {
          console.log('Play clicked');
        }
      }, {
        text: 'Favorite',
        icon: 'heart',
        handler: () => {
          console.log('Favorite clicked');
        }
      }, {
        text: 'Cancel',
        icon: 'close',
        role: 'cancel',
        handler: () => {
          console.log('Cancel clicked');
        }
      }]
    });
    await actionSheet.present();
  }
  
  async presentIcons() {
    const actionSheetController = document.querySelector('ion-action-sheet-controller');
    await actionSheetController.componentOnReady();
    const actionSheetElement = await actionSheetController.create({
      header: "Albums",
      buttons: [{
        text: 'Delete',
        role: 'destructive',
        icon: 'trash',
        handler: () => {
          console.log('Delete clicked');
        }
      }, {
        text: 'Share',
        icon: 'share',
        handler: () => {
          console.log('Share clicked');
        }
      }, {
        text: 'Play (open modal)',
        icon: 'arrow-dropright-circle',
        handler: () => {
          console.log('Play clicked');
        }
      }, {
        text: 'Favorite',
        icon: 'heart',
        role: 'selected',
        handler: () => {
          console.log('Favorite clicked');
        }
      }, {
        text: 'Cancel',
        role: 'cancel',
        icon: 'close',
        handler: () => {
          console.log('Cancel clicked');
        }
      }]
    })
    await actionSheetElement.present();
  }
  
  async presentNoBackdropDismiss() {
    const actionSheetController = document.querySelector('ion-action-sheet-controller');
    await actionSheetController.componentOnReady();
    const actionSheetElement = await actionSheetController.create({
      backdropDismiss: false,
      buttons: [{
        text: 'Archive',
        handler: () => {
          console.log('Archive clicked');
        }
      }, {
        text: 'Destructive',
        role: 'destructive',
        handler: () => {
          console.log('Destructive clicked');
        }
      }, {
        text: 'Cancel',
        role: 'cancel',
        handler: () => {
          console.log('Cancel clicked');
        }
      }]
    });
    await actionSheetElement.present();
  }
  
  async presentAlert() {
    const actionSheetController = document.querySelector('ion-action-sheet-controller');
    await actionSheetController.componentOnReady();
    const actionSheetElement = await actionSheetController.create({
      buttons: [{
        text: 'Open Alert',
        handler: () => {
          console.log('Open Alert clicked');
        }
      }, {
        text: 'Cancel',
        role: 'cancel',
        handler: () => {
          console.log('Cancel clicked');
        }
      }]
    });
    await actionSheetElement.present();
  }
  
  async presentScroll() {
    const actionSheetController = document.querySelector('ion-action-sheet-controller');
    await actionSheetController.componentOnReady();
    const actionSheetElement = await actionSheetController.create({
      buttons: [
        {
          text: 'Add Reaction',
          handler: () => {
            console.log('Add Reaction clicked');
          }
        }, {
          text: 'Copy Text',
          handler: () => {
            console.log('Copy Text clicked');
          }
        }, {
          text: 'Share Text',
          handler: () => {
            console.log('Share Text clicked');
          }
        }, {
          text: 'Copy Link to Message',
          handler: () => {
            console.log('Copy Link to Message clicked');
          }
        }, {
          text: 'Remind Me',
          handler: () => {
            console.log('Remind Me clicked');
          }
        }, {
          text: 'Pin File',
          handler: () => {
            console.log('Pin File clicked');
          }
        }, {
          text: 'Star File',
          handler: () => {
            console.log('Star File clicked');
          }
        }, {
          text: 'Mark Unread',
          handler: () => {
            console.log('Mark Unread clicked');
          }
        }, {
          text: 'Edit Title',
          handler: () => {
            console.log('Edit Title clicked');
          }
        }, {
          text: 'Save Image',
          handler: () => {
            console.log('Save Image clicked');
          }
        }, {
          text: 'Copy Image',
          handler: () => {
            console.log('Copy Image clicked');
          }
        }, {
          text: 'Delete File',
          role: 'destructive',
          handler: () => {
            console.log('Delete File clicked');
          }
        }, {
          text: 'Cancel',
          role: 'cancel', // will always sort to be on the bottom
          handler: () => {
            console.log('Cancel clicked');
          }
        }
      ]
    });
    await actionSheetElement.present();
  }
  
  async presentScrollNoCancel() {
    const actionSheetController = document.querySelector('ion-action-sheet-controller');
    await actionSheetController.componentOnReady();
    const actionSheetElement = await actionSheetController.create({
      buttons: [
        {
          text: 'Add Reaction',
          handler: () => {
            console.log('Add Reaction clicked');
          }
        }, {
          text: 'Copy Text',
          handler: () => {
            console.log('Copy Text clicked');
          }
        }, {
          text: 'Share Text',
          handler: () => {
            console.log('Share Text clicked');
          }
        }, {
          text: 'Copy Link to Message',
          handler: () => {
            console.log('Copy Link to Message clicked');
          }
        }, {
          text: 'Remind Me',
          handler: () => {
            console.log('Remind Me clicked');
          }
        }, {
          text: 'Pin File',
          handler: () => {
            console.log('Pin File clicked');
          }
        }, {
          text: 'Star File',
          handler: () => {
            console.log('Star File clicked');
          }
        }, {
          text: 'Mark Unread',
          handler: () => {
            console.log('Mark Unread clicked');
          }
        }, {
          text: 'Edit Title',
          handler: () => {
            console.log('Edit Title clicked');
          }
        }, {
          text: 'Save Image',
          handler: () => {
            console.log('Save Image clicked');
          }
        }, {
          text: 'Copy Image',
          handler: () => {
            console.log('Copy Image clicked');
          }
        }, {
          text: 'Delete File',
          role: 'destructive',
          handler: () => {
            console.log('Delete File clicked');
          }
        }
      ]
    });
    await actionSheetElement.present();
  }
  
  async presentCancelOnly() {
    const actionSheetController = document.querySelector('ion-action-sheet-controller');
    await actionSheetController.componentOnReady();
    const actionSheetElement = await actionSheetController.create({
      buttons: [
        {
          text: 'Cancel',
          role: 'cancel', // will always sort to be on the bottom
          handler: () => {
            console.log('Cancel clicked');
          }
        }
      ]
    });
    await actionSheetElement.present();
  }
  
  async presentWithCssClass() {
    const actionSheetController = document.querySelector('ion-action-sheet-controller');
    await actionSheetController.componentOnReady();
    const actionSheetElement = await actionSheetController.create({
      header: "Custom Css Class",
      cssClass: "my-class my-custom-class",
      buttons: [
        {
          text: 'Test',
          role: 'test',
          cssClass: 'my-cancel-button my-custom-button customClass',
          handler: () => {
            console.log('Cancel clicked');
          }
        }
      ]
    });
    await actionSheetElement.present();
  }
}

Done. Now look at the result

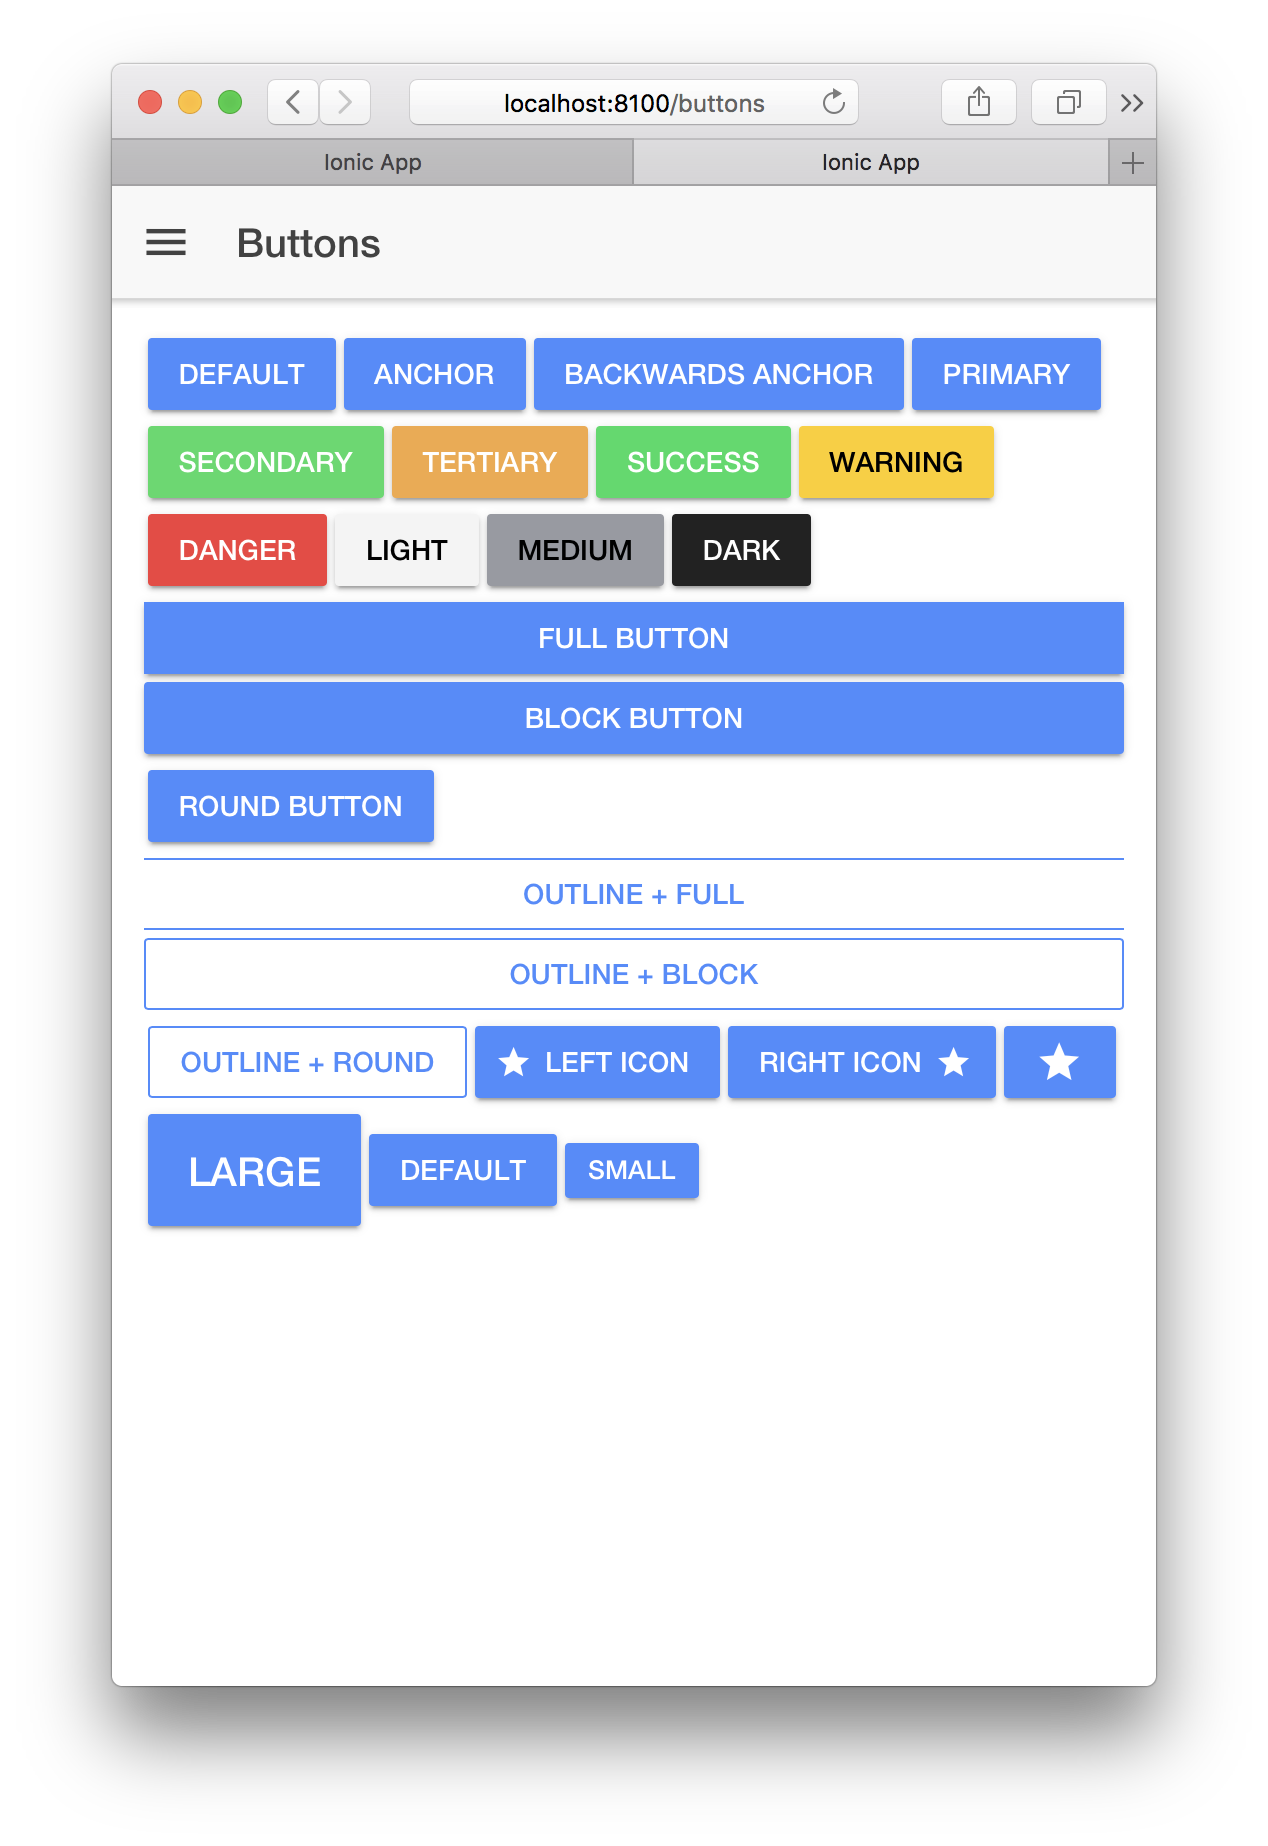
Add page: Buttons

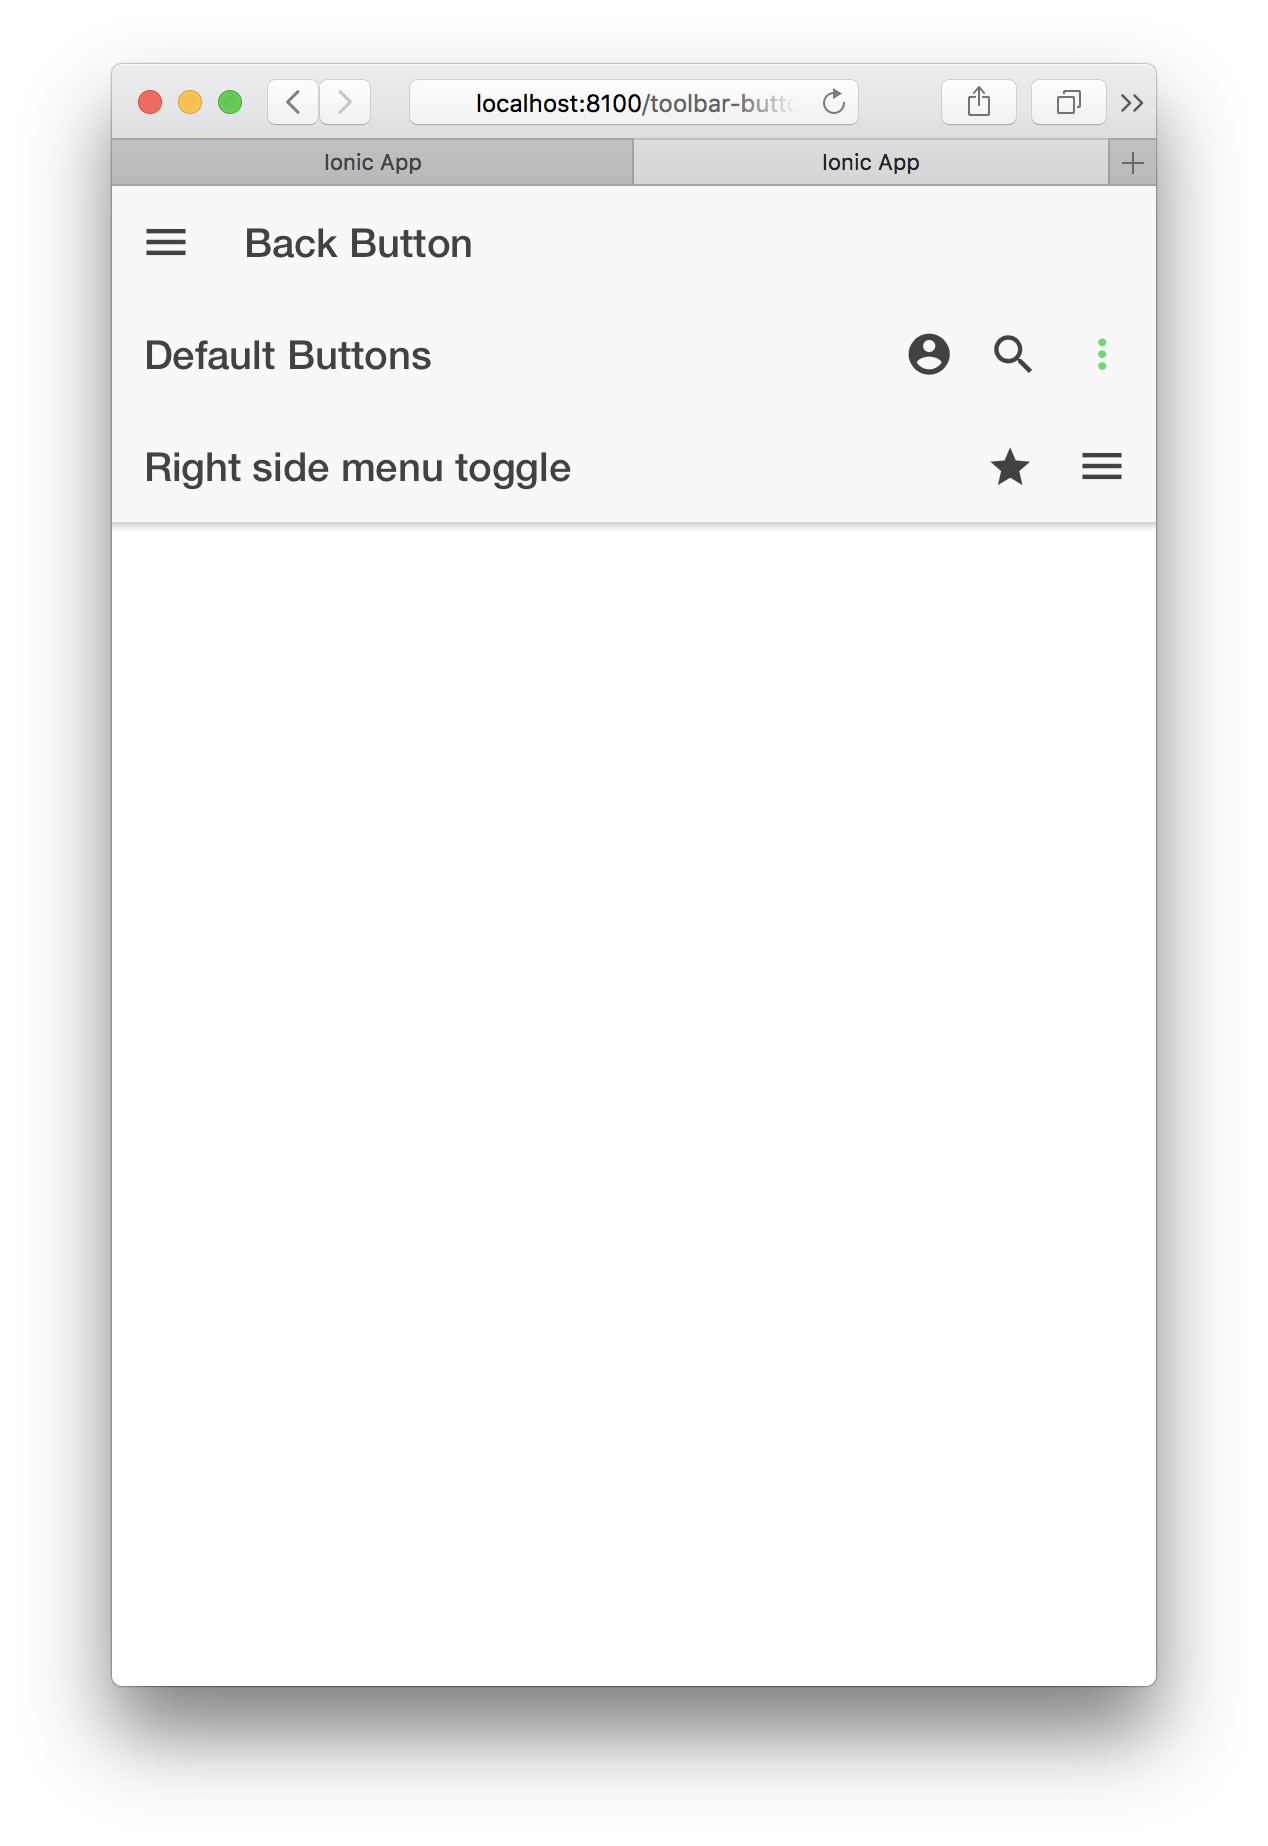
Add page: Toolbar Buttons

Migration

Vorbereitung / Installation

Hier findet ihr die genaue Beschreibung

npm i -D @ionic/v4-migration-tslint
npm i codelyzer

Erstellen einer JSON Datei ionic-migration.json

{
  "rulesDirectory": [
    "@ionic/v4-migration-tslint/rules"
  ],
  "rules": {
    "ion-action-sheet-method-create-parameters-renamed": true,
    "ion-alert-method-create-parameters-renamed": true,
    "ion-datetime-capitalization-changed": true,
    "ion-item-option-method-get-sliding-percent-renamed": true,
    "ion-back-button-not-added-by-default": { "options": [true], "severity": "warning" },
    "ion-button-attributes-renamed": true,
    "ion-button-is-now-an-element": true,
    "ion-chip-markup-has-changed": true,
    "ion-fab-button-is-now-an-element": true,
    "ion-fab-attributes-renamed": true,
    "ion-fab-fixed-content": true,
    "ion-col-attributes-renamed": true,
    "ion-icon-attribute-is-active-removed": true,
    "ion-item-is-now-an-element": true,
    "ion-item-ion-label-required": true,
    "ion-item-attributes-renamed": true,
    "ion-item-divider-ion-label-required": true,
    "ion-item-options-attribute-values-renamed": true,
    "ion-item-option-is-now-an-element": true,
    "ion-label-attributes-renamed": true,
    "ion-list-header-ion-label-required": true,
    "ion-menu-toggle-is-now-an-element": true,
    "ion-navbar-is-now-ion-toolbar": true,
    "ion-option-is-now-ion-select-option": true,
    "ion-radio-attributes-renamed": true,
    "ion-radio-slot-required": true,
    "ion-radio-group-is-now-an-element": true,
    "ion-range-attributes-renamed": true,
    "ion-spinner-attribute-values-renamed": true,
    "ion-tab-attributes-renamed": true,
    "ion-text-is-now-an-element": true,
    "ion-buttons-attributes-renamed": true
  }
}

Migration durchführen

npx tslint -c ionic-migration.json -p tsconfig.json

Ionic | App from Scratch – Two Sidemenus

Prepare your starter App

ionic start App sidemenu --type angular --no-git

Change into the newly create folder and start the Ionic App

cd App
ionic serve

You will see the default Ionic Sidemenu App

The entries of the sSidemenu are defined in app.components.ts:

export class AppComponent {
	public appPages = [
		{ title: 'Home', url: '/home', icon: 'home' },
		{ title: 'List', url: '/list', icon: 'list' }
	];

The sidemenu itself and his apperance are defined in app.component.html:

<ion-app>
  <ion-split-pane contentId="main-content">
    <ion-menu contentId="main-content" type="overlay">
      <ion-header>
        <ion-toolbar>
          <ion-title>Menu</ion-title>
        </ion-toolbar>
      </ion-header>
      <ion-content>
        <ion-list>
          <ion-menu-toggle auto-hide="false" *ngFor="let p of appPages">
            <ion-item [routerDirection]="'root'" [routerLink]="[p.url]">
              <ion-icon slot="start" [name]="p.icon"></ion-icon>
              <ion-label>{{p.title}}</ion-label>
            </ion-item>
          </ion-menu-toggle>
        </ion-list>
      </ion-content>
    </ion-menu>
    <ion-router-outlet id="main-content"></ion-router-outlet>
  </ion-split-pane>
</ion-app>

The Sidemenu entries and the Icon are added in line 13 and 14 to the sidemenu.

Define two sidemenus in app.html

<ion-menu [content]="contentLeft"> ....</ion-menu>
<ion-menu side="right" [content]="contentRight">....</ion-menu>
 ....

<ion-nav [root]="rootPage" #contentLeft #contentRight swipeBackEnabled="false"></ion-nav>

Add buttons to page

<ion-header>
   <ion-navbar>
      <button ion-button start menuToggle>
         <ion-icon name="menu"></ion-icon>
      </button>
      <ion-title>Demo of two Sidemenus</ion-title>
      <button ion-button end menuToggle="right">
         <ion-iconname="menu"></ion-icon>
      </button>
   </ion-navbar>
</ion-header>
<ion-content padding>
</ion-content>
Result
Github Repository

You can find the code here

Ionic | App from Scratch

Prepare Environment

Install Node.JS

$ LATEST=18.16.0 
$ nvm install $LATEST --latest-npm node --version  
$ npm --version 
$ nvm alias latest $LATEST
$ nvm alias default $LATEST 

Install Ionic

$ npm -g install ionic@latest
$ ionic -version

Create an app from Template

ionic start --list
ionic start sidemenu sidemenu
ionic start super super

Introduction: First App

Prepare the base Application

Create basic structure from template

$ ionic start app_from_scratch sidemenu --type angular
$ cd app_from_scratch

Some name changing

To keep the structure of the filenames the same, i like to change the name for the routing module (changing the dash to a dot)

from

app-routing.module.ts

to

app-routing.module.ts

Show base app

$ ionic serve -c
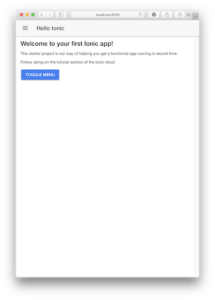
bildschirmfoto-2016-11-16-um-18-04-31

Add a page

Create a new page with the name “About”

$ ionic generate page About

Add import to app.components.ts

  public appPages = [
    { title: 'Home', url: '/home', icon: 'home' },
    { title: 'List', url: '/list', icon: 'list' },
    { title: 'About', url: '/about', icon: '' }
  ];

Add item to app-routing.module.ts

const routes: Routes = [
  { path: '', redirectTo: 'home', pathMatch: 'full' },
  { path: 'home', loadChildren: './home/home.module#HomePageModule' },
  { path: 'list', loadChildren: './list/list.module#ListPageModule' },
  { path: 'about', loadChildren: './about/about.module#AboutPageModule' }
];

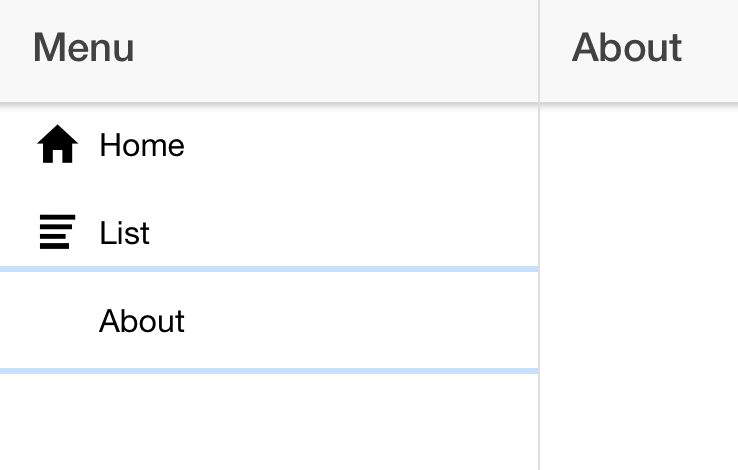
Save the file now, and you will see the sidemenu entry:

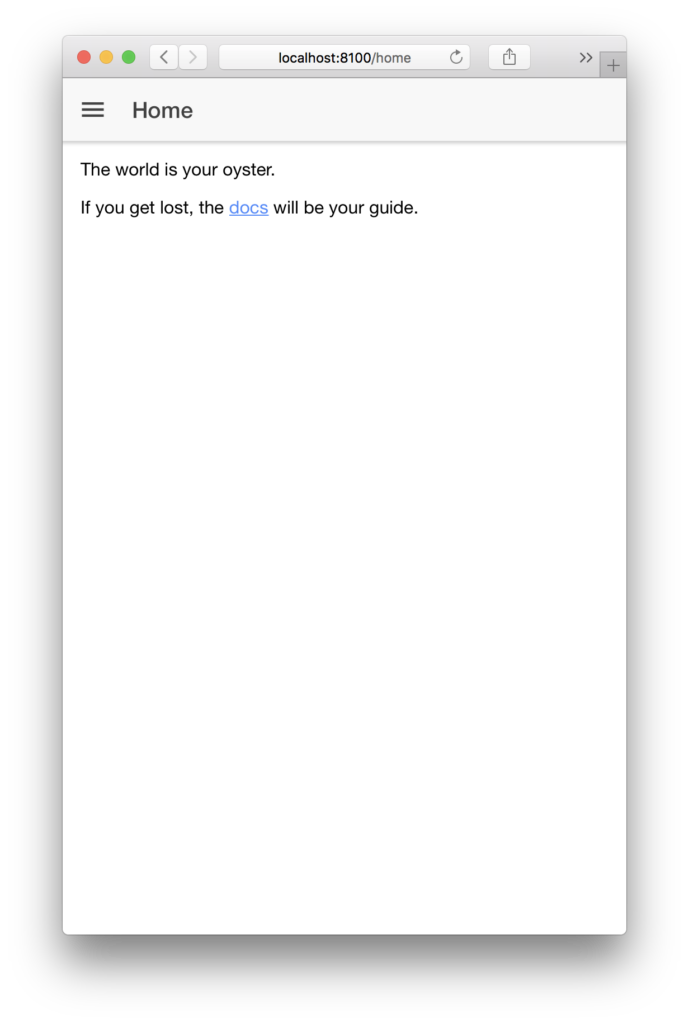
Looks great, but… where is the sidemenu?

Ok, if you check the home page html code (home.page.html), you will find a button for the side menu

<ion-header>
  <ion-toolbar>
    <ion-buttons slot="start">
      <ion-menu-button></ion-menu-button>
    </ion-buttons>
    <ion-title>Home</ion-title>
  </ion-toolbar>
</ion-header>

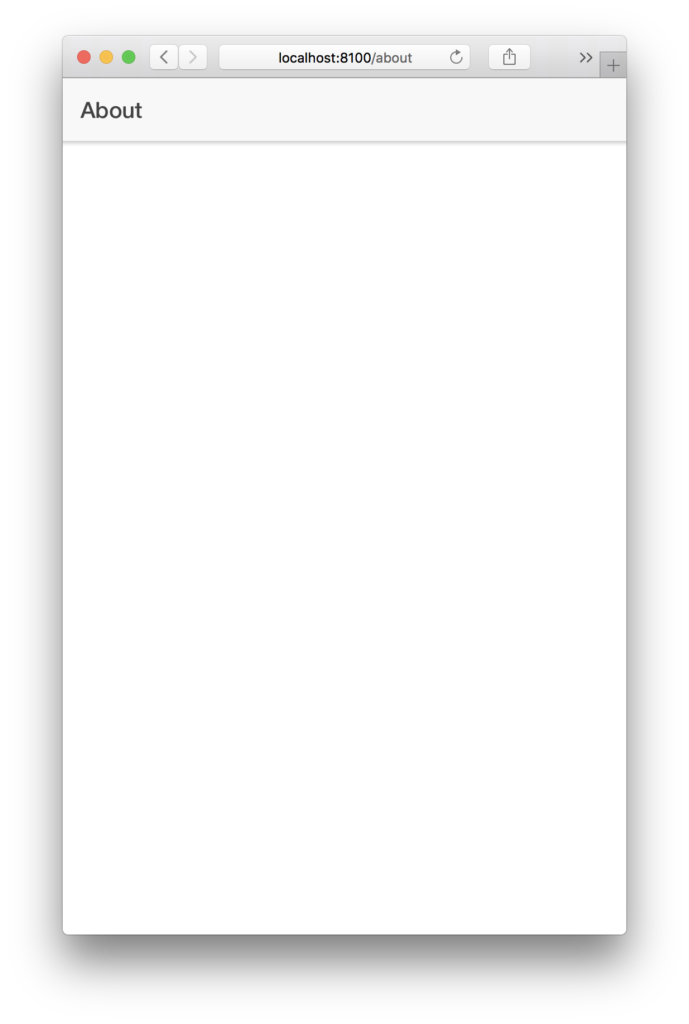
Missing in about.page.html:

<ion-header>
  <ion-toolbar>
    <ion-title>About</ion-title>
  </ion-toolbar>
</ion-header>

So, we had to add the desired code snippet

<ion-header>
    <ion-toolbar>
      <ion-buttons slot="start">
        <ion-menu-button></ion-menu-button>
      </ion-buttons>
      <ion-title>About</ion-title>
    </ion-toolbar>
  </ion-header>

Add some Ionic Components

Look at the Ionic Preview App, or read the documentation, if you what to dive in immediately.

Or just copy some code from the documentation page and try by yourself:

bildschirmfoto-2016-11-16-um-19-01-22
bildschirmfoto-2016-11-16-um-18-58-48

We describe the steps to add additional components in detail in this blog.

Directory structure of an application

One possible way to build an app is:

  • create a base app from blank template
  • add desired pages, code and components

To find out the necessary steps to add an new page or component, look into the templates and compare a template with the blank template. the differences are the required steps to an a component.

For example, if you want to add tabs to your app, then compare the blank template with the tabs template:

$ ionic start starter_tabs  tabs  --type angular --no-deps --no-git --no-link
$ ionic start starter_blank blank --type angular --no-deps --no-git --no-link

The diff command shows the changes between the two templates:

$ diff -r -w starter_tabs starter_blank
diff -r -w starter_blank/ionic.config.json starter_tabs/ionic.config.json
2c2
<   "name": "starter_blank",
---
>   "name": "starter_tabs",
diff -r -w starter_blank/package.json starter_tabs/package.json
2c2
<   "name": "starter_blank",
---
>   "name": "starter_tabs",
Only in starter_tabs/src/app: about
diff -r -w starter_blank/src/app/app-routing.module.ts starter_tabs/src/app/app-routing.module.ts
5,6c5
<   { path: '', redirectTo: 'home', pathMatch: 'full' },
<   { path: 'home', loadChildren: './home/home.module#HomePageModule' },
---
>   { path: '', loadChildren: './tabs/tabs.module#TabsPageModule' }
8d6
< 
diff -r -w starter_blank/src/app/app.module.ts starter_tabs/src/app/app.module.ts
3c3
< import { RouterModule, RouteReuseStrategy, Routes } from '@angular/router';
---
> import { RouterModule, RouteReuseStrategy } from '@angular/router';
9d8
< import { AppComponent } from './app.component';
10a10
> import { AppComponent } from './app.component';
Only in starter_tabs/src/app: contact
diff -r -w starter_blank/src/app/home/home.module.ts starter_tabs/src/app/home/home.module.ts
0a1,2
> import { IonicModule } from '@ionic/angular';
> import { RouterModule } from '@angular/router';
3d4
< import { IonicModule } from '@ionic/angular';
5,6d5
< import { RouterModule } from '@angular/router';
< 
10a10
>     IonicModule,
13,19c13
<     IonicModule,
<     RouterModule.forChild([
<       {
<         path: '',
<         component: HomePage
<       }
<     ])
---
>     RouterModule.forChild([{ path: '', component: HomePage }])
diff -r -w starter_blank/src/app/home/home.page.html starter_tabs/src/app/home/home.page.html
3,5c3
<     <ion-title>
<       Ionic Blank
<     </ion-title>
---
>     <ion-title>Home</ion-title>
diff -r -w starter_blank/src/app/home/home.page.spec.ts starter_tabs/src/app/home/home.page.spec.ts
14,15c14
<     })
<       .compileComponents();
---
>     }).compileComponents();
diff -r -w starter_blank/src/app/home/home.page.ts starter_tabs/src/app/home/home.page.ts
6c6
<   styleUrls: ['home.page.scss'],
---
>   styleUrls: ['home.page.scss']
8,10c8
< export class HomePage {
< 
< }
---
> export class HomePage {}
Only in starter_tabs/src/app: tabs

Some differences come from the different names (starter_blank vs. starter_tabs, HomePage vs. TabsPage). The significant changes are those, which are new in the starter_tabs directory.