Laravel | Tipps und Tricks | Bootstrap verwenden

Inhaltsverzeichnis

Create and Prepare your Laravel Project

Create Laravel App

Installing a fresh Laravel project by running the following steps:

Create a new applaravel new --stack livewire --jet --teams app
In the file .env and change DB Connection to sqliteDB_CONNECTION=sqlite
Create an empty file database/database.sqlite
Start DB Migrationphp artisan migrate
Start Laravelphp artisan serve

Create Page for Bootstrap Demo

Create a file resources/views/using-bootstrap.blade.php with the following content:

<!DOCTYPE html>
<html lang="{{ str_replace('_', '-', app()->getLocale()) }}">

<head>
    <meta charset="utf-8">
    <meta name="viewport" content="width=device-width, initial-scale=1">

    <title>Laravel: Using Bootstrap from Local</title>
</head>

<body class="antialiased">
   <main>
      <div class="container py-4">
         <header class="pb-3 mb-4 border-bottom">
            <a href="/" 
               class="d-flex align-items-center text-dark text-decoration-none">
               <title>Bootstrap</title>
               <span class="fs-4">Bootstrap example</span>
            </a>
         </header>

         <div class="p-5 mb-4 bg-light rounded-3">
            <div class="container-fluid py-5">
               <h1 class="display-5 fw-bold">
                  Using Bootstrap in Laravel Projects
               </h1>
               <p class="col-md-8 fs-4">
                  It's very easy to add the Bootstrap Framework 
                  to your Laravel Project.
               </p>
               <button class="btn btn-primary btn-lg" type="button">
                  See how...
               </button>
            </div>
         </div>
      </div>
   </main>
</body>
</html>

Add the link /using-bootstrap to your App by adding this to route/web.php

Route::get('/', function () {
    return view('welcome');
});

Route::get('/using-bootstrap', function () {
    return view('using-bootstrap');
});

If you open http://127.0.0.1:8000/using-bootstrap in the Browser, you the demo page but with no bootstrap styling.

Adding Bootstrap to your Project

You have three possibilities to add Bootstrap into your Larval Project

Methode 1: Adding Bootstrap by a Link to CDN

Using CDN (Content delivery network) is quite easy and simple for beginners. CDN is a network of servers providing the source files for almost every library used in front-end development.

We need the references for bootstrap.min.css and bootstrap.bundle.min.js

You add Bootstrap by inserting the following code snippets in your main Laravel Page.

We will use the file resources/views/using-bootstrap.blade.php

<link            
    href="https://cdn.jsdelivr.net/npm/bootstrap@5.1.3/dist/css/bootstrap.min.css"
    rel="stylesheet"
    integrity="sha384-1BmE4kWBq78iYhFldvKuhfTAU6auU8tT94WrHftjDbrCEXSU1oBoqyl2QvZ6jIW3"
    crossorigin="anonymous"
>
<script  src="https://cdn.jsdelivr.net/npm/bootstrap@5.1.3/dist/js/bootstrap.bundle.min.js"
    integrity="sha384-ka7Sk0Gln4gmtz2MlQnikT1wXgYsOg+OMhuP+IlRH9sENBO0LRn5q+8nbTov4+1p"
    crossorigin="anonymous">
</script>

The final file looks like this:

<!DOCTYPE html>
<html lang="en">
<head>
    <meta charset="UTF-8">
    <meta name="viewport" content="width=device-width, initial-scale=1.0">
    <meta http-equiv="X-UA-Compatible" content="ie=edge">
    <title>Boostrap 5</title>
    <link href="https://cdn.jsdelivr.net/npm/bootstrap@5.0.1/dist/css/bootstrap.min.css" rel="stylesheet" integrity="sha384-+0n0xVW2eSR5OomGNYDnhzAbDsOXxcvSN1TPprVMTNDbiYZCxYbOOl7+AMvyTG2x" crossorigin="anonymous">
</head>
<body>
    <div class="container">
        <div class="alert alert-success mt-5" role="alert">
            Boostrap 5 is working!
        </div>    
    </div>
    <script src="https://cdn.jsdelivr.net/npm/bootstrap@5.0.1/dist/js/bootstrap.bundle.min.js" integrity="sha384-gtEjrD/SeCtmISkJkNUaaKMoLD0//ElJ19smozuHV6z3Iehds+3Ulb9Bn9Plx0x4" crossorigin="anonymous"></script>
</body>
</html>

Methode 2: Adding Bootstrap Public Folder

Download Bootstrap 5 file and put the files into the folder app/public/assets/vendor/bootstrap/5.2.0

Add the following code snippets to your Laravel Page:

<link href="{{ asset('assets/vendor/bootstrap/5.2.0/css/bootstrap.min.css') }}" rel="stylesheet">
<script src="{{ asset('assets/vendor/bootstrap/5.2.0/js/bootstrap.min.js') }}"></script>

The final files look like this:

<!DOCTYPE html>
<html lang="en">
<head>
    <meta charset="UTF-8">
    <meta name="viewport" content="width=device-width, initial-scale=1.0">
    <meta http-equiv="X-UA-Compatible" content="ie=edge">
    <title>Boostrap 5</title>
    <link rel="stylesheet" href={{ asset('css/bootstrap.min.css') }}>
</head>
<body>
    <div class="container">
        <div class="alert alert-success mt-5" role="alert">
            Boostrap 5 is working!
        </div>    
    </div>
    <script src="{{ asset('js/bootstrap.min.js') }}"></script>
</body>
</html>

Methode 3: Adding Bootstrap 5 using Laravel Mix

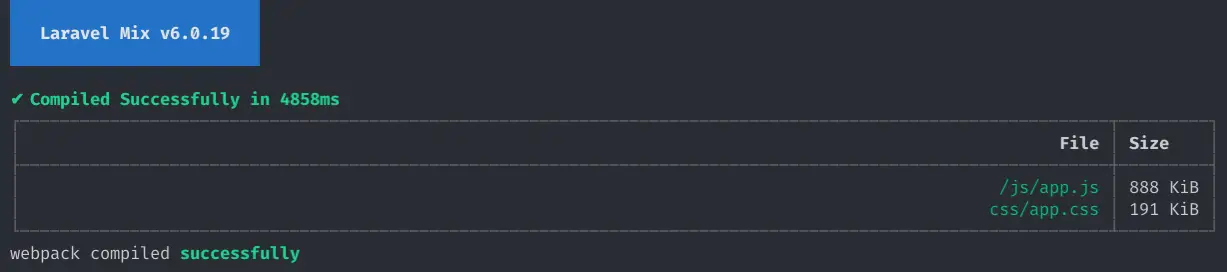
In Laravel, all Frontend Modules are handles with Laravel Mix. This is an elegant wrapper around Webpack, a Package manager for installing and managing node modules.

To use Mix, you need to install NodeJS and NPM.

After this, install all required modules of your starter project

npm install

If you can see node_modules folder, this means npm is working.

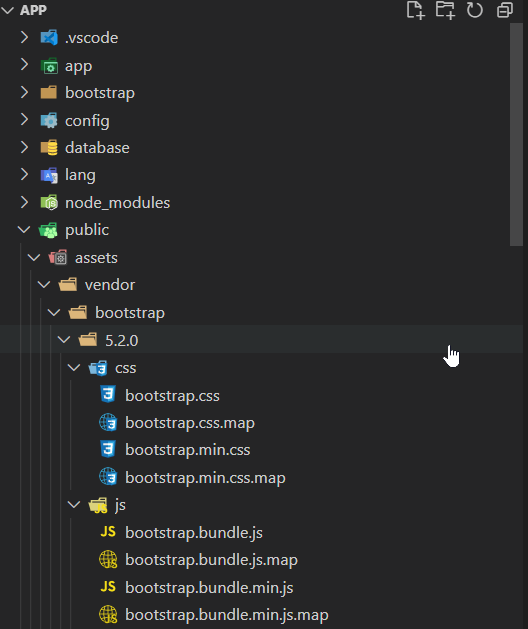
Now we need to install bootstrap and the required modules

npm install bootstrap --save-dev 
npm install @popperjs/core --save-dev

You will find the new packages in package.json

    "devDependencies": {
        "@popperjs/core": "^2.11.5",
        "@tailwindcss/forms": "^0.4.0",
        "@tailwindcss/typography": "^0.5.0",
        "alpinejs": "^3.0.6",
        "axios": "^0.25",
        "bootstrap": "^5.1.3",
        "laravel-mix": "^6.0.6",
        "lodash": "^4.17.19",
        "postcss": "^8.1.14",
        "postcss-import": "^14.0.1",
        "tailwindcss": "^3.0.0"
    }

Next, add the following line to resources/css/app.css:

@import "bootstrap";

Add the following line to the file resources/js/bootstrap.js:

window._ = require("lodash");
import "bootstrap";

Run the following command to build the frontend files (css and js)

npm run development

You done. See the result here: http://127.0.0.1:8000/using-bootstrap

Using Bootstrap

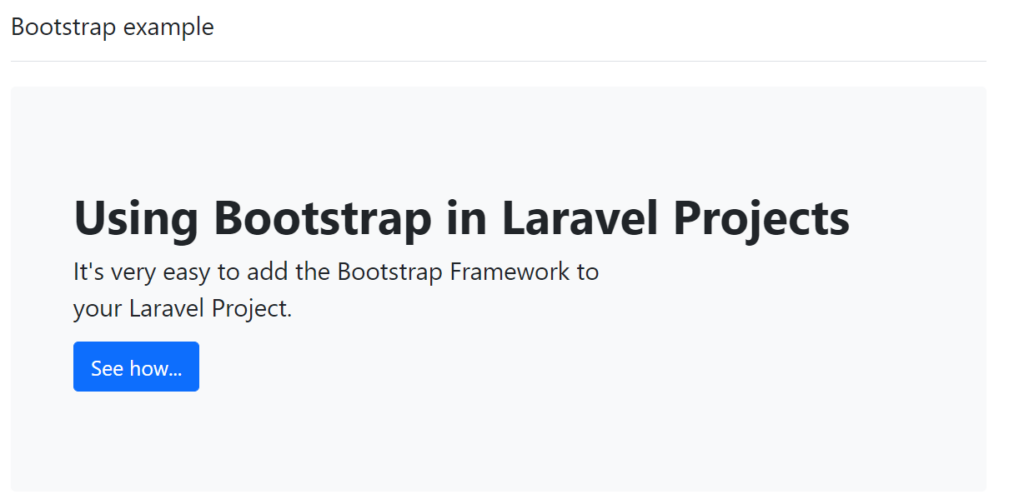
With the Bootstrap Framework installed, now we can style our Pages. An overview of what you can do could be found in the Documentation or using the Examples.

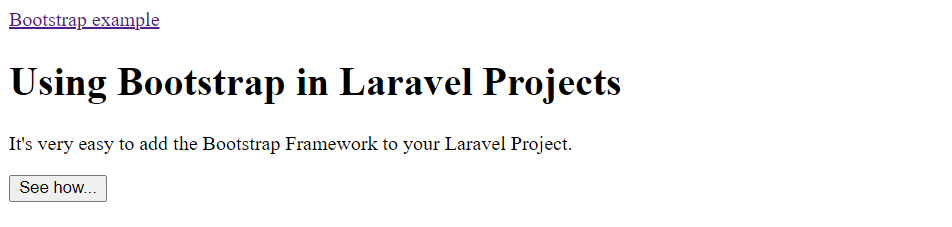
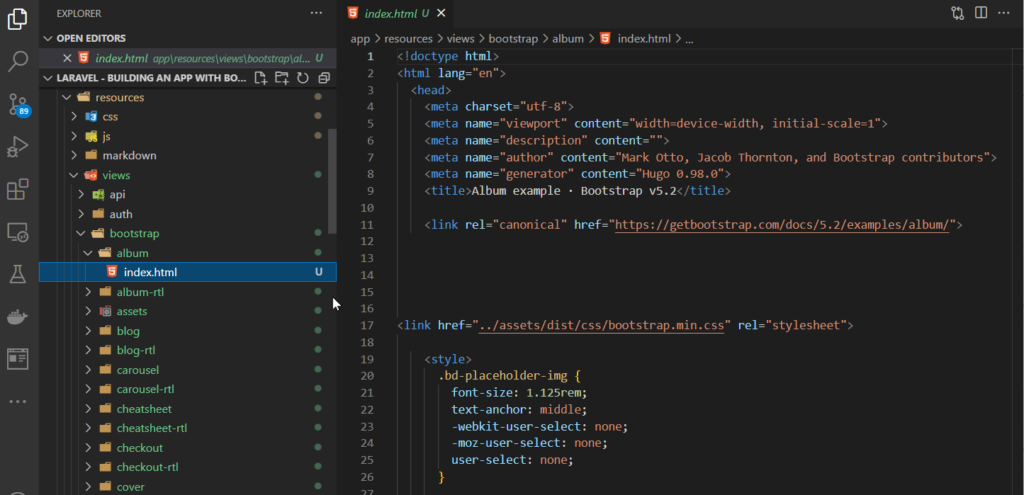
We will work with the Examples, so download all examples to the folder resources/views/bootstrap

With the Commandline and PowerShell, you could do this: Change to the folder and download the Archive with the examples

❯ Set-Location resources\views
❯ Invoke-WebRequest https://github.com/twbs/bootstrap/releases/download/v5.2.0-beta1/bootstrap-5.2.0-beta1-examples.zip -O bootstrap.zip

Extract the archive, don’t forget the trailing dot ‘.’

❯ Expand-Archive .\bootstrap.zip .

Rename the created folder

❯ Rename-Item .\bootstrap-5.2.0-beta1-examples\ bootstrap
❯ Remove-Item bootstrap.zip

Now, we have all examples in the folder resources/views/bootstrap and we are ready to play with them:

Modify the album example to use with Laravel

Modify the /using-bootstrap (resources/views/using-bootstrap.blade.php) page

Add a sample text and a link to out Album Page

<div class="p-5 mb-4 bg-light rounded-3">
    <div class="container-fluid py-5">
    ... Keep the original content
    </div>

    <div class="container-fluid py-5">
        <p class="col-md-8 fs-4">
            Just start with an <a href="bootstrap/album">example</a>
        </p>
    </div>
</div>

Modify routes/web.php to include a link to /bootstrap/album

Add the following lines to route/web.php

Route::get('/bootstrap/album', function () {
    return view('bootstrap/album');
});

Modify the Album Page

Rename and move the file resources/views/bootstrap/album/index.html to resources/views/bootstrap/album.blade.php.

Please note: We also changed the folder of the file. All examples’ files will be placed directly under the folder resources/views/bootstrap

You can do this for all files with the following PowerShell Script:

Get-ChildItem . index.html -recurse                        | `


Addon: Script to modify all examples files

Remove-Item _web.php

Remove-Item _links.php
Add-Content _links.php "<div class='list-group w-auto'>"

function Add-Link($header, $link) {

Add-Content _links.php ('<a href="' + $link + '" class="list-group-item list-group-item-action d-flex gap-3 py-3" aria-current="true">')
Add-Content _links.php '<img src="https://github.com/twbs.png" alt="twbs" width="32" height="32" class="rounded-circle flex-shrink-0">'
Add-Content _links.php '<div class="d-flex gap-2 w-100 justify-content-between">'
Add-Content _links.php ('<div><h6 class="mb-0">' + $header + '</h6></div>')
Add-Content _links.php '<p class="mb-0 opacity-75">Another examples></p>'
Add-Content _links.php '</div>'
Add-Content _links.php '<small class="opacity-50 text-nowrap">&nbsp;</small>'
Add-Content _links.php '</a>'

}

 $LINK_OLD_JS="../assets/dist/js/bootstrap.bundle.min.js"
$LINK_OLD_CSS="../assets/dist/css/bootstrap.min.css"
 
 $LINK_NEW_JS="{{ asset('js/app.js')   }}"
$LINK_NEW_CSS="{{ asset('css/app.css') }}"


Get-ChildItem . index.html -recurse                        `
|
|
    (Get-Content $_\index.html)         `
    |
    |
    | Set-Content  $_".blade.php"

    Add-Content _web.php "Route::get('/bootstrap/$_', function () { return view('bootstrap/$_'); });"

    Write-Host "Add links to example $_"
    Add-Link $_ "bootstrap/$_"
}

Add-Content _links.php "</div>"

FAQ

Errors and Problems

Build Modules with npm run dev shows up a warning

To see more information about the warning, add the following to the file webpack.mix.js after the first mix.js( ...

mix.webpackConfig({
    stats: {
        children: true,
    },
});

Then, run npm run dev again.